Data management

Open the file browser for the training space, navigating to DATA > training-scratch > Files (unless you are already there).

screenshot

File browser layout

The breadcrumb navigator presents the path to the current working directory and allows navigation to its parent directories. The current working directory has a context menu with all available actions.

The toolbox, located in the top right corner, contains shortcuts for common directory actions.

The rest of the view presents a list of files in the current directory.

screenshot

Exercise

Creating directories and uploading data

  1. Use the New directory button to create a directory named with your first name.

    screenshot

  1. Double-click on the created directory to enter it.

  2. Click on the Upload files button and choose files from your computer (at least 5) or drag & drop them in the file browser area.

    You can also drag & drop whole directories.

    Make sure not to upload any confidential files because other users of the space have access to them. You may use some of the files from /tmp.

  1. While the data is being uploaded, a progress panel appears in the bottom-right corner of the screen. It is possible to upload multiple files at once or add more files during an ongoing upload.

    screenshot

Context menu

All file management operations are available in the context menu invoked with a right-click or using the three-dots button on the right.

Files can be selected or deselected by left-clicking on them. By holding down Ctrl (or Opt on MacOS) while clicking, it is possible to select/deselect multiple files. A range of files can be selected by holding down Shift.

When at least 2 items are selected, right-click or use the Selection action button to invoke the context menu.

screenshot

Downloading and deleting files

  1. Download one of your files by double-clicking or using the Download action.

  2. Download a whole directory using the Download (tar) action and inspect the contents of the archive.

  3. Use the Delete action to remove a file.

    screenshot

Switching providers

You can browse your files via any provider that supports the current space.

If you choose another provider, you will eventually see the same content, but new changes might appear with different delay. Providers continuously synchronize the data changes within space, and depending on the system usage intensity, they can take from a couple of seconds to even hours to propagate.

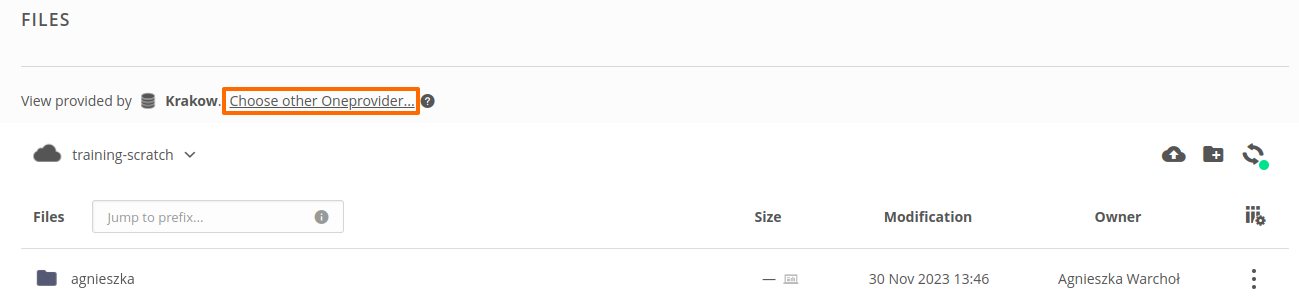
Click on Choose other Oneprovider at the top and switch to a different one. Use the globe icon on the right for a graphical presentation and choice.

screenshot

Synchronization delays

Open the file browser in two different browser tabs, choosing a different provider in each one. Upload a file in one tab and switch to the other. After some time, you should see the file appear on the list.

Configure columns

Disable and change order of columns in the file browser.

  1. Click Configure columns icon in the top right corner of the file list.

  2. Uncheck one of the columns and watch it disappear from the file's table.

  3. Use drag & drop in the popup to change the order of the rows...

  4. ... or grab the header of a column in the table and drop it in between other columns.

    screenshot

Moving and copying files

  1. Click the copy action for one of your files.

  2. Create a new directory and enter it.

  3. Click on the paste icon in the toolbox or use the action from the context menu, invoked with a right-click on empty space in the file list.

  4. Repeat the procedure but with cut instead of copy.

    screenshot

  1. Click the Create symbolic link action in the context menu for one of your files.

  2. Navigate to another directory and click on the Place symbolic link icon in the toolbox, or use the context menu invoked with a right-click on empty space in the file list.

    screenshot

  1. Click the Create hard link action in the context menu for another file.

  2. Navigate to another directory and use the Place hard link action. You will see a new file with a badge informing you about the hard link count. Click the badge to see the details.

    screenshot

Viewing file information

  1. Click the Information action in the context menu for one of your files to view the detailed information about the file.

  2. Use links to download and show that file.

    screenshot

Renaming files

Rename a file to file-posix, it will be used for the next exercise.

Use the Rename action.

screenshot

Space privileges regarding data management

  1. Read files - the absence of this privilege prohibits reading files, but its presence alone does not grant it, as it depends on POSIX/ACL permissions.

  2. Write files - the absence of this privilege prohibits editing files, but its presence alone does not grant it, as it depends on POSIX/ACL permissions.

Permissions

Each file can use one of the permission types at the same time:

  • POSIX (default) is based on permissions used in Unix or Linux systems. In Onedata, the semantics of the group and other permission sets are a bit different.

    rwx r-- ---
     |   |   |
     |   |   guests
     |   |
     |   space members
     |
     owner user
    

    See the documentation here.

  • Access Control Lists (ACL) are a mechanism for regulating access to files and directories using hierarchical rules (Access Control Entries — ACE) that grant and deny granular operations for a specific principal. Onedata supports the subset of CDMI ACL which is based on NFSv4 standard RFC 3530. See the documentation here.

POSIX permissions

Change POSIX permissions to forbid downloading the file-posix file by space members.

  1. Use the Permissions action in the context menu.

  2. Uncheck Read permissions for the group and save changes.

  3. Try to download the file-posix file which belongs to the colleague on your right.

    screenshot

ACLs permissions

Create an ACL that forbids viewing your whole directory for the colleague on your right.

  1. Bring up the Permissions menu for the directory.
  2. Change permissions type for ACL.
  3. Choose the name of your colleague from the dropdown.

ACLs permissions

  1. Click on the entry to expand privileges, choose deny type, and click on data checkbox, then save those changes.

    screenshot

Oooops...

Looks like you can no longer access your directory!

And the rights to modify ACLs are gone too...

How ACL permissions work

ACLs are evaluated top-down until the first entry with the principal matching the user is found. For an operation to be available, the matching entry must be an implicit ALLOW ACE. When no entry is found, the check finishes with a DENY.

By adding just one ACE that denies something, we effectively denied any access to anyone.

So, what now?

Space owner to the rescue!

Space owner is a role in a space that can be assigned to any number of space members, but at least one.

The owner can be perceived as a root user of a POSIX filesystem; owners overcome any POSIX/ACL permissions and space privileges, having access to all the data and operations.

This is handy when we find ourselves struggling with ACLs, but also in other cases. For example, when a user leaves the space, and a cleanup of his data is needed.


Now, the space owner mercifully fixes the ACL shenanigans.

ACLs permissions

  1. Repeat the procedure: add an entry that denies data-related operations for the colleague on your right.

  2. Add an entry for EVERYONE that grants ALL privileges. Be careful, the denying entry should be in the first place for it to have any effect — or else the EVERYONE entry will match for your colleague and access will be granted. Use the context menu to modify the list order.

    screenshot

ACLs permissions

  1. Don't forget to save the changes.

  2. Go inside the directory belonging to the colleague on your left, and check if you can access the directory.

    screenshot

Next chapter:

Architecture from admin's PoV