Quickstart
Table of Contents
Introduction — Onezone service
The Onedata software can be used to build different ecosystems. Each Onedata ecosystem constitutes an independent data management platform, made up of multiple data centers. At the heart of each Onedata ecosystem lies the Onezone service that serves as an entry point to the system and coordinates work of underlying data providers.
To get started with Onedata, make sure you can identify your Onezone service:
-
If your institution is a part of a Onedata ecosystem, they should guide you to the proper website.
-
If you have access to EGI services or your Identity Provider is federated in the EGI Check-In services for identity management, you may get access to the EGI DataHub Onezone. All users there are granted access to the PLAYGROUND Space for testing purposes. You may also use it to follow the Sandbox tutorial below (use the PLAYGROUND Space on datahub.egi.eu instead of the Sandbox Space on demo.onedata.org).
-
If you are new to this software and don’t have an account yet, you can log in to demo.onedata.org to get access to the Sandbox environment. Follow the rest of the quickstart guide.
-
If you are a developer or sysadmin, consider setting up your own local deployment using the demo mode.
Log in
Open the website of your Onezone service. You will be welcomed with a login screen, offering a choice of Identity Providers.
Each Onezone service may be configured differently. This tutorial is based on a publicly accessible zone — demo.onedata.org — which you can use to familiarize yourself with the system if your don’t have access to any Onedata services. You will need an account in EGI or Google for that purpose. If you don’t have one, contact us and we will create a test account for you.

Click on the selected Identity Provider and follow the steps to log in to Onedata. You will have to accept releasing your user information so that you can be authenticated by the Onezone service.
The green key icon is reserved for the login of administrators and special users created through the Onepanel administrative interface. Regular users should use social or institutional accounts to sign in.
Sandbox
All users logging in to demo.onedata.org are granted access to the Sandbox Space. It’s a perfect place to play around with Onedata and test its features.
The Sandbox Space is intended to be a testing environment and comes with no guarantees. It is cleaned if it becomes cluttered.
Do not store any private or sensitive data in the Space, as it’s available to all the logged-in users.
If you have logged in and you don’t see the Sandbox Space in the DATA tab, it’s possible that you don’t belong to the All users group. It may happen if you have opted-out of the group or logged into the system in the past, when the Sandbox was not set up yet. To fix it, join the group manually by consuming the token below:
MDAxZWxvY2F00aW9uIGRlbW8ub25lZGF00YS5vcmcKMDA3NmlkZW500aWZpZXIgMi9ubWQvdXNyLWMwNWU3M2EwZmE4NzQzOTI1NDE3ZGRjMDMzZTEwZWExY2g4NzQzL3VqZzphbGxfdXNlcnM6LzAyZDRmYTA3NGEwYTNlYTIzNTYwZDc00Yzg00YTA1Mjk1Y2gyYzE5CjAwMmZzaWduYXR1cmUgzFtuZQ5JPZ1KH1d8FhoNNy4bA1ToeILElN1F3FDwt0000KCreate your own directory in the Sandbox
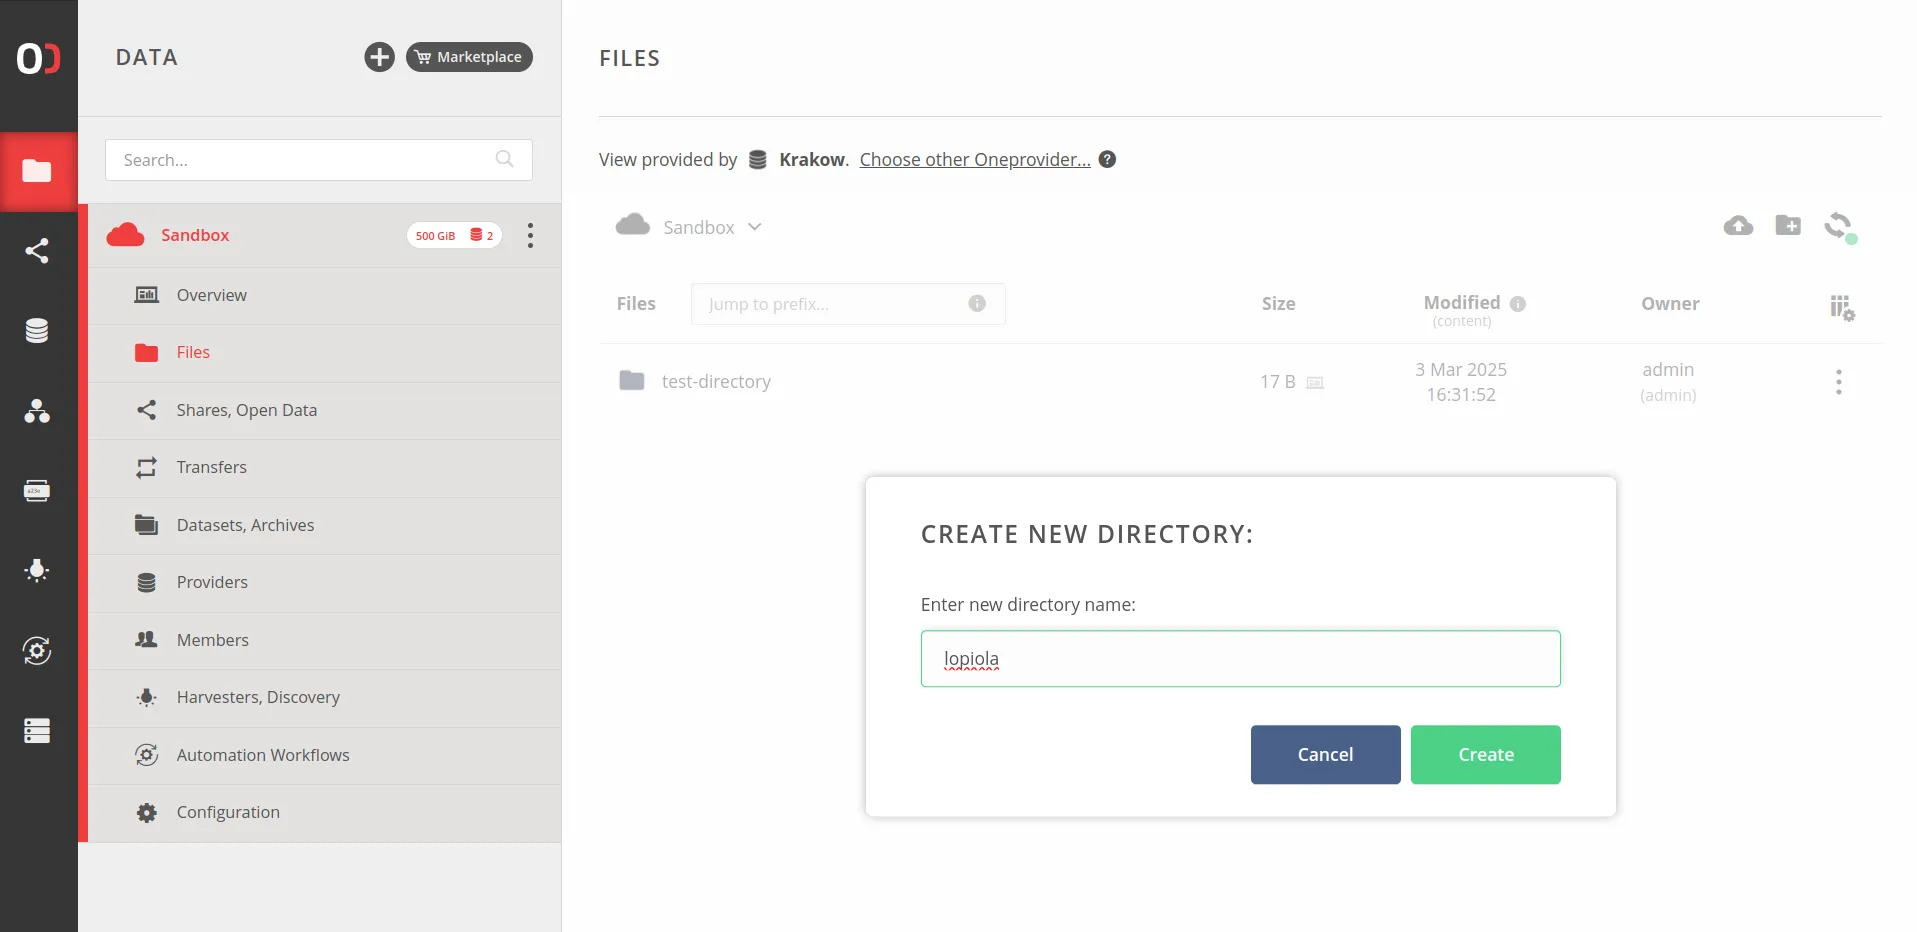
Navigate to the DATA > Sandbox > Files tab and create a new directory using the action in the top right corner or by invoking the right-click menu. Give it a meaningful name:
Right-click on the newly created directory and choose Permissions from the context menu. Switch to the ACL permission type and add a single entry, for yourself, allowing all operations:
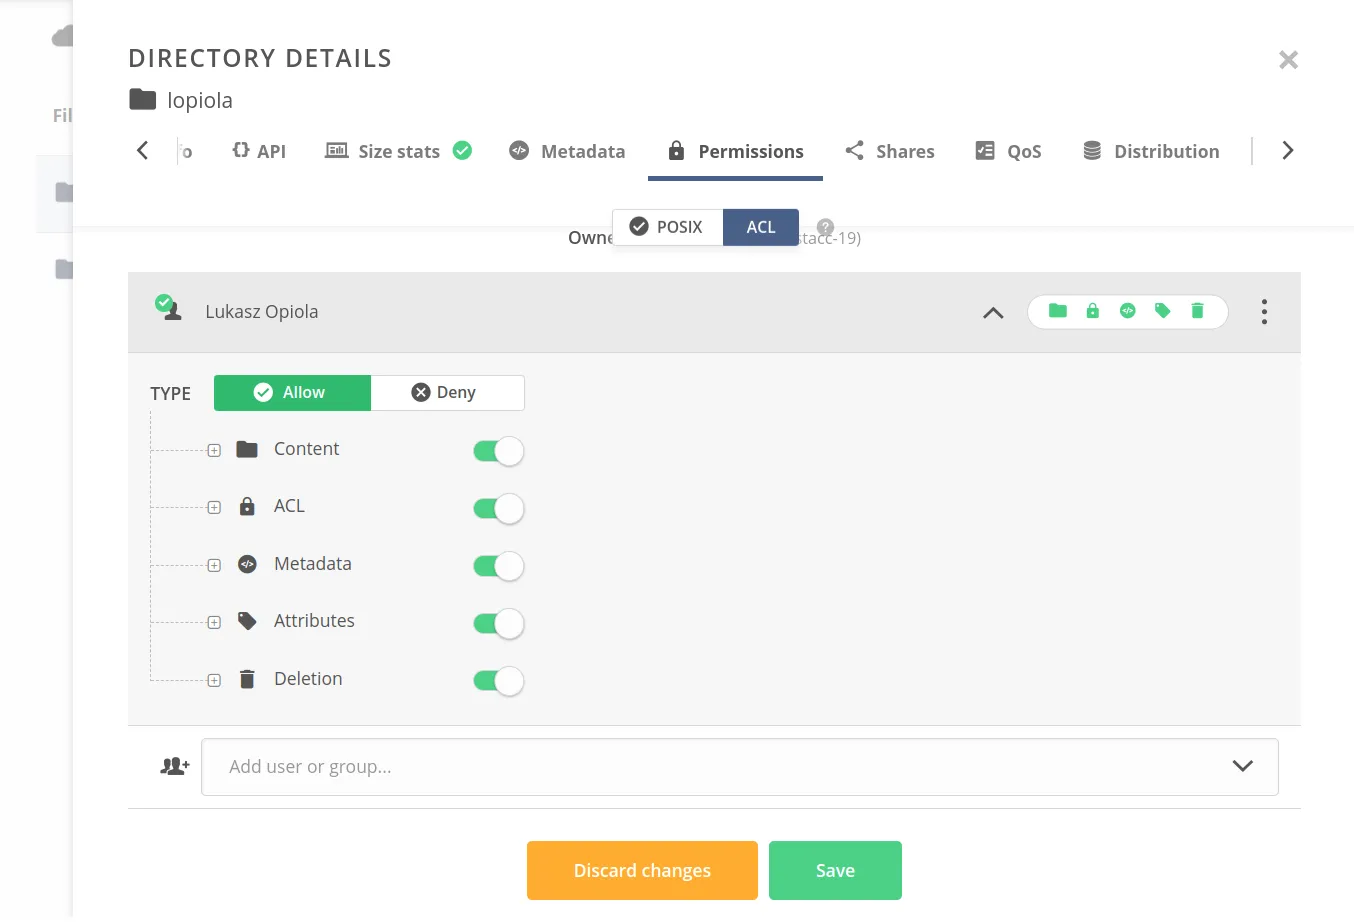
Hit Save and done — you now have your own directory in the Sandbox Space, to which no one else has access (ACLs implicitly deny access if there is no explicitly allowing entry). You may use this directory to upload some data and test Onedata features. If you wish for others to see the fruits of your experiments, feel free to place your data in a non-ACL-secured location.
Next steps
To get a better understanding of Onedata and its features, we recommend the following chapters:
- Spaces — will give you an overview of this fundamental concept in Onedata.
- Data — describes how the data is organized and accessed.
- Web file browser — guides you through all the features of the file browser in the Onedata Web UI.
- Account management — shows how to manage your Onedata account.
- Further reading — use the menu on the left to dive deeper into different aspects of Onedata.
Want more?
If you have tested Onedata out and would like a real thing, contact us — we’ll see what can be done to organize a fully-fledged Onedata ecosystem for your use cases.
Useful links
| Concept | Description |
|---|---|
| Shares | Publish and share your data using publicly accessible links. |
| Replication and migration | Manage the distribution and replication of data. |
| Metadata | Assign custom metadata to files and directories (JSON / RDF / xattr). |
| Data discovery | Index file metadata, perform queries, browse the metadata. |
| Datasets | Organize related files together. |
| Archives | Preserve your data for long-term access. |
| Tokens | Authorize various actions across the system. |
| Quality of Service | Manage file replica distribution based on declarative rules. |
| Deploy Onedata | Deploy your own Onedata services. |