Graphical wizard
The prerequisites for this installation method are the same as for the installation using batch mode. With this method, the Onedata cluster is configured and deployed by using the Onepanel Web GUI.
Prerequisites
Make sure the host intended for deployment is properly set up.
Customizing Oneprovider Docker Compose script
Create the following directories:
sudo mkdir -p /opt/onedata/oneprovider/persistence
sudo mkdir -p /opt/onedata/oneprovider/certs
Create the following Docker Compose file in /opt/onedata/oneprovider/docker-compose.yml:
version: '2.0'
services:
  node1.oneprovider.internal:
    # Oneprovider Docker image version
    image: onedata/oneprovider:25.1
    # Hostname (in this case the hostname inside Docker network)
    hostname: node1.oneprovider.internal
    # The IP of VM need to be placed below under extra_hosts, for example:
    # - "node1.oneprovider.internal:10.20.30.5"
    extra_hosts:
      - "node1.oneprovider.internal:YOUR_HOST_IP"
    # dns: 8.8.8.8 # Optional, in case Docker containers have no DNS access
    # Host network mode is preferred, but on some systems may not work (e.g. CentOS)
    network_mode: host
    # Friendly name of the Oneprovider Docker container
    container_name: oneprovider-1
    # Mapping of volumes to Oneprovider container
    volumes:
      - "/var/run/docker.sock:/var/run/docker.sock"
      # Oneprovider runtime files
      - "/opt/onedata/oneprovider/persistence:/volumes/persistence"
      # Overlay configs
      - "/opt/onedata/oneprovider/op-panel-overlay.config:/etc/op_panel/overlay.config"
      - "/opt/onedata/oneprovider/op-worker-overlay.config:/etc/op_worker/overlay.config"
      # Additional, trusted CA certificates (all files from this directory will be added)
      - "/opt/onedata/oneprovider/cacerts:/etc/op_worker/cacerts"
      # Uncoment lines below if you have disabled the built-in Let's Encrypt client
      ## SSL certificate
      #- "/opt/onedata/oneprovider/certs/cert.pem:/etc/op_panel/certs/web_cert.pem"
      ## SSL certificate key
      #- "/opt/onedata/oneprovider/certs/key.pem:/etc/op_panel/certs/web_key.pem"
      ## Certificate chain for the TLS certificate above
      #- "/opt/onedata/oneprovider/certs/cacert.pem:/etc/op_panel/certs/web_chain.pem"
      # a block data volume (POSIX) for supporting a space - if applicable
      - "/mnt/data:/volumes/storage"

    # Expose the necessary ports from Oneprovider container to the host
    # This section can be commented when using host mode networking
    ports:
      - "80:80"
      - "443:443"
      - "4443:4443"
      - "6665:6665"
      - "9443:9443"

    environment:
      # Tell Onepanel not to read configuration from environment variable
      ONEPANEL_BATCH_MODE: "false"
Make sure to overwrite YOUR_HOST_IP with the actual value.
Prepare the systemd files for Oneprovider service as shown in the section Running Docker based installation using systemd and run it:
sudo systemctl enable oneprovider.service
sudo systemctl start oneprovider.serviceDeploying the Onedata cluster using the Web GUI
Start a web browser and open https://localhost:9443. If the browser is not started on the provider host, replace localhost with the IP of the host. You may need to accept the SSL security exception in your browser. The deployment process is straightforward — just follow the instructions on the subsequent pages. You can hover the question marks for additional explanations. The following screenshots illustrate the process.
Click on the Create a new cluster button.

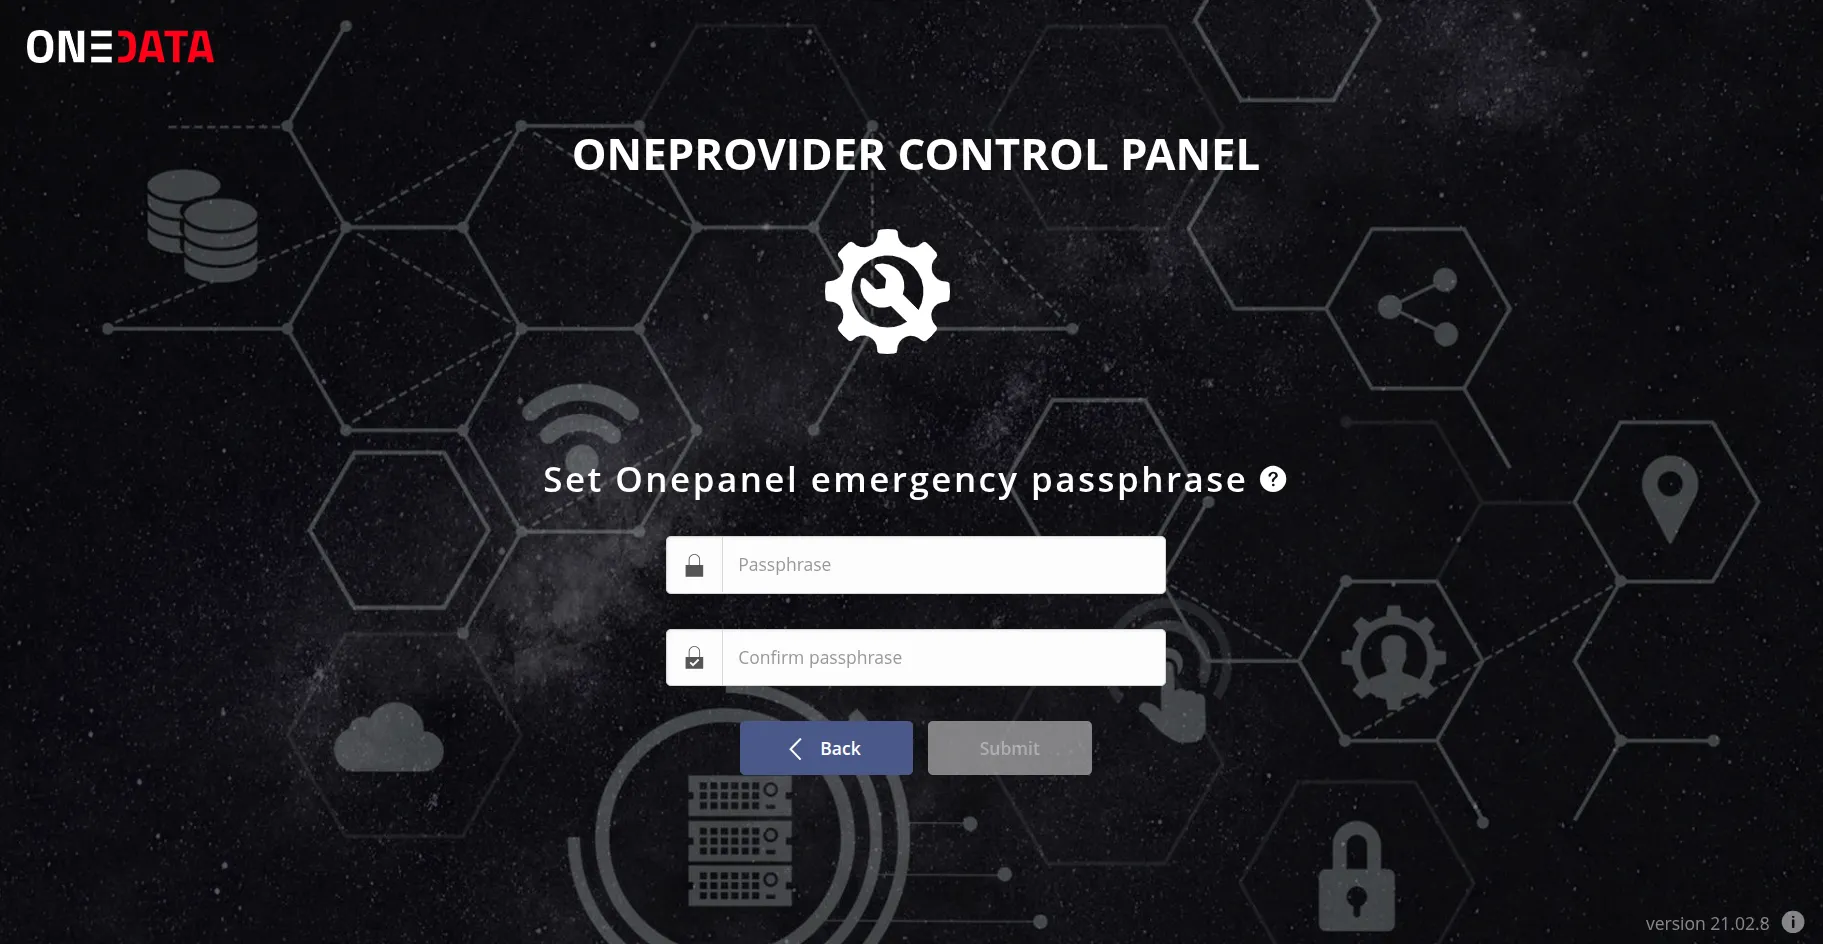
Enter the new passphrase and click on the Submit button.
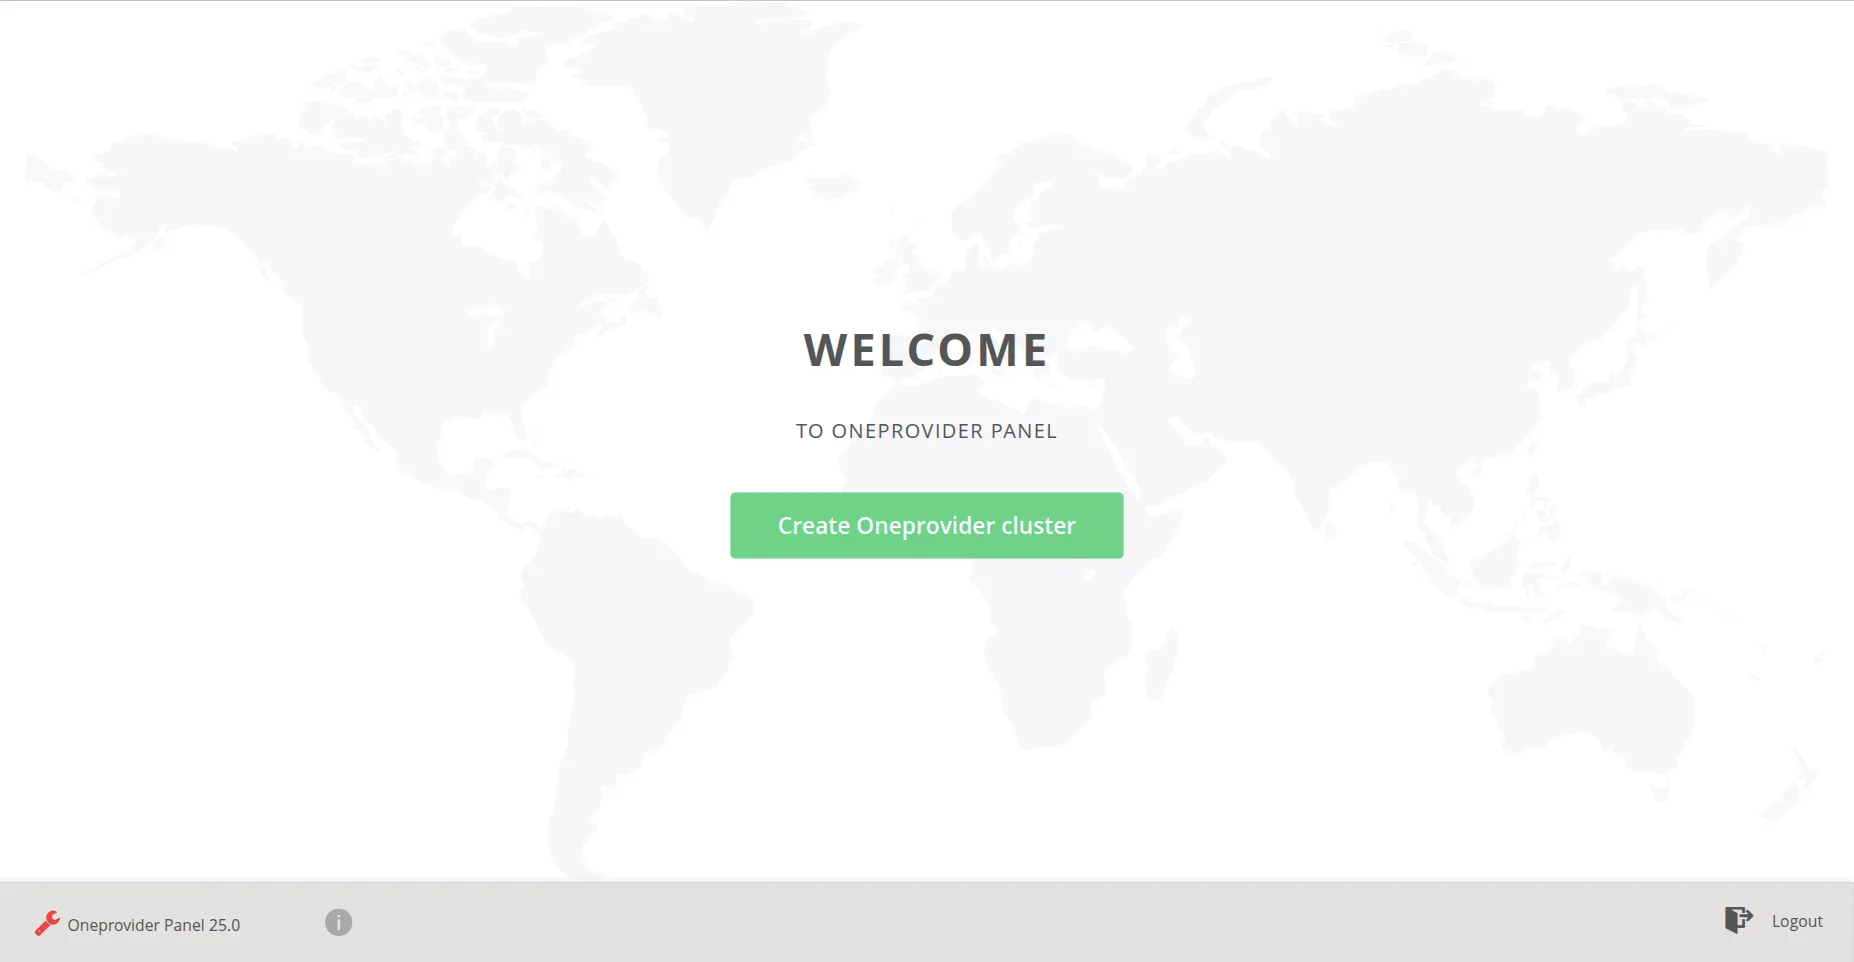
Click on the Create Oneprovider cluster button.
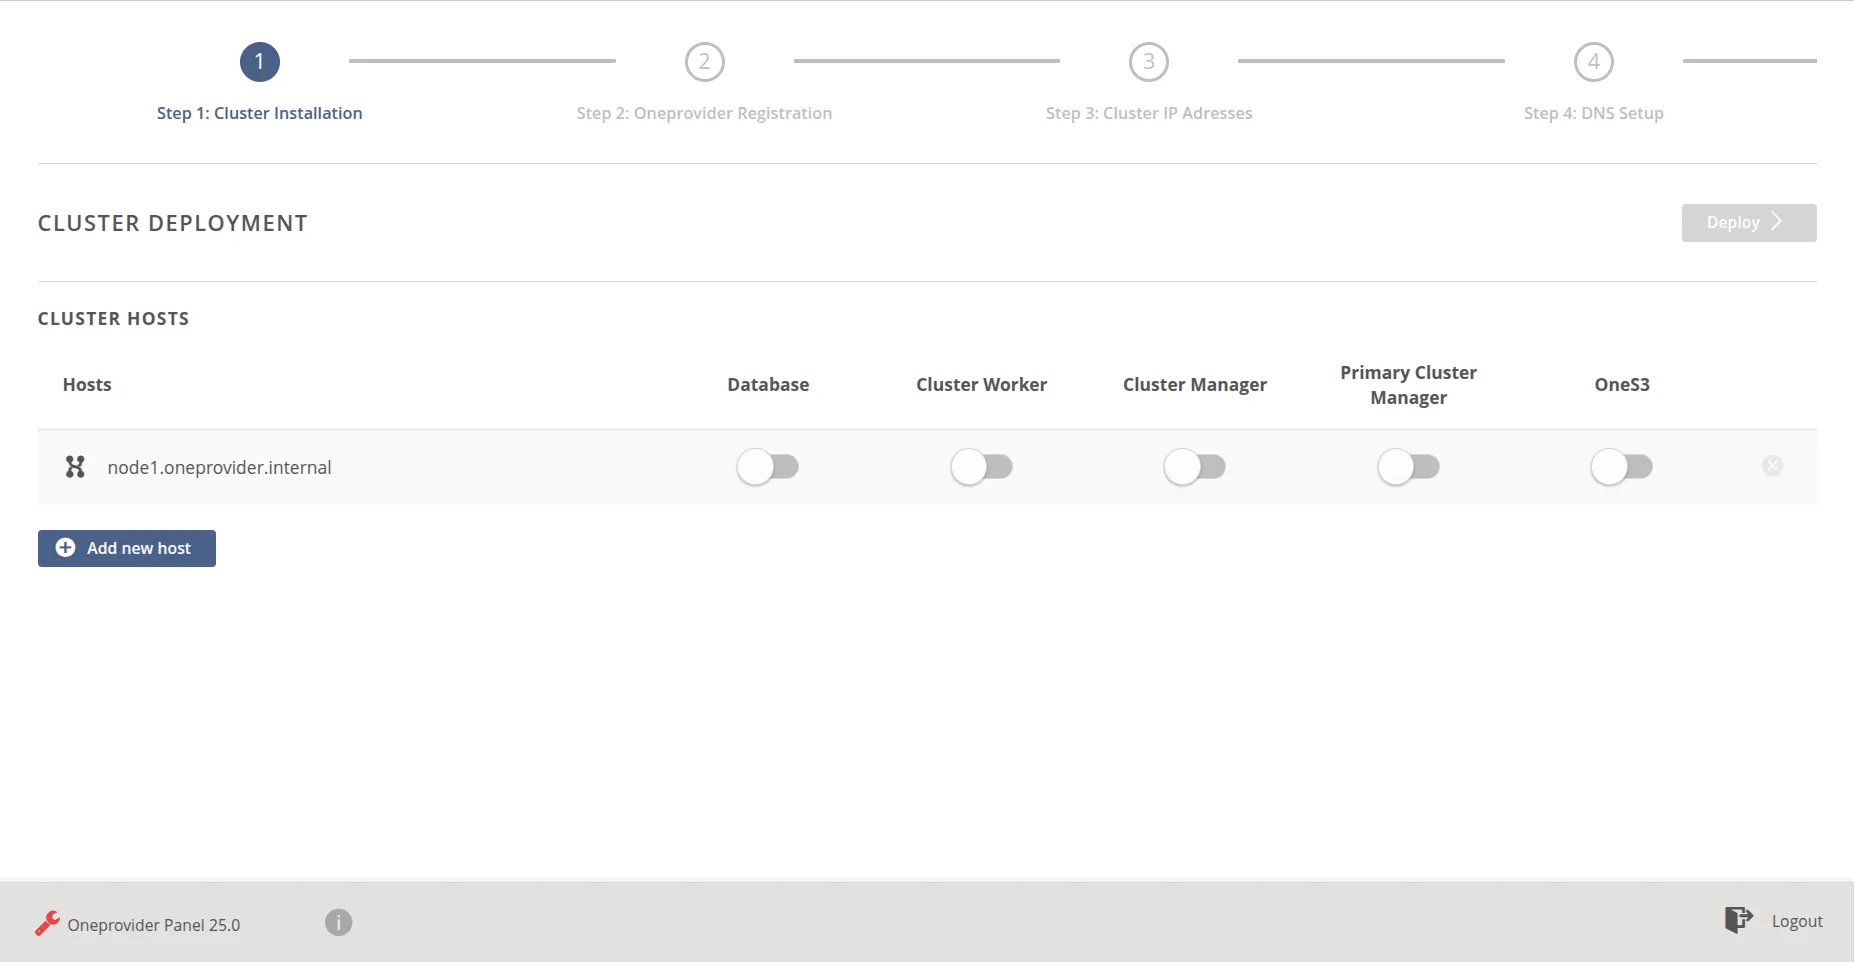
Choose the components to be installed on the given host. For a one-host deployment, as in this example, select all components. Click on the green Deploy button.
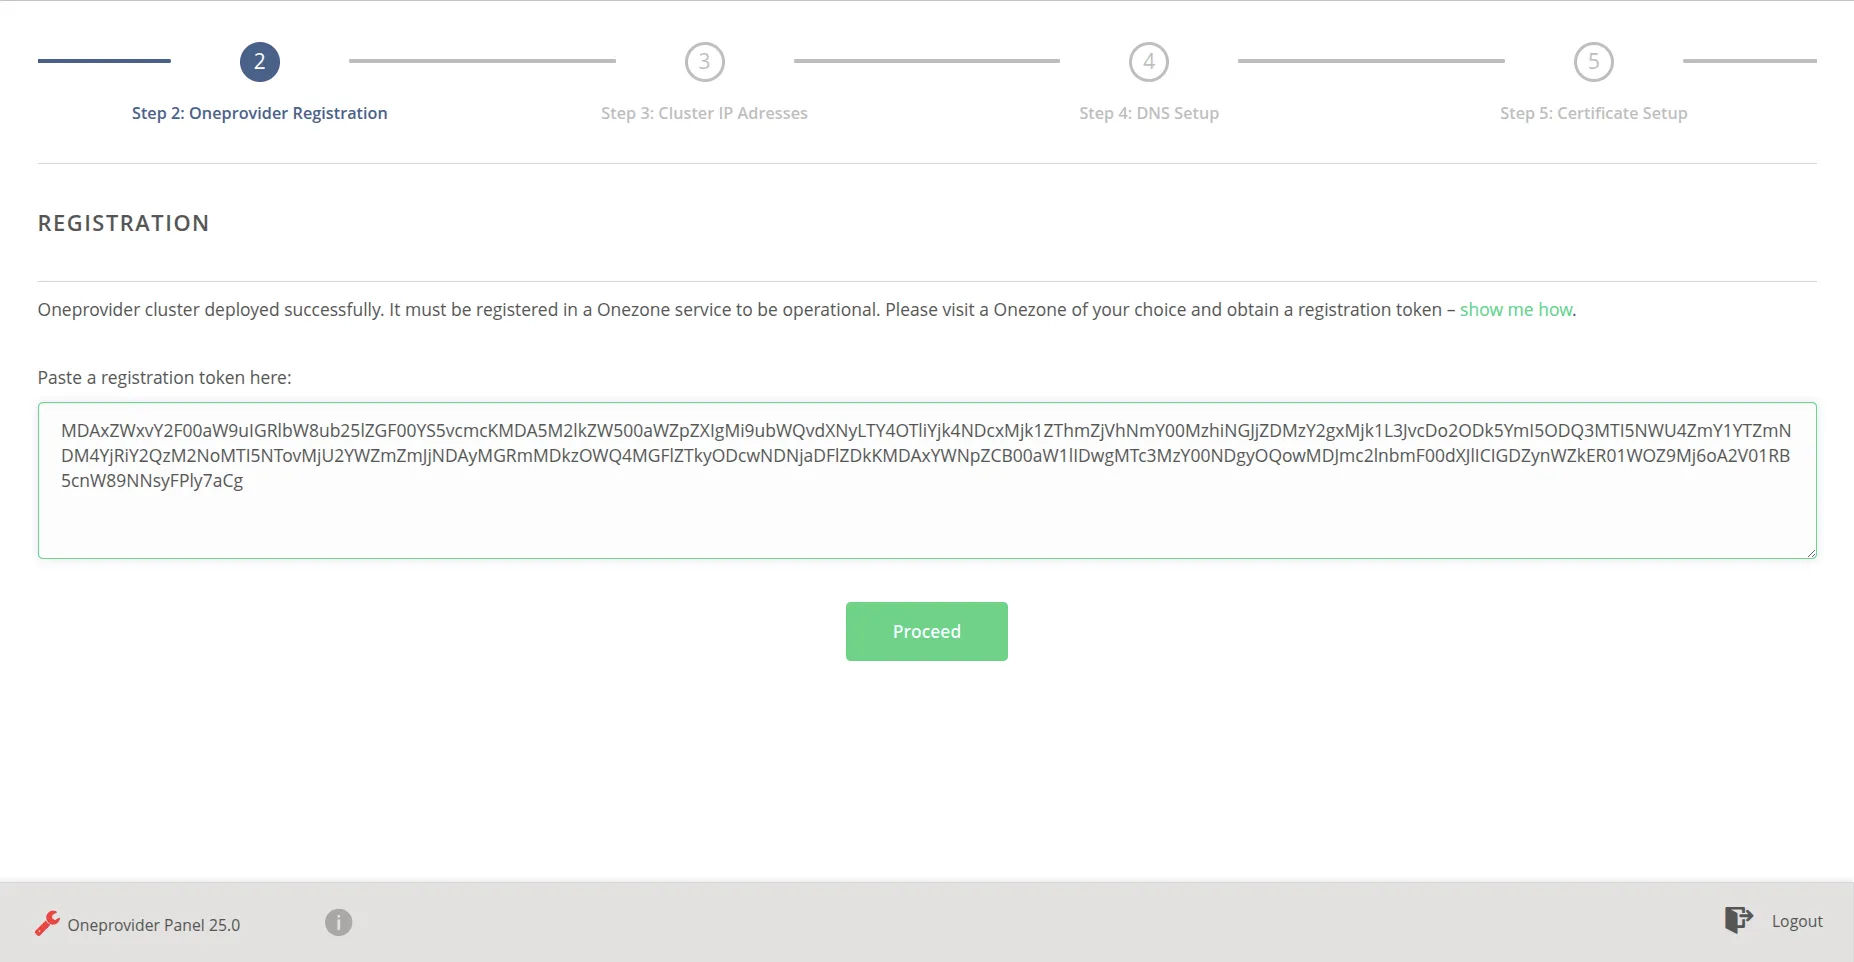
Register your provider in a given Onezone. Click on the link show me how for instructions. Paste the obtained token and click on the green Proceed button.
Fill the required form fields and click on the Register button.

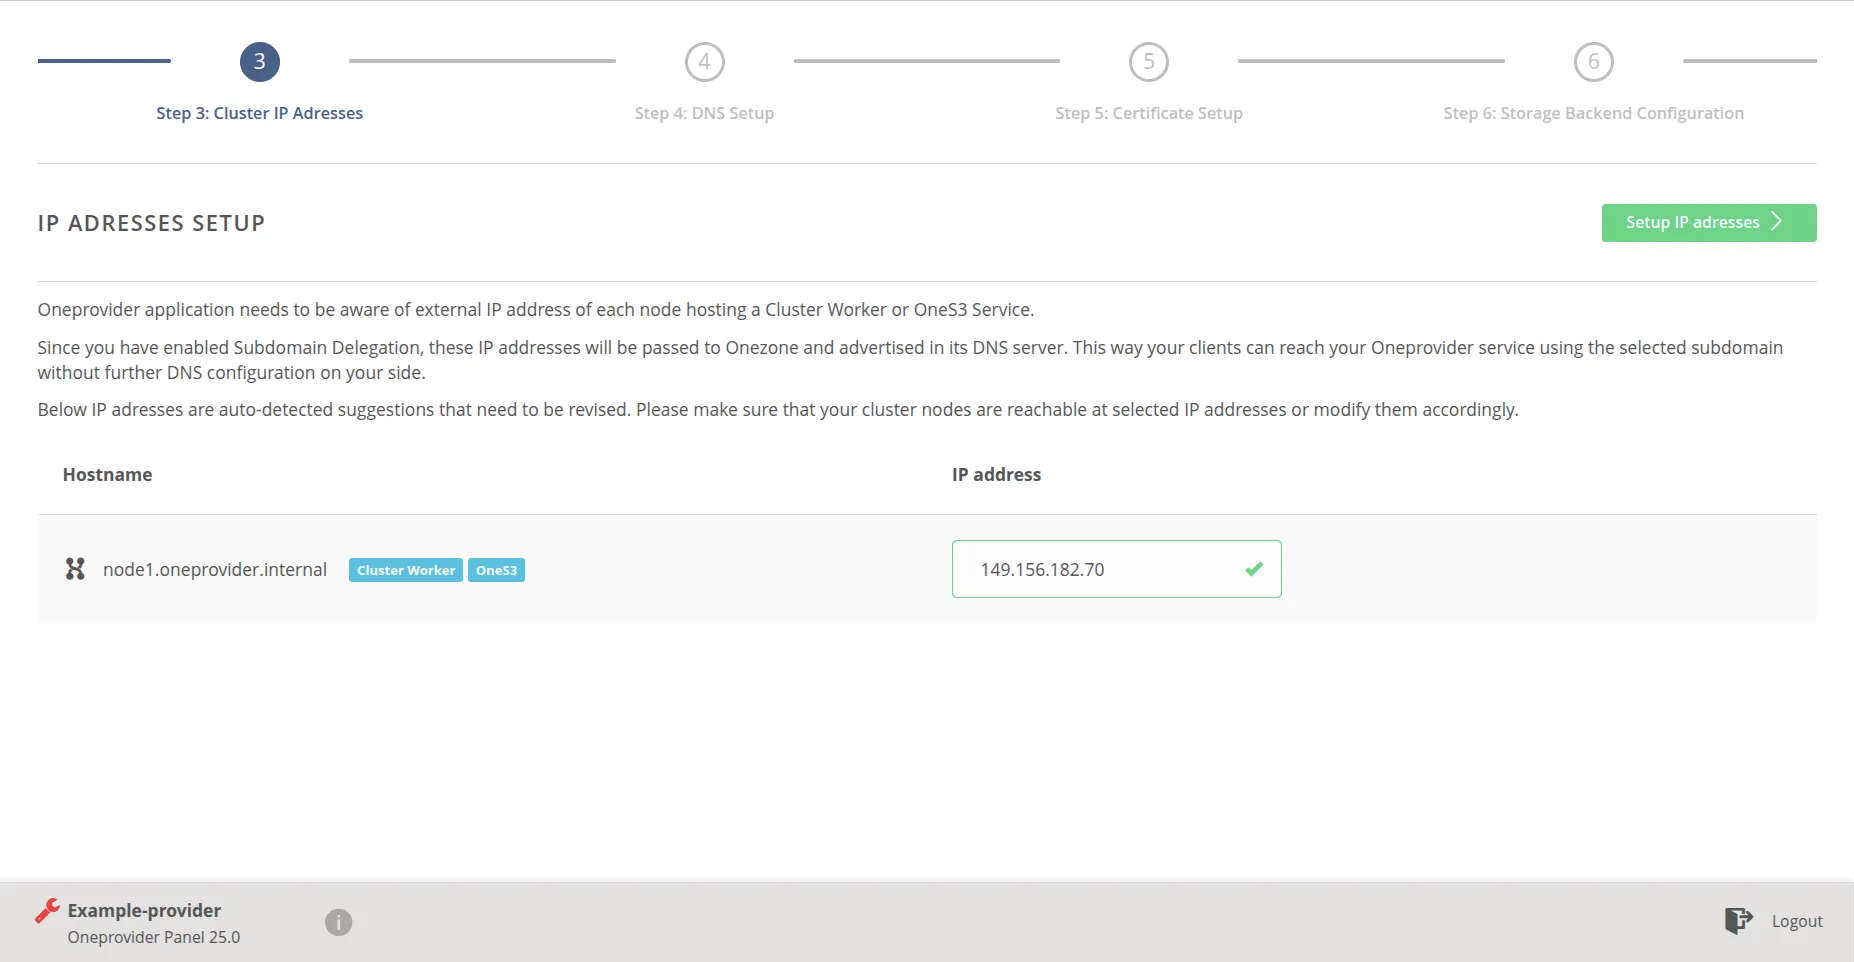
Check the correctness of IP address and click on the Setup IP address button.
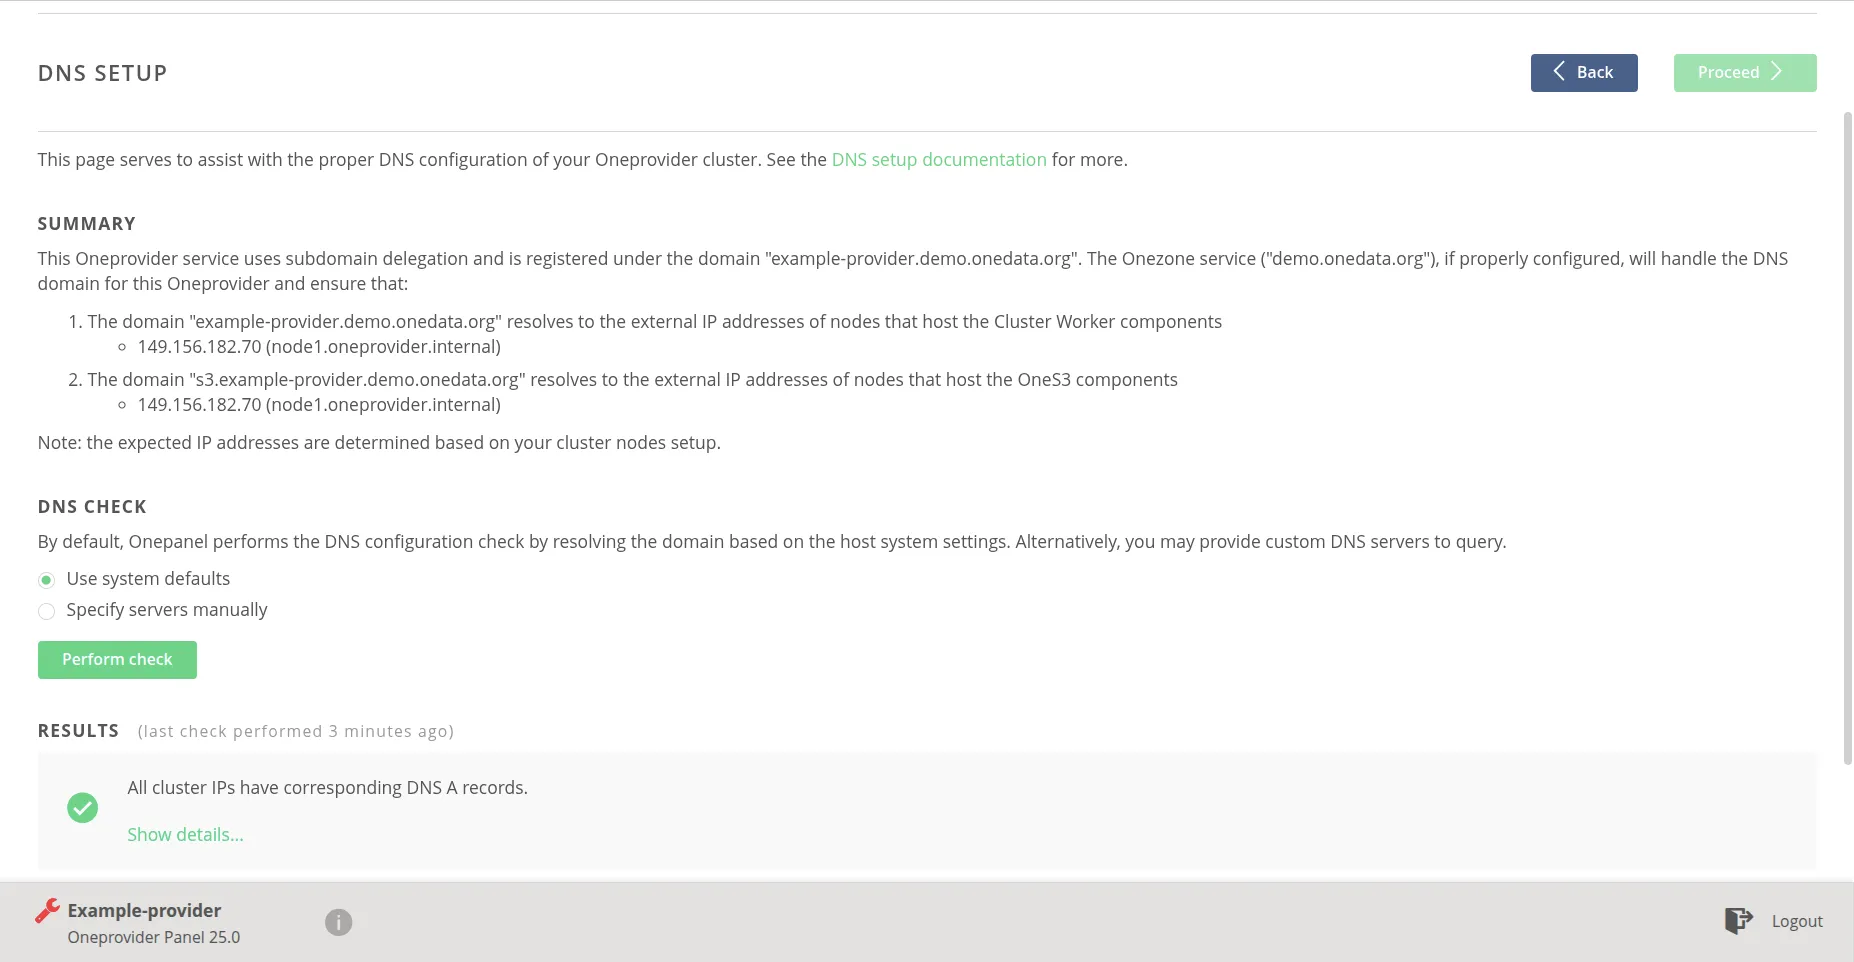
Check the DNS configuration and click on the Proceed button.
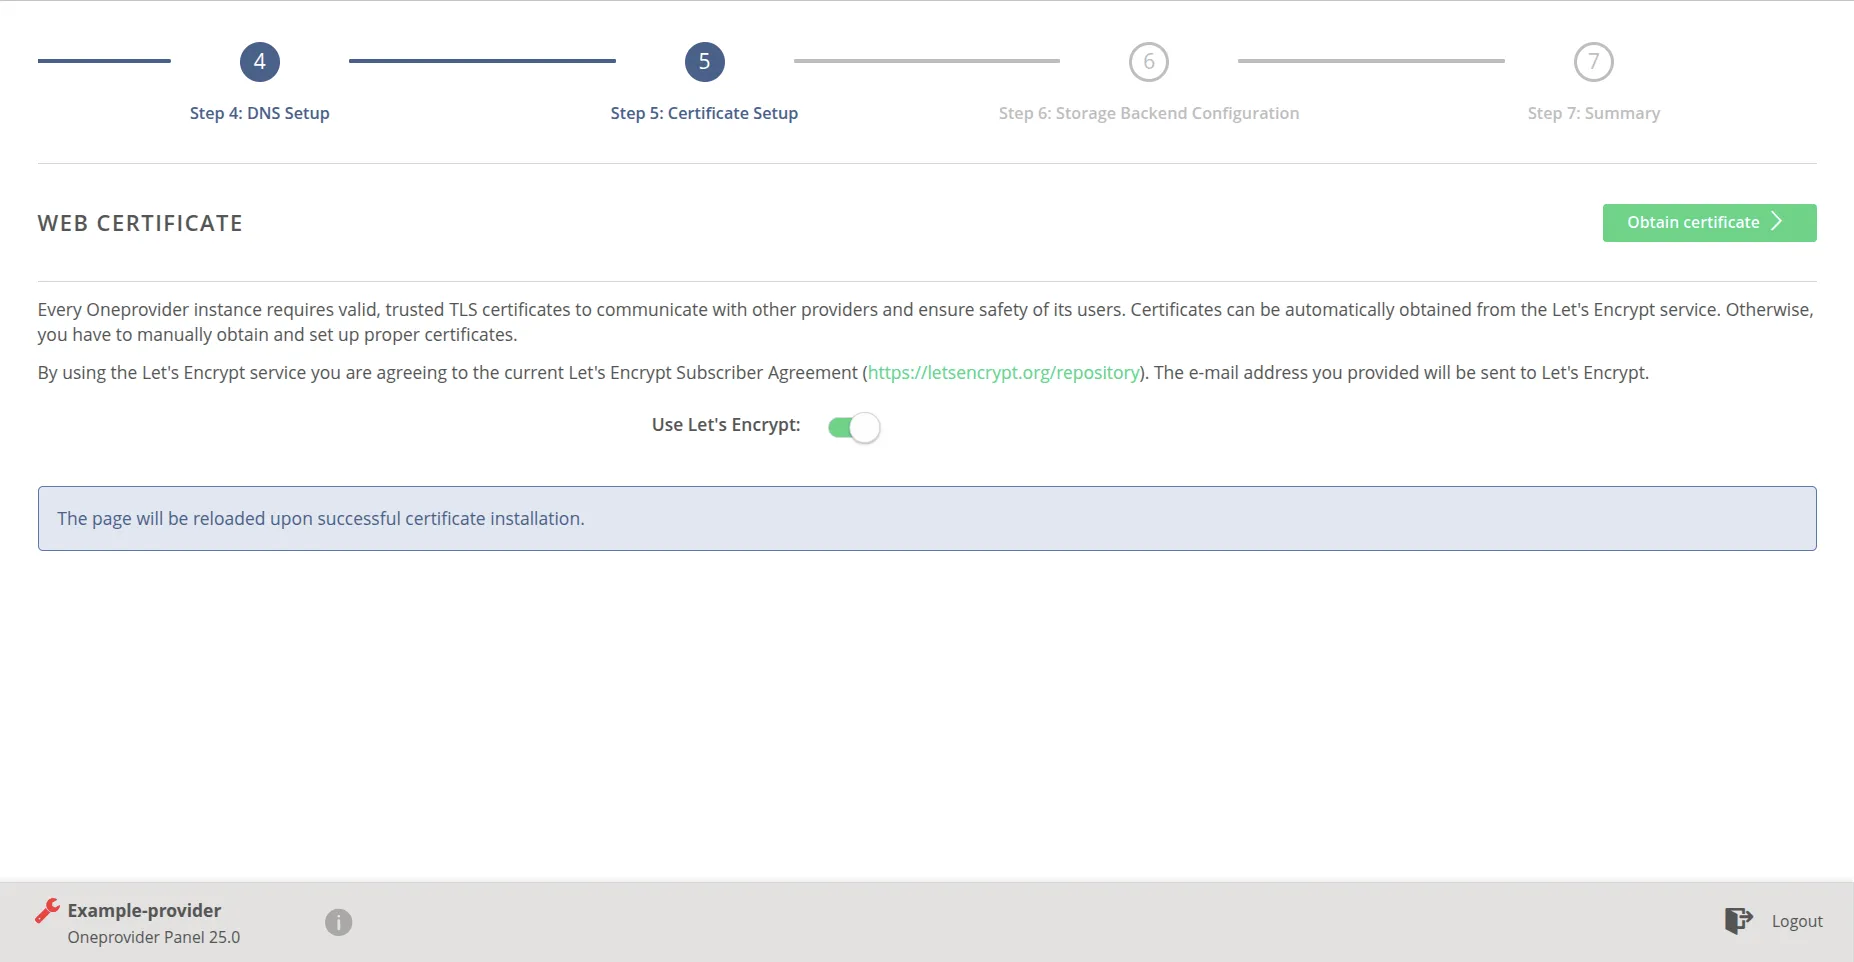
Click on the Obtain certificate button.
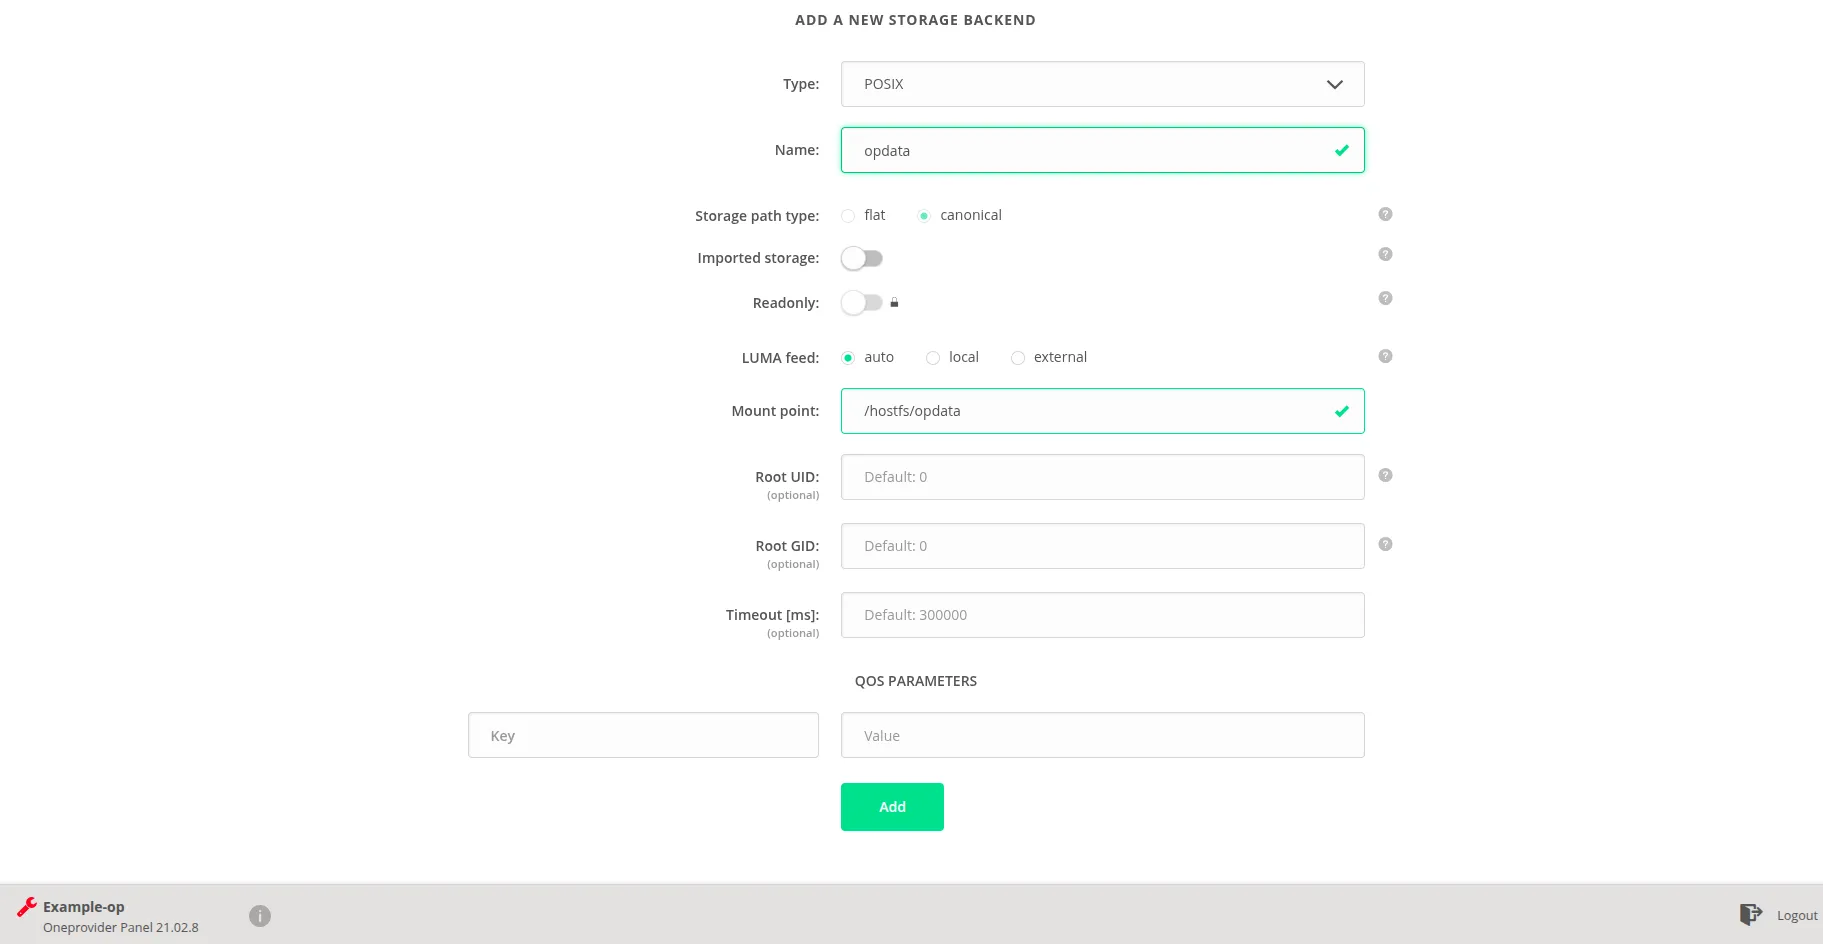
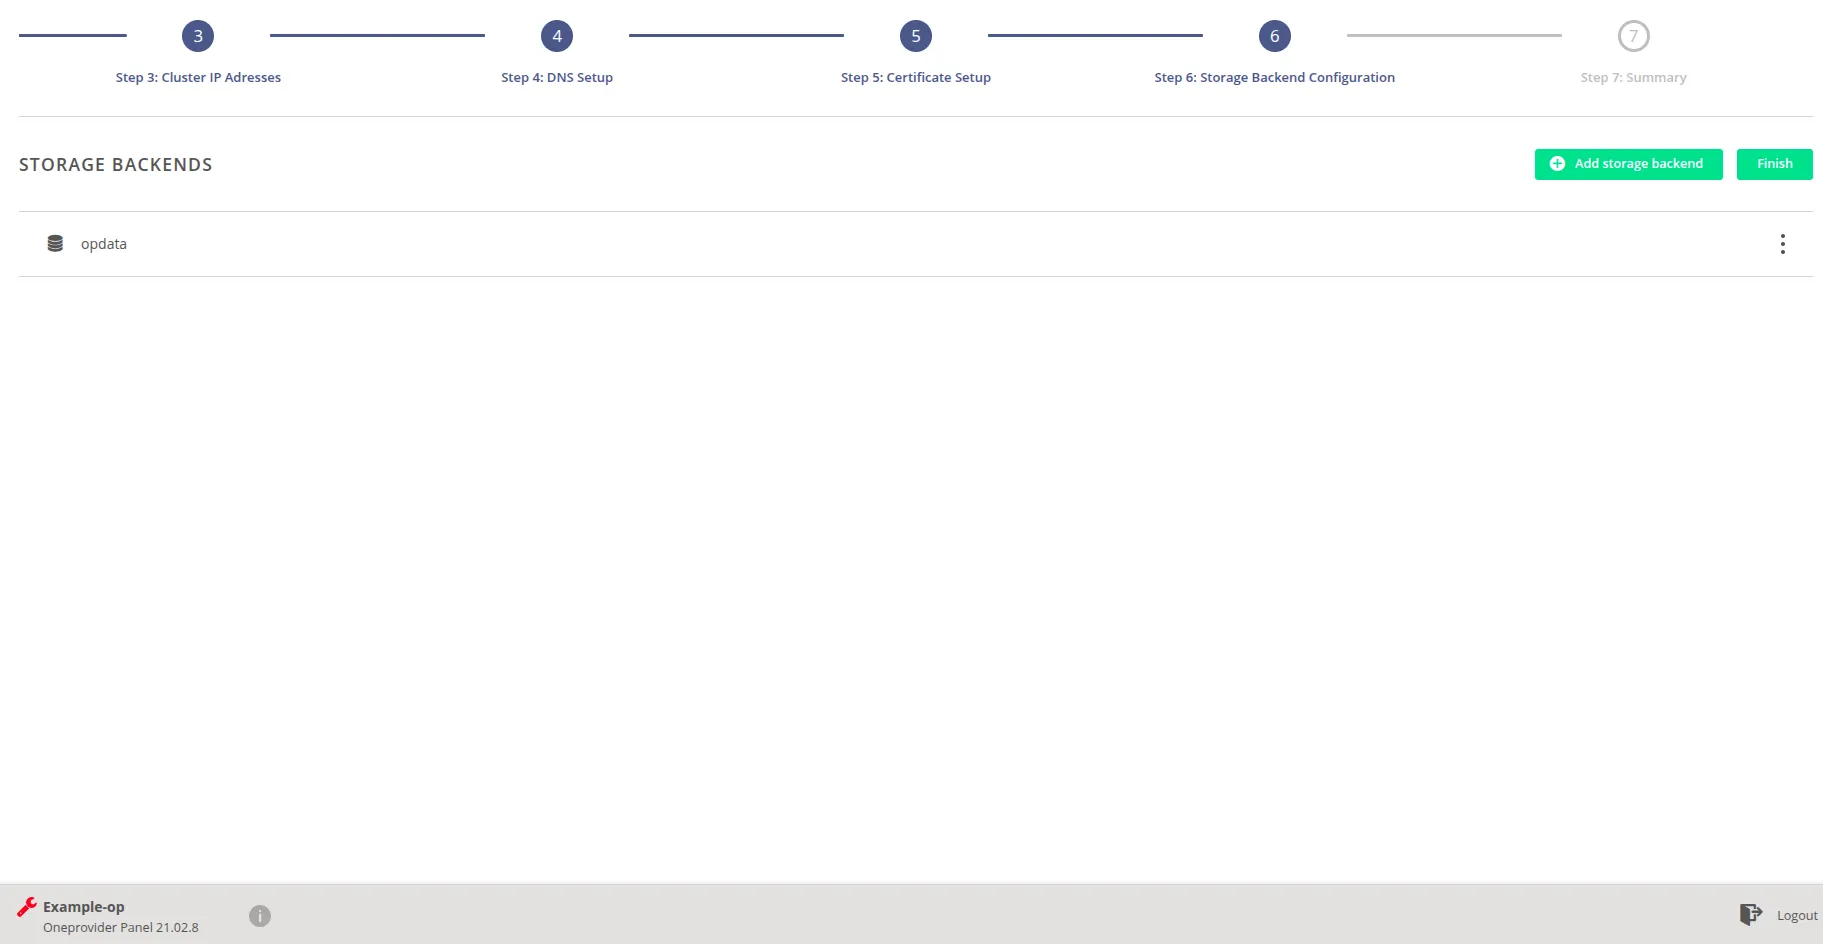
Choose the type of storage and give it a name and provide the necessary parameters. Click on the Add button.
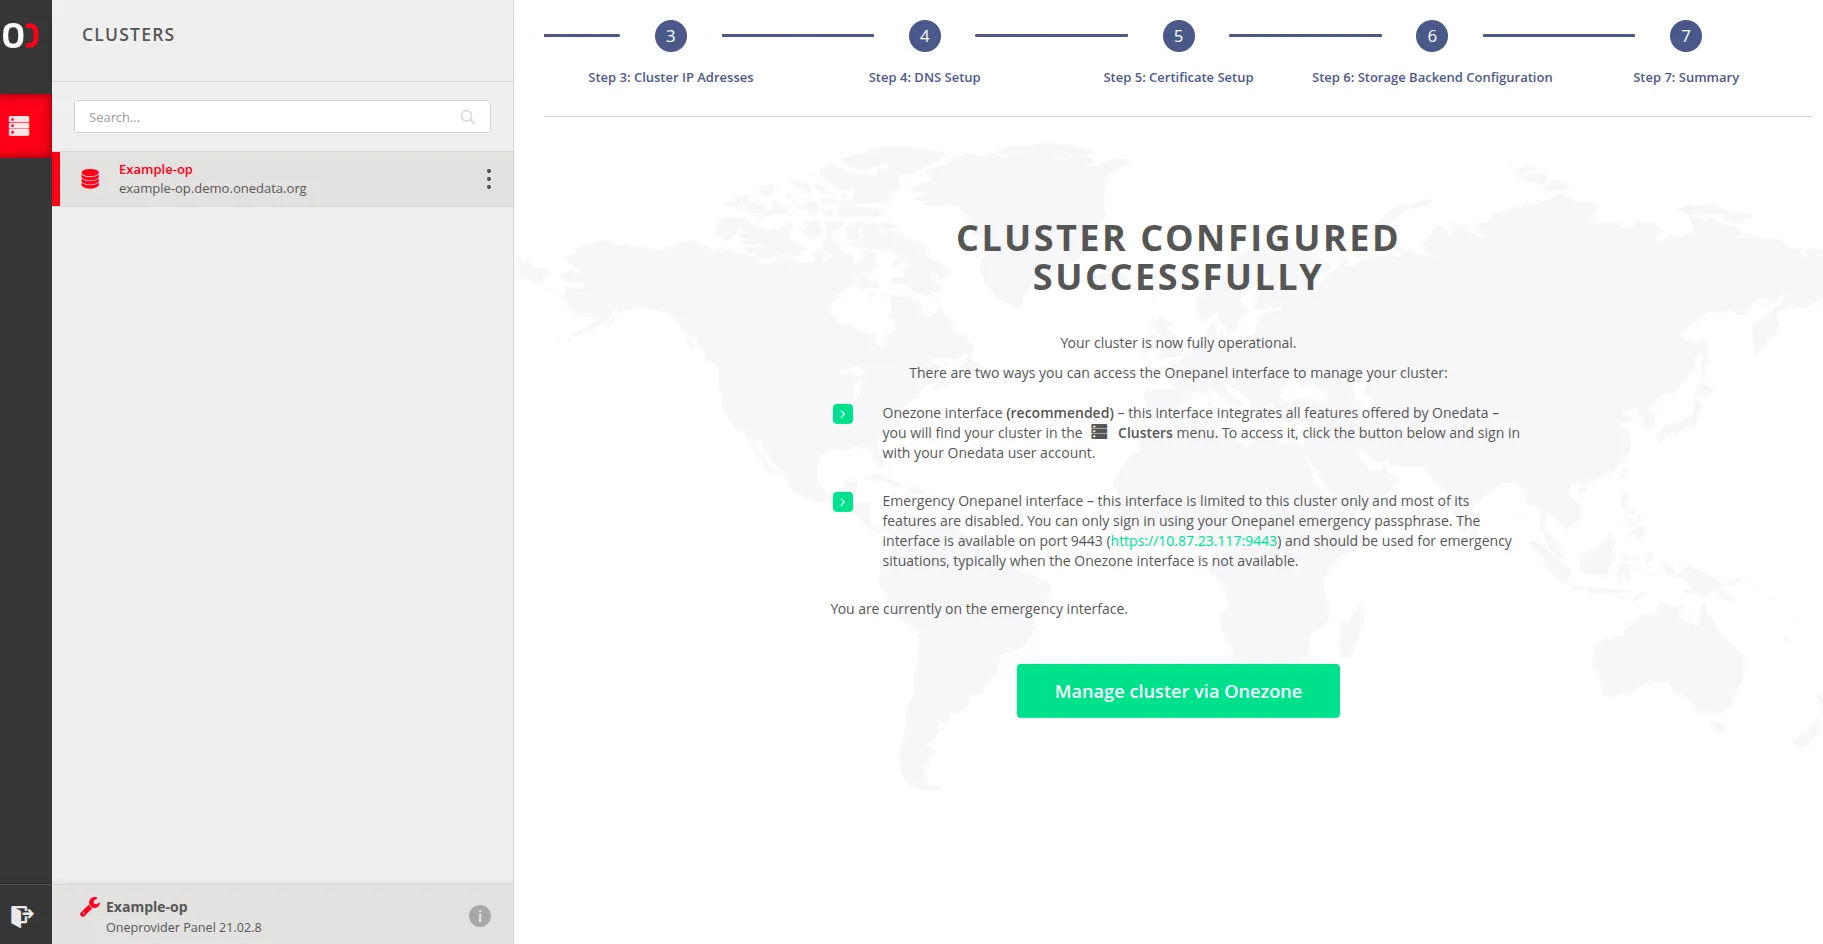
Finally, click on the Finish button.
Now you can start managing your cluster, e.g., support a space as described in Space support.