Onedatify CLI wizard
Onedatify is an easy-to-use wizard that sets up a Docker-based Oneprovider instance. The script automatically registers the deployed Oneprovider instance to a selected Onezone service and allows for interactive configuration of a storage backend and space support.
Prerequisites
Make sure the host intended for deployment is properly set up.
Log in and choose a space to be supported
You must have a user account in Onezone to register a new Oneprovider. Log in to the Web interface and choose a space that will be supported by the newly created Oneprovider.
If needed, create a new space.
Onedatify always configures the first space support for you, so that you can verify if the provider is functional. You may use a dummy space that you will later remove. You will be able to add more space supports after the deployment is finished.
Generate the Onedatify one-liner
Navigate to the Data > Space name > Providers view. Click on the Add support button in the main view.
Select the Deploy your own Oneprovider tab and copy the generated command.
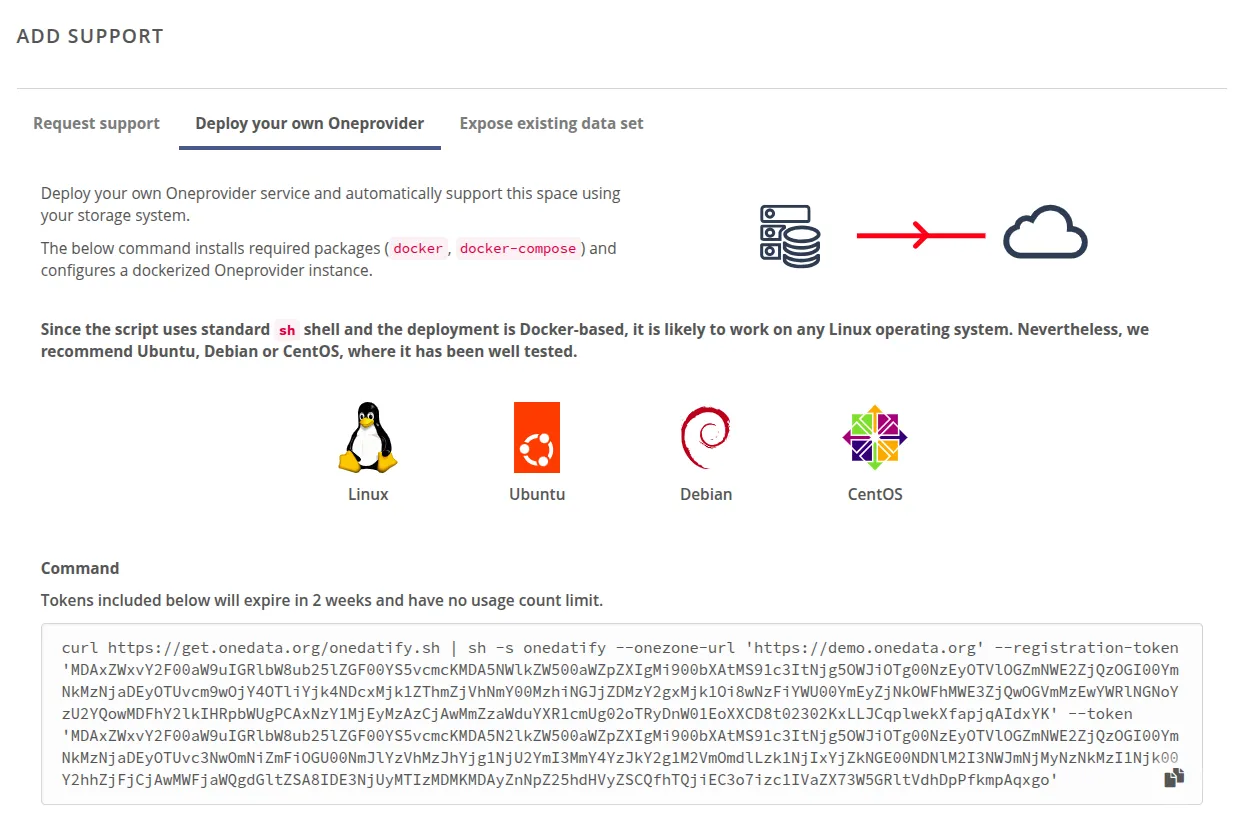
If you would like to expose a pre-existing dataset that resides on a storage backend, use the Expose existing data set tab.
Run the command on the target host
Paste the one-liner in the terminal on the Oneprovider machine (as superuser or as a user with sudo privileges).
Follow the instructions in the wizard.
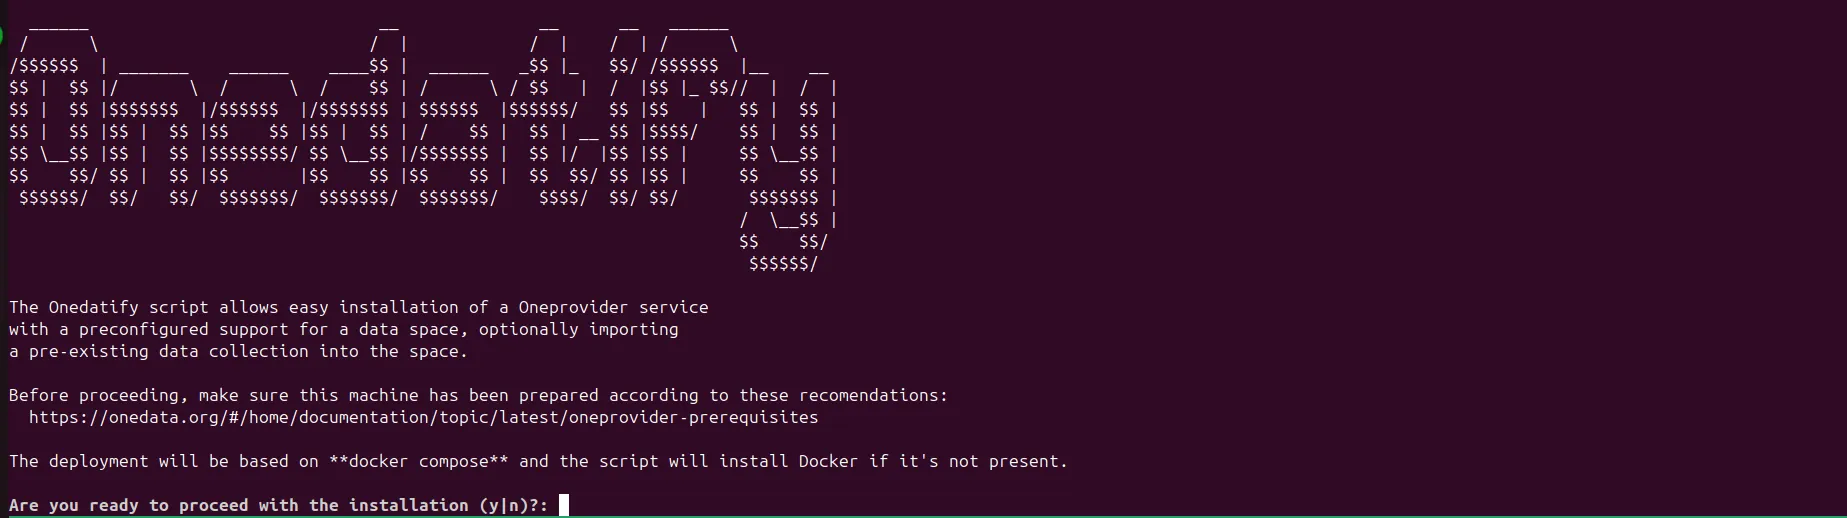
During the installation, the wizard will ask you several questions and suggest default settings to help you through the process:
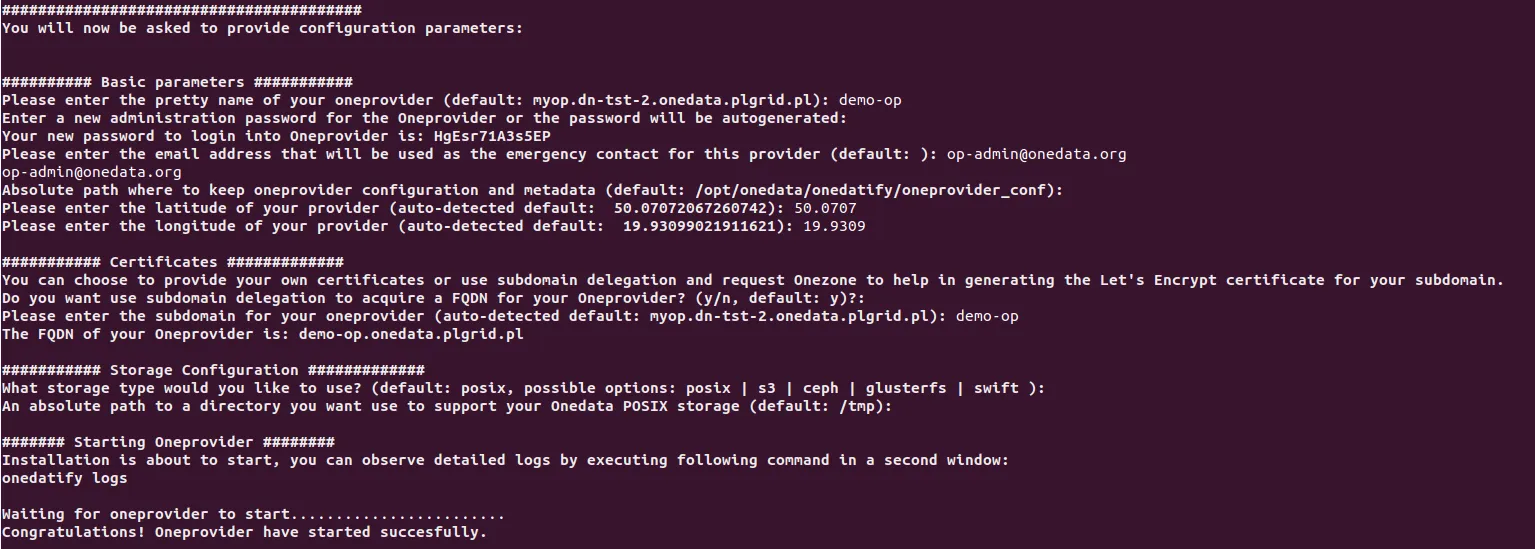
The progress can be monitored on a separate terminal using the following command:
journalctl -u onedatify.service -f