# Data Discovery
This guide is dedicated for administrators that would like to properly configure Data Discovery services for end users. Consider reading the counterpart documentation for end users that includes a guide for querying Data Discovery indices in Onedata and a FAQ that should help solve problems.
# Harvesters
Data discovery services in Onedata are built around the concept of harvesters. A harvester acts as a metadata sink that brings together multiple sources of metadata. Harvesters have two main functions:
automatic scanning of data spaces and collecting file metadata, which is fed into a harvesting backend (e.g. Elasticsearch) for indexing,
browsing the collected metadata and querying indices using a graphical interface or REST API.
# Harvesting process overview
Metadata detection, processing and indexing — the harvesting process — is a multi-stage algorithm whose flow depends on the harvester configuration. The below documentation will help you understand the main concepts and configure your harvester correctly.
# Detecting new metadata
A harvester can be connected to any number of spaces, each of which can be supported by any number of Oneproviders. For every such pair (Oneprovider & space), there is a continuous harvesting process that scans the space by incrementally iterating over all changes that have been made to the files locally (a.k.a. changes stream). Types of changes handled by the harvesting mechanism are:
- creation and deletion of a file,
- metadata change (extended attributes, JSON or RDF),
- file name change.
Each change triggers a metadata submission, which is posted in batches to the Onezone service. The changes stream is robust and resistant to failures — in case of any problems, harvesting is restarted at the point of last successful submission.
NOTE: The changes to files are processed in the order of occurrence — if the space is large and has not been fully harvested yet, it might take a long time for the newest changes to be indexed.
# Feeding metadata into indices
Metadata is continuously submitted by Oneproviders to Onezone, which acts as a sink and feeds it to an external harvesting backend (e.g. Elasticsearch). Harvesters are bound to the harvesting backends in many-to-one relation — many harvesters can use the same backend simultaneously. Such backend persists metadata in data structures called indices, which allow performing database-like queries in terms of fields defined by index schema (either provided by a user or an automatically generated one). A harvester may contain any number of indices, but all of them are handled only by the backend bound to the harvester. The Onezone service feeds the same metadata changes streams to each harvester index via harvesting backend API. The result of that submission depends on the index schema — incoming metadata entry might be accepted (fully or partially) or rejected. For example, one can use 2 different indices which accept different types of JSON metadata (depending on its content). Each index will only accept objects that match its schema, effectively splitting the harvested metadata into two subsets. As a result, they can be used like tables in a database — each holding records of different types.
# More about index schemas
The index schema describes:
- the format of the incoming metadata and how it should be saved,
- conditions which have to be met by a metadata submission to be accepted,
- search parameters used during queries,
- additional configuration to adjust the indexing process itself (e.g. a number of used nodes in Elasticsearch).
The index schema format depends on the type of used harvesting backend. In most cases, there is no need to define a custom index schema.
Backends are pluggable — by default, Onezone comes with one predefined backend plugin for Elasticsearch. Its documentation concerning index schemas can be found here (opens new window).
# Querying indexed metadata
After the metadata has been submitted and accepted by the harvesting backend, it can be queried using the Data Discovery GUI and REST API (refer to the end user documentation).
Apart from that, it is possible to directly access the harvesting backend. It requires network a connection to the harvesting backend (which is often behind a firewall). This way, one can use all proprietary API features with no additional translation layers from Onedata system.
WARNING: Using direct access to the harvesting backend may corrupt your indexed data as it allows not only to query, but also to modify and remove metadata entries and whole indices. Use it with caution.
# Public access
If desired, it is possible to grant public access to the GUI and REST API so that unauthenticated users can make API queries and browse the harvester using a public link to its GUI. Otherwise, it is available only to the harvester members (users and groups). In the public view, the harvester GUI is displayed in full-screen mode.
The public mode can be enabled by a harvester member with sufficient privileges using the Configuration submenu.
# GUI guide
# Creating a new harvester
NOTE: To create a harvester you need to have the
oz_harvesters_createadmin privilege. Learn more here.
- Navigate to the Discovery tab and click “Get started”
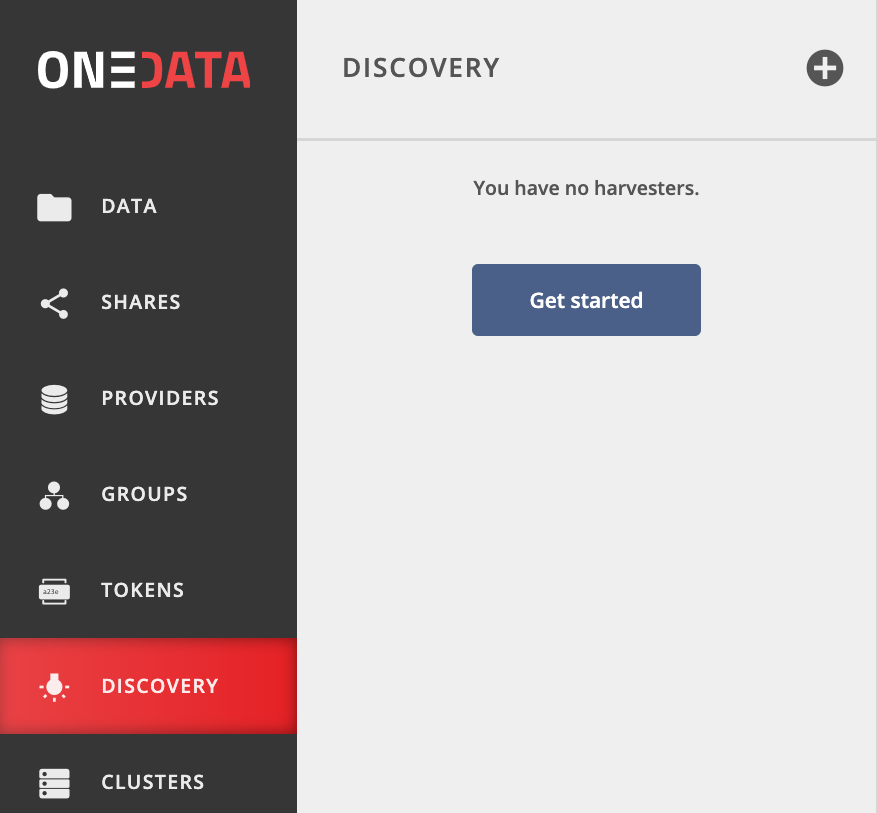
Choose the Create a harvester option or the (+) button at the top of the side menu.
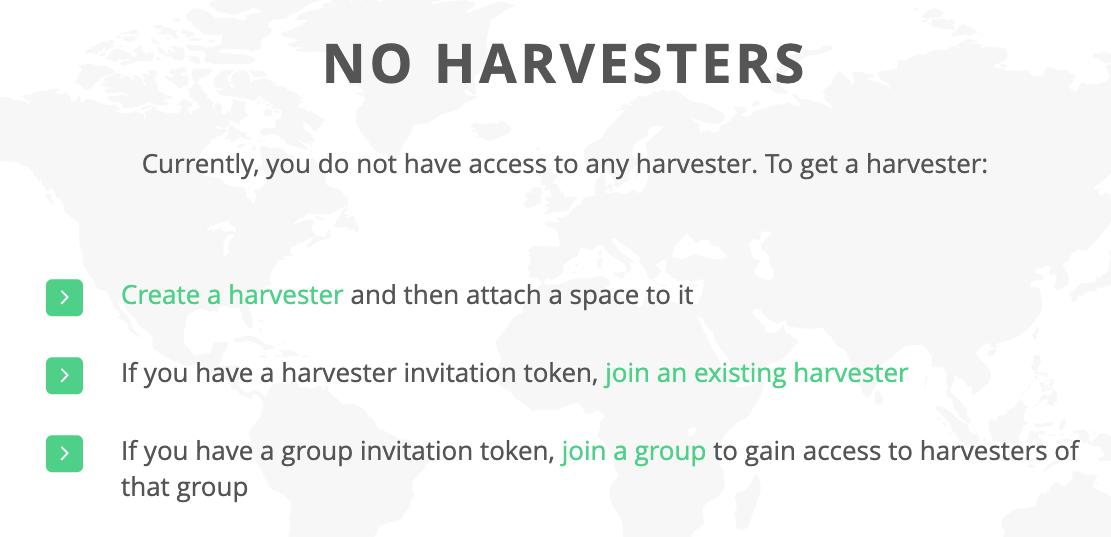 Other options visible on the screen can be used to join an existing harvester.
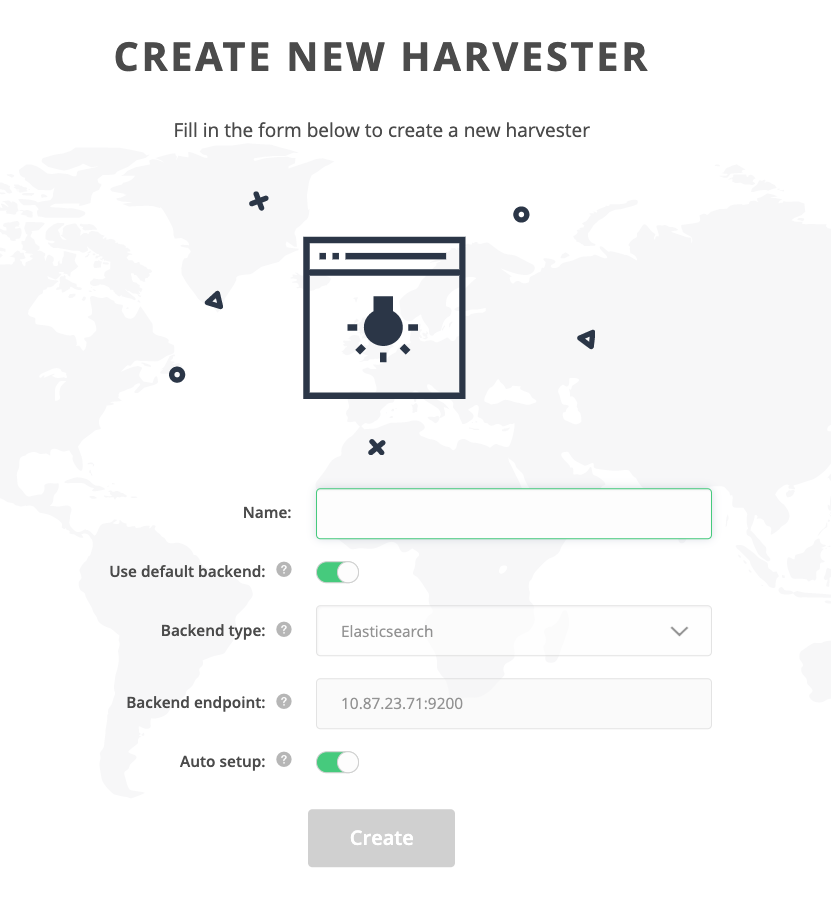
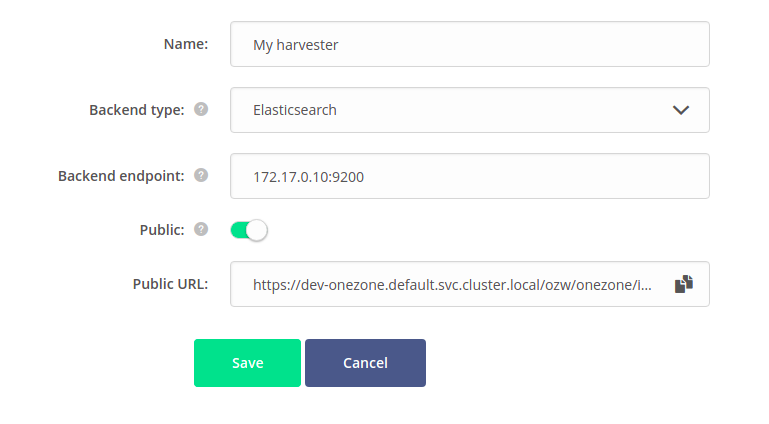
Fill in the information — choose a meaningful name, the plugin that will be used as harvesting backend (by default only Elasticsearch is available). Endpoint is a location where the API of the harvesting backend is available. It is optional — if not specified, default endpoint configured for the environment will be used. Auto setup means that the newly created harvester will have an initial generic index and ready-to-use data discovery GUI. Auto setup is recommended, unless you are an advanced user, and you want to customize configuration on your own.
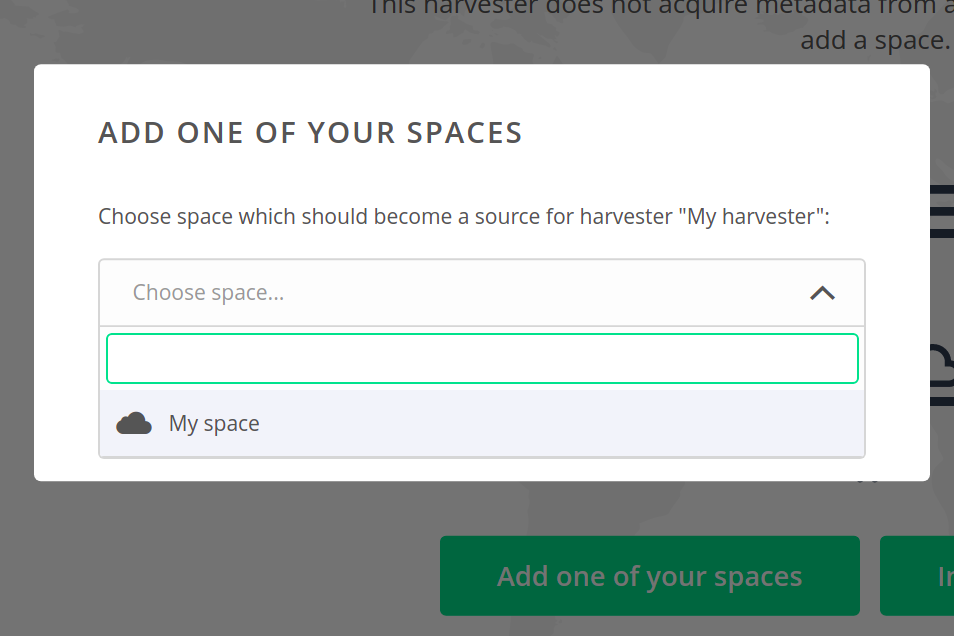
Navigate to the Spaces submenu to add a space to the harvester.
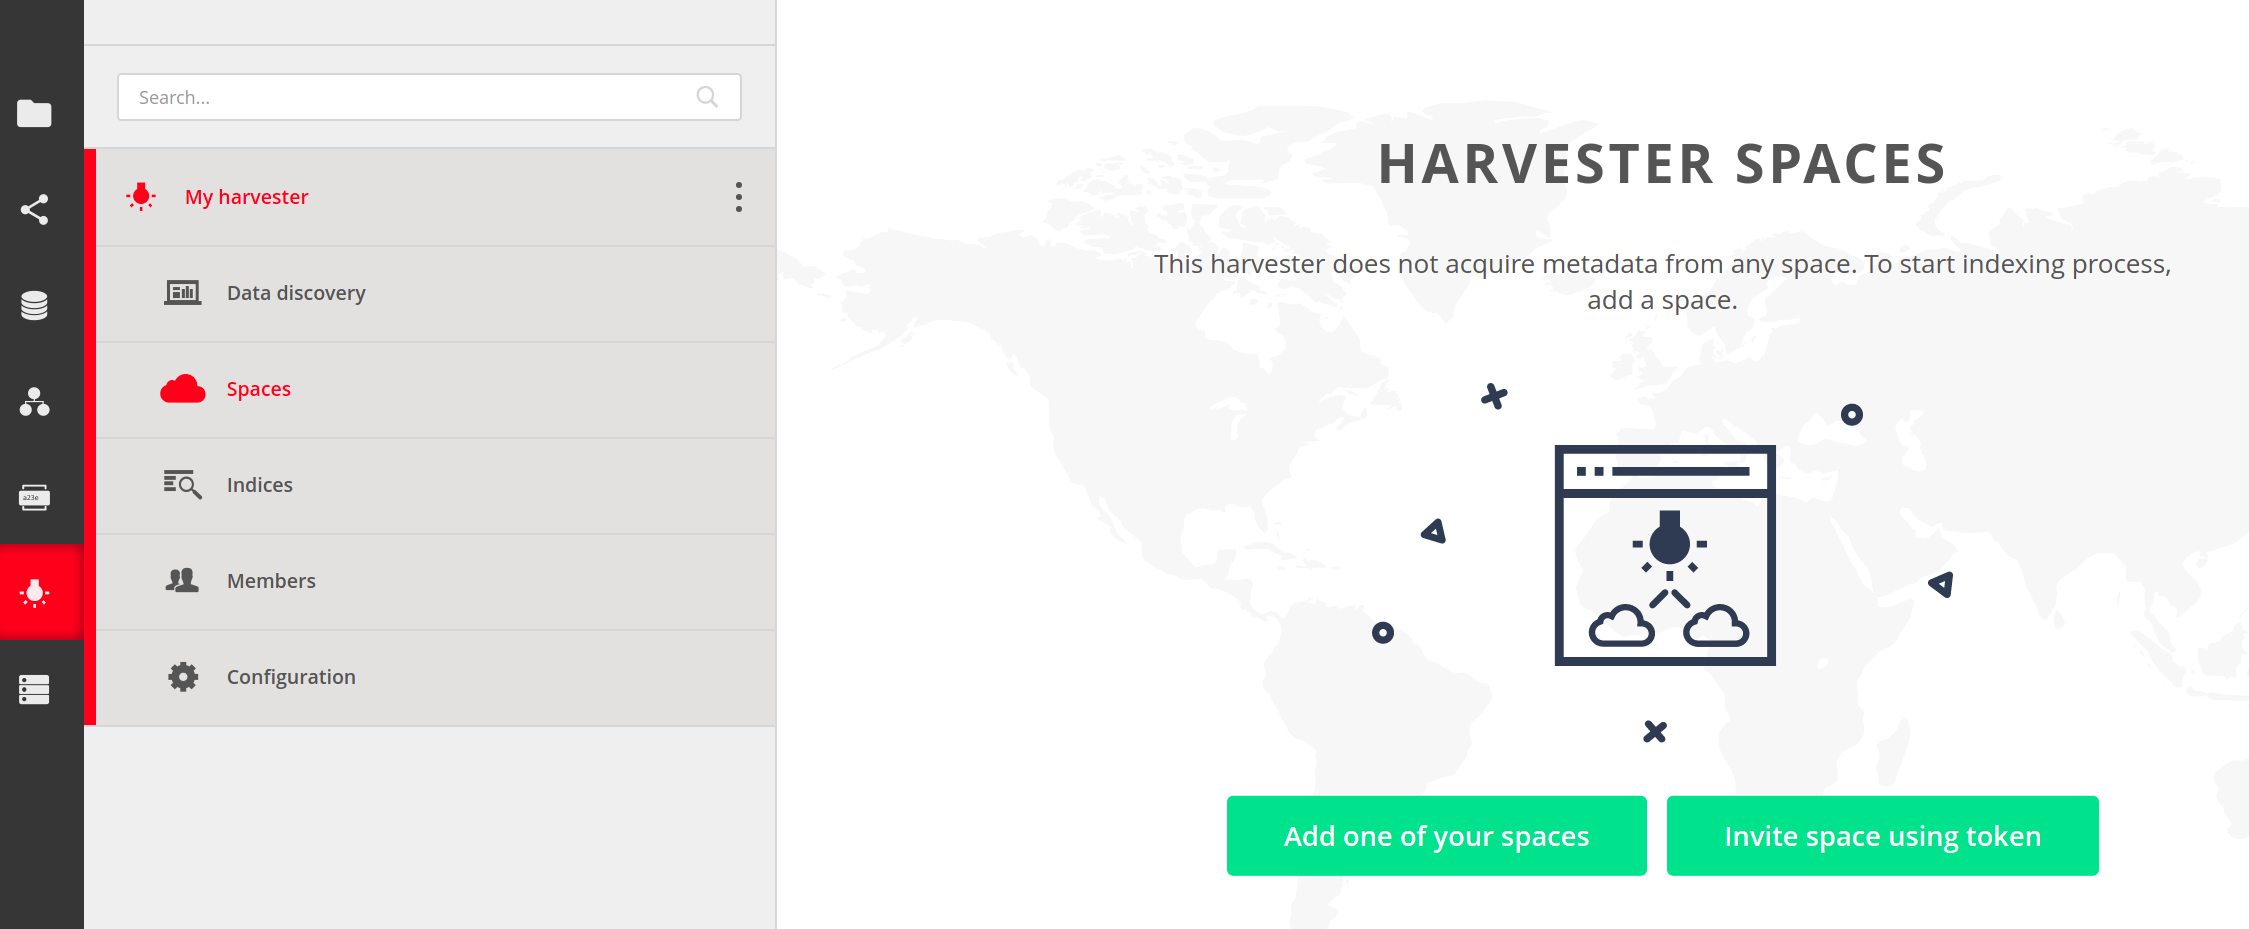
You can generate an invitation token and pass it to another user for them to add one of their spaces. For this guide, choose the Add one of your spaces. If you don't have any, learn about spaces.
After that the space will be added to the harvester — harvesting processes will be started and indexing of file metadata will begin.

- That's it! You have a fully configured harvester and it is ready to use for data discovery. If files in the added space does not have any metadata, then add some (see here) to make them searchable.
The harvesting results are available through Data discovery submenu of your harvester.
# Harvester spaces
A harvester can have many spaces attached to it. A list of them is available through Spaces submenu of your harvester.
# Adding new spaces
At any moment you have a possibility to extend the list of spaces with new ones — either one of yours or a space of some another user. Both methods are available through context menu visible on the top right corner of the harvester spaces view.

Add one of your spaces options has already been shown in
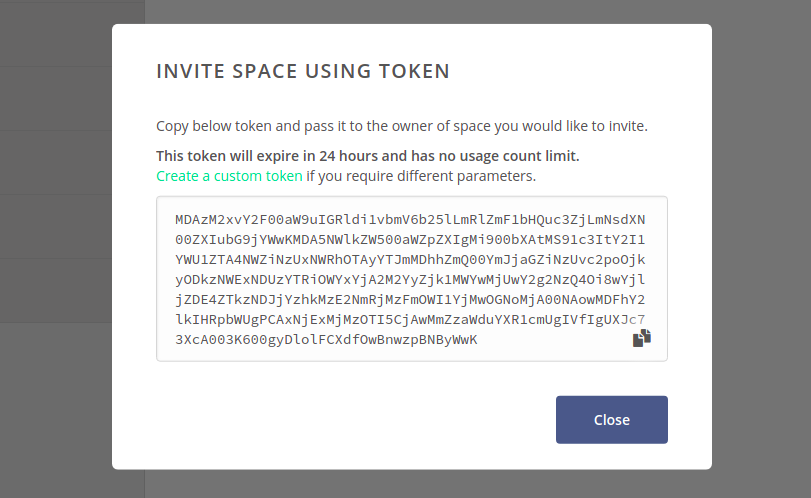
creating a harvester section. Invite space using token
opens a window with token, which should be passed to the owner of the space to be
added to the harvester. The invitation can be accepted using the Consume
action in the in the Tokens GUI,
as long as the consuming user has the Add harvester privilege in the space.
# Removing spaces
If you want to stop collecting metadata from one of the harvester spaces, click on the context menu on the right side of the spaces list entry and choose Remove this space.
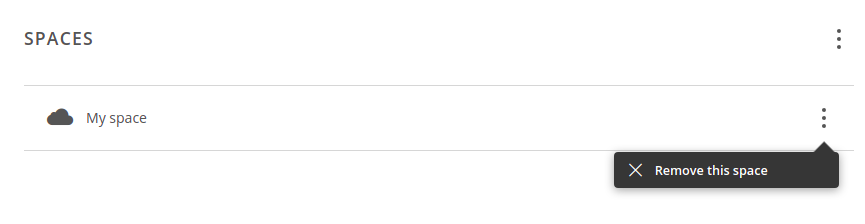
And then click on Remove button to acknowledge your decision.

NOTE: Removing space from the harvester will not remove previously indexed data from harvesting backend. It will also not affect the space itself.
# Harvester indices
A harvester can have multiple indices. These can be found under Indices submenu of the harvester.
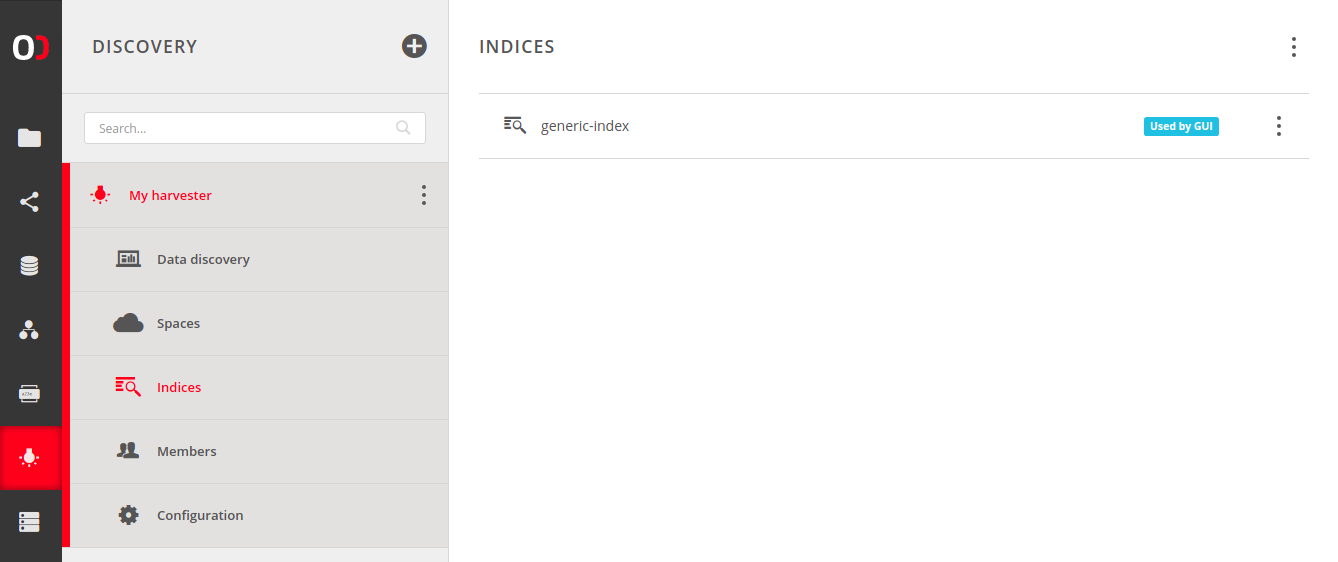
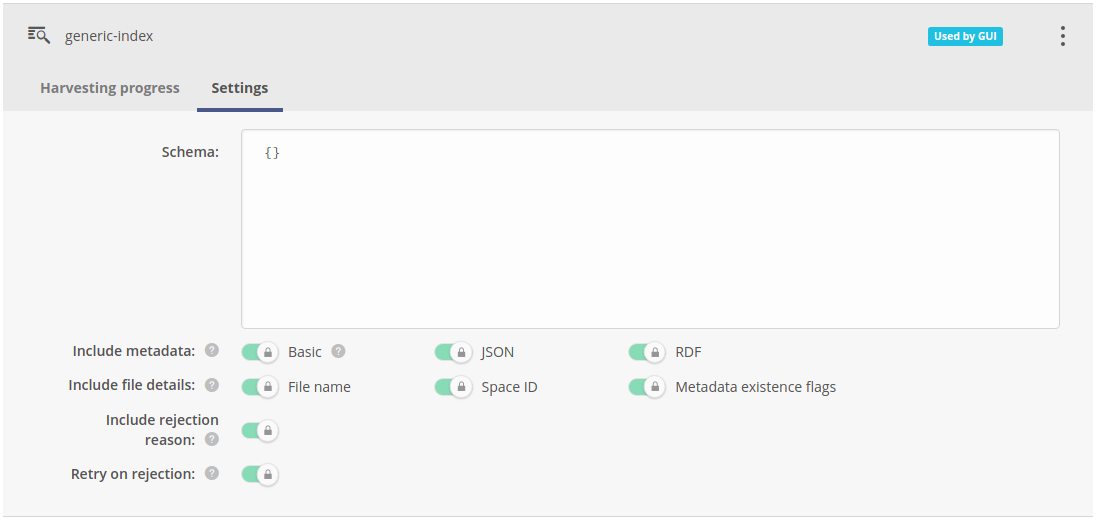
By default (if Auto setup was enabled during the harvester creation) there is one generic-index entry. It is a very basic index, which is designed to accept incoming metadata without any extra restrictions. It is also used by the data discovery GUI (which is denoted by Used by GUI badge).
NOTE: If there are many indices, only a subset of them might be used by GUI. Other ones still work and collect metadata, but are not accessible via the data discovery GUI. To query them you need to use REST API or change indices configuration of the GUI plugin.
# Adding new index
To add a new index, click on the context menu visible on the top right corner of the harvester indices view. Then choose Create new index.

Fill in the form to set up a new index. It contains a few options to customize:
- Name — a name for the new index.
- Schema — an index schema, which will be used by the harvesting backend during its creation. It is optional, but if provided, it must be in the format required by the harvesting backend, e.g. for Elasticsearch it must be a correct index mapping.
- Include metadata — determines which type of metadata should be indexed. At least one type must be selected.
- Include file details — specifies what file details should be harvested alongside the metadata. Enabling Metadata existence flags will add boolean flags saying whether the file has any metadata of certain type. The File name field may be utilized by the GUI plugin to improve the browsing experience.
- Include rejection reason — if enabled, all payloads rejected by the harvesting backend will be automatically analysed for offending data (e.g. fields that do not match the schema), pruned and submitted again. This might slow down the harvesting process and cause nonconformant metadata to be lost.
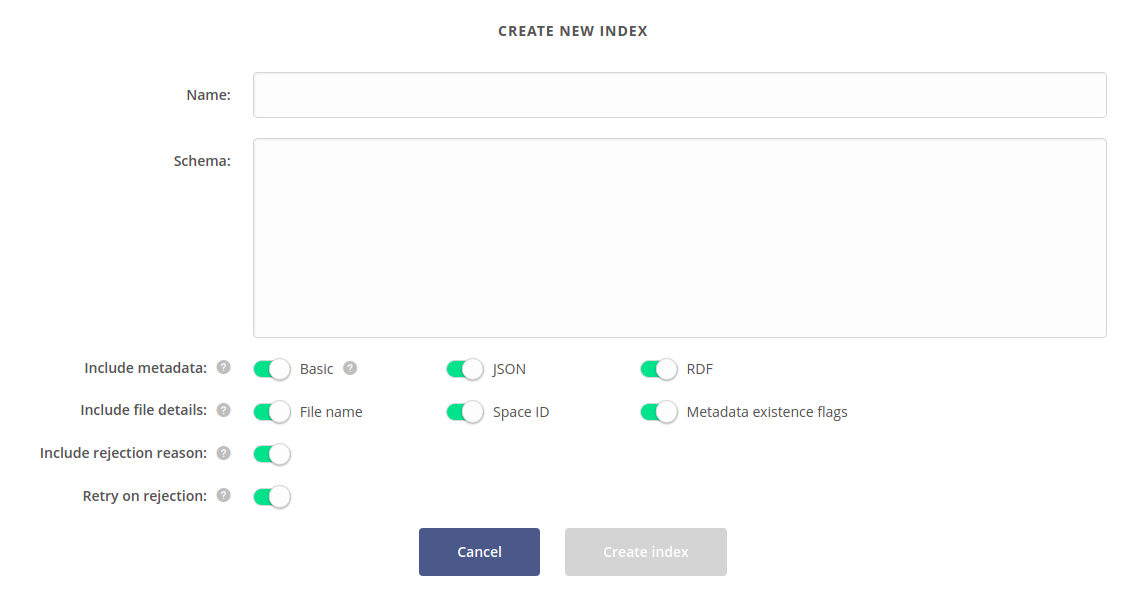
When a configuration for the new index is ready, click Create index. New entry will be visible on the indices list and the harvesting process will start.
NOTE: The order of adding spaces and creating indices does not matter. Every index (even those created after adding spaces) will always process all metadata from all spaces starting from the beginning of their lifecycle.
# Removing an index
If you want to stop collecting metadata in a specific index, click on the context menu on the right side of that index and choose Remove.

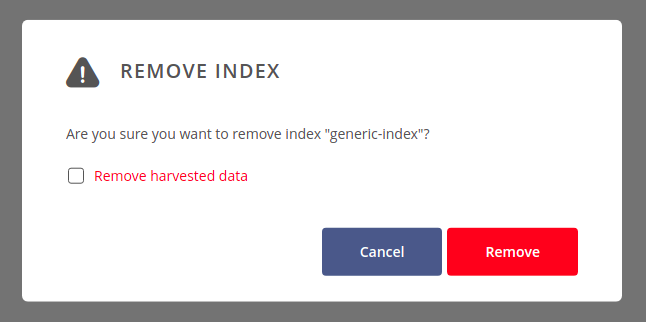
You can select Remove harvested data checkbox if you want to remove the index structure from the harvesting backend. Otherwise, only a binding between the harvester and the index will be destroyed, so harvested data will still live in the harvesting backend persistence (and be accessible via its direct proprietary API).
At the end, click on Remove button to acknowledge your decision.
# Index characteristics
Click on the index to see its details. Harvesting progress shows the space scanning progress per each pair (Oneprovider & space). You can click on each chart to see more information. To view statistics for spaces that are no longer attached to the harvester, use the Show archival spaces / providers toggle.

Settings tab presents the configuration as set during the creation of that specific index. It cannot be modified during index lifecycle, as it would require a rebuild of the whole index. If required, a new index with different configuration should be created.
# Harvester members
The members view — available through Members submenu — allows you to add users or groups to the harvester and manage their privileges. It is the same mechanism as used by spaces and groups members concepts. For more information see group members management.
NOTE: When the harvester is public, its indices can be accessed by anyone regardless of the actual harvester members and their privileges.
# Harvester settings
Each harvester has two categories of configuration, both can be found under the Configuration submenu.
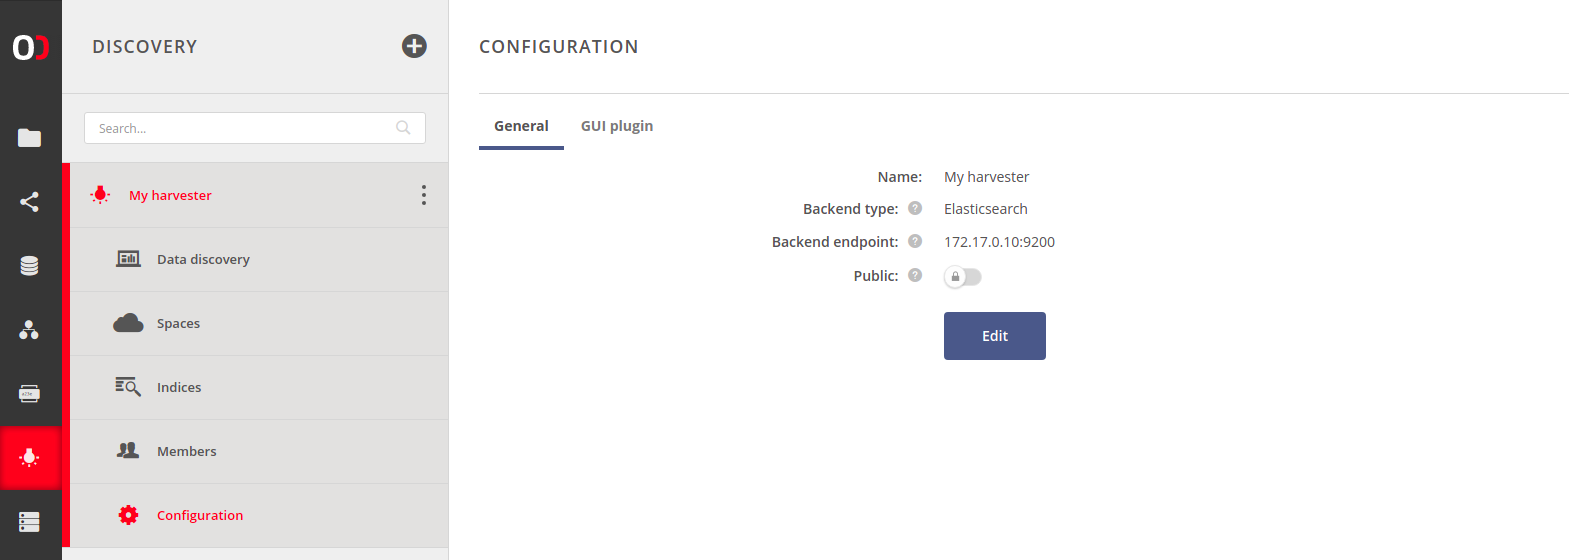
# General settings
General settings are very similar to the form used for harvester creation. The only difference is the Public setting. If enabled, anyone with the public link can browse the harvested metadata or use the REST API for queries.
# GUI plugin settings
The second category is GUI plugin settings, which are responsible for adjusting data discovery GUI, including usage of custom GUIs with non-standard configuration.
Each harvester comes with a so-called generic GUI for data discovery to let the harvester administrator kick-start the harvesting process and let the users interact with metadata. It provides simple mechanisms for querying indices and filtering the results. As needed, the generic GUI can be replaced with a custom one, which can visualise indexed data in a specialized way. Hence the term GUI plugin.
GUI plugin is a self-contained web application. After uploading, it is embedded into the Onezone interface. It communicates with the underlying harvesting service through Onezone.

# Uploading custom GUI plugin
The first section of GUI plugin configuration allows to upload your own GUI plugin. It should be a standalone, static web application compressed in tar.gz format.
Only plugins that are whitelisted are accepted (for safety purposes).
If your custom plugin was not provided directly by the Onedata team, then you will
need to contact the Onezone administrator and ask to add harvester GUI checksum (from
shasum -a 256 your-plugin.tar.gz) to /etc/oz_worker/compatibility.json
configuration file.
WARNING: Use only GUI plugins which are whitelisted by the Onezone and taken from a trusted source. Custom GUI plugins may contain malicious code and cause critical security issues, including data leaks and unauthorized operations.
# GUI plugin indices
Each GUI plugin has a list of indices which are needed for the plugin to work. Custom plugins require a mapping between required indices and actual indices defined for the harvester. Onezone will proxy GUI plugin communication to the harvesting service according to these settings.
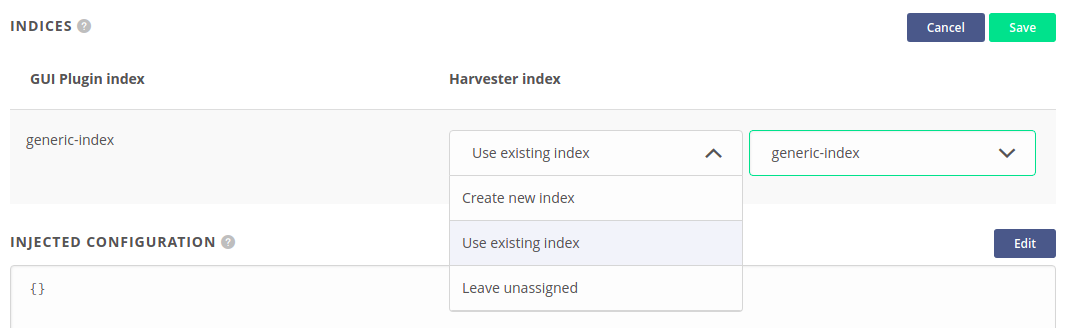
For each required index, there are three possible options to choose:
- Create new index — creates an empty, new index according to the index schema provided by the GUI plugin itself.
- Use existing index — uses one of the existing indices. You have to be sure that its schema is compatible with the schema used by the GUI plugin.
- Leave unassigned — use only if you are sure that this requirement is optional and the GUI plugin can work without it.
# GUI plugin injected configuration
Some of the custom GUI plugins might have a possibility for a more complicated configuration. In such a situation you should use Injected configuration section and fill it with your own configuration in JSON format.
NOTE: If you do not know what the possible options are, enter the edition mode and click Use defaults button. It will fill the textarea with the example configuration provided by the GUI plugin.