# Data Discovery
This guide is dedicated to non-admin users that would like to index the metadata from files in their spaces and perform queries. Consider reading the counterpart documentation for admins that might give you more insights into the concept of Data Discovery in Onedata, especially concerning the configuration of harvesters and indices.
You may also want to take a look at the FAQ.
# Harvesters
Data discovery services in Onedata are built around the concept of harvesters. A harvester acts as a metadata sink that brings together multiple sources of metadata. Harvesters have two main functions:
automatic scanning of data spaces and collecting file metadata, which is fed into a harvesting backend (e.g. Elasticsearch) for indexing,
browsing the collected metadata and querying indices using a graphical interface or REST API.
# Indexing your metadata
Before you start, make sure that the following requirements are met:
- By indexing metadata you implicitly give a consent for sharing them with all members of the indexing harvester. Anyone with access to the harvester will be able to query the indices and see metadata.
- The files to be indexed do not have conflicting metadata formats — learn more.
There are several ways how you can index the metadata attached to the files in your space by adding it to a harvester.
WARNING: Keep in mind that all members of a harvester have access to your indexed metadata without restrictions. This includes any new member that may join the harvester in the future.
# 1. Adding a space to an existing harvester
You do not have to be a member of a harvester to add a space to it. Contact the harvester owner and ask him for a space invite token. The invitation can be accepted using the Consume action in the Tokens GUI, as long as the consuming user has the Add harvester privilege in the space.
You will be asked to choose a space to be added to the harvester and the harvester will start processing your metadata. Keep in mind that you need to be a member of the harvester to query the indices, unless the harvester has public access.
# 2. Adding a space to your own harvester
If you are already a member of a harvester, you can add one of your spaces as a source of metadata. If you have sufficient privileges, you can use the option to add one of your spaces to the harvester, available in the Spaces submenu. Otherwise, contact the harvester owner and ask him for a space invite token. The invitation can be accepted using the Consume action in the Tokens GUI. You will be asked to choose a space to be added to the harvester. After a while, your metadata should be accessible via Data discovery submenu of the harvester.
# 3. Creating a new harvester
This method requires an action from an Onezone administrator, who has sufficient privileges. Contact an administrator and ask to create a new harvester. The administrator should then give you a user invite token. The invitation can be accepted using the Consume action in the Tokens GUI. Continue as described in (2) to add a space to the new harvester.
In case of any problems with metadata indexing, contact the owner or creator of your harvester.
# Querying indexed metadata
The harvested metadata is indexed by the backend configured for given harvester — e.g. an Elasticsearch cluster. The indices can be queried using the Data Discovery GUI or the REST API.
The data discovery GUI is arguably the most convenient way, providing easy to use tools for querying and filtering results. The REST API is dedicated for more advanced users and automation using custom middleware or scripts.
# Public and private access
Refer to the admin documentation.
# Data Discovery GUI
Open the Data discovery view, where the harvester can be browsed. To see any results, you must make sure that there are some files in spaces attached to the harvester (preferably with some custom metadata set). You might open the public view of the harvester (if enabled) to enter the full-screen mode.
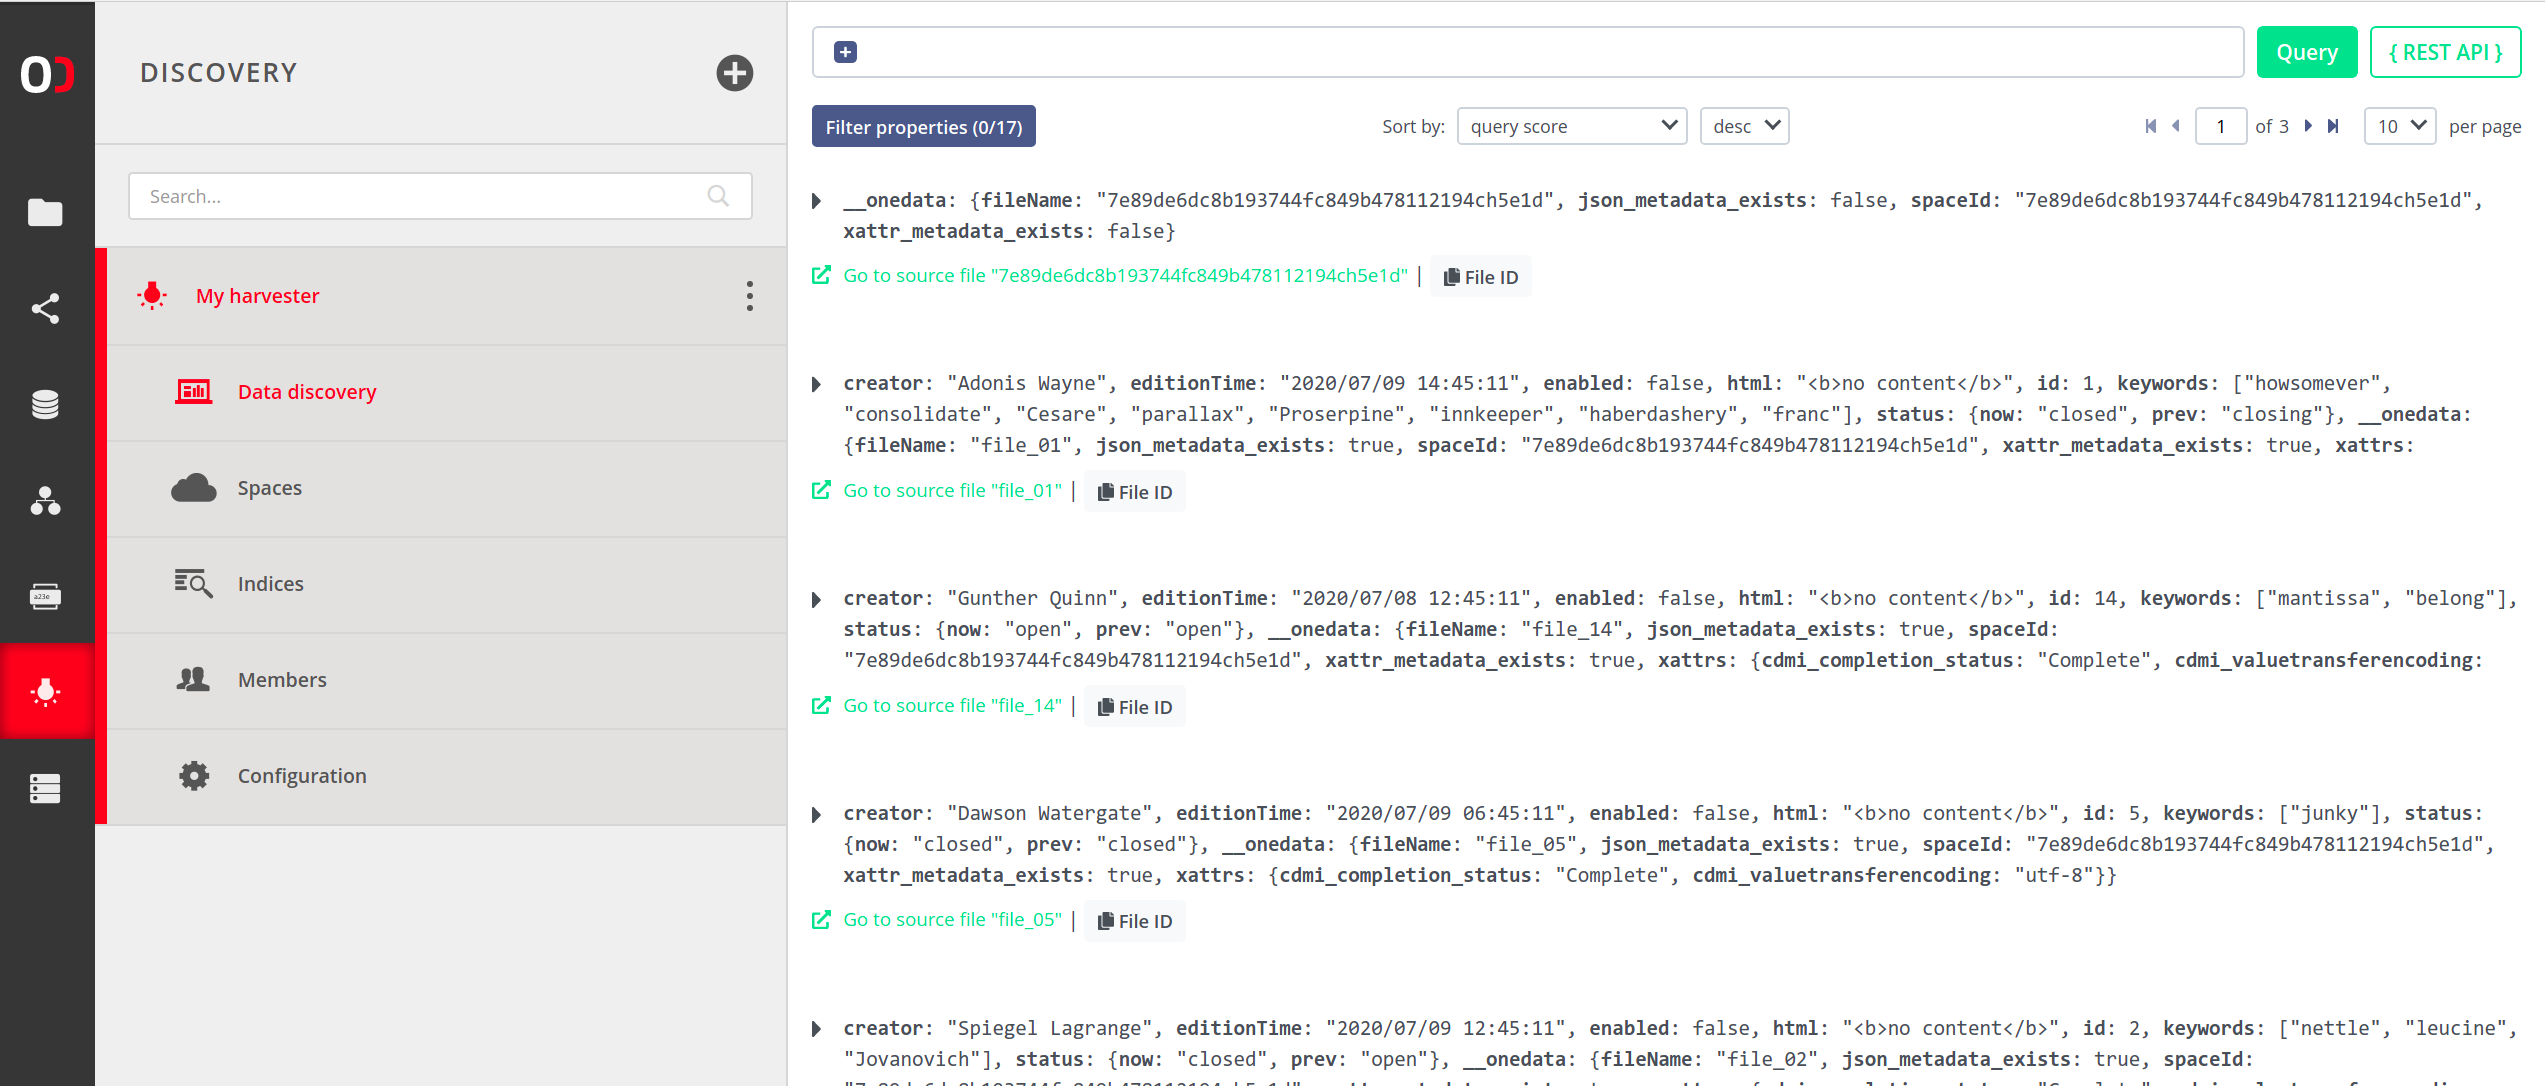
Click on an entry to expand it and view the metadata. This example shows a file that has some custom JSON metadata set. Such file can be found in the index by its filename or queries matching the JSON metadata.
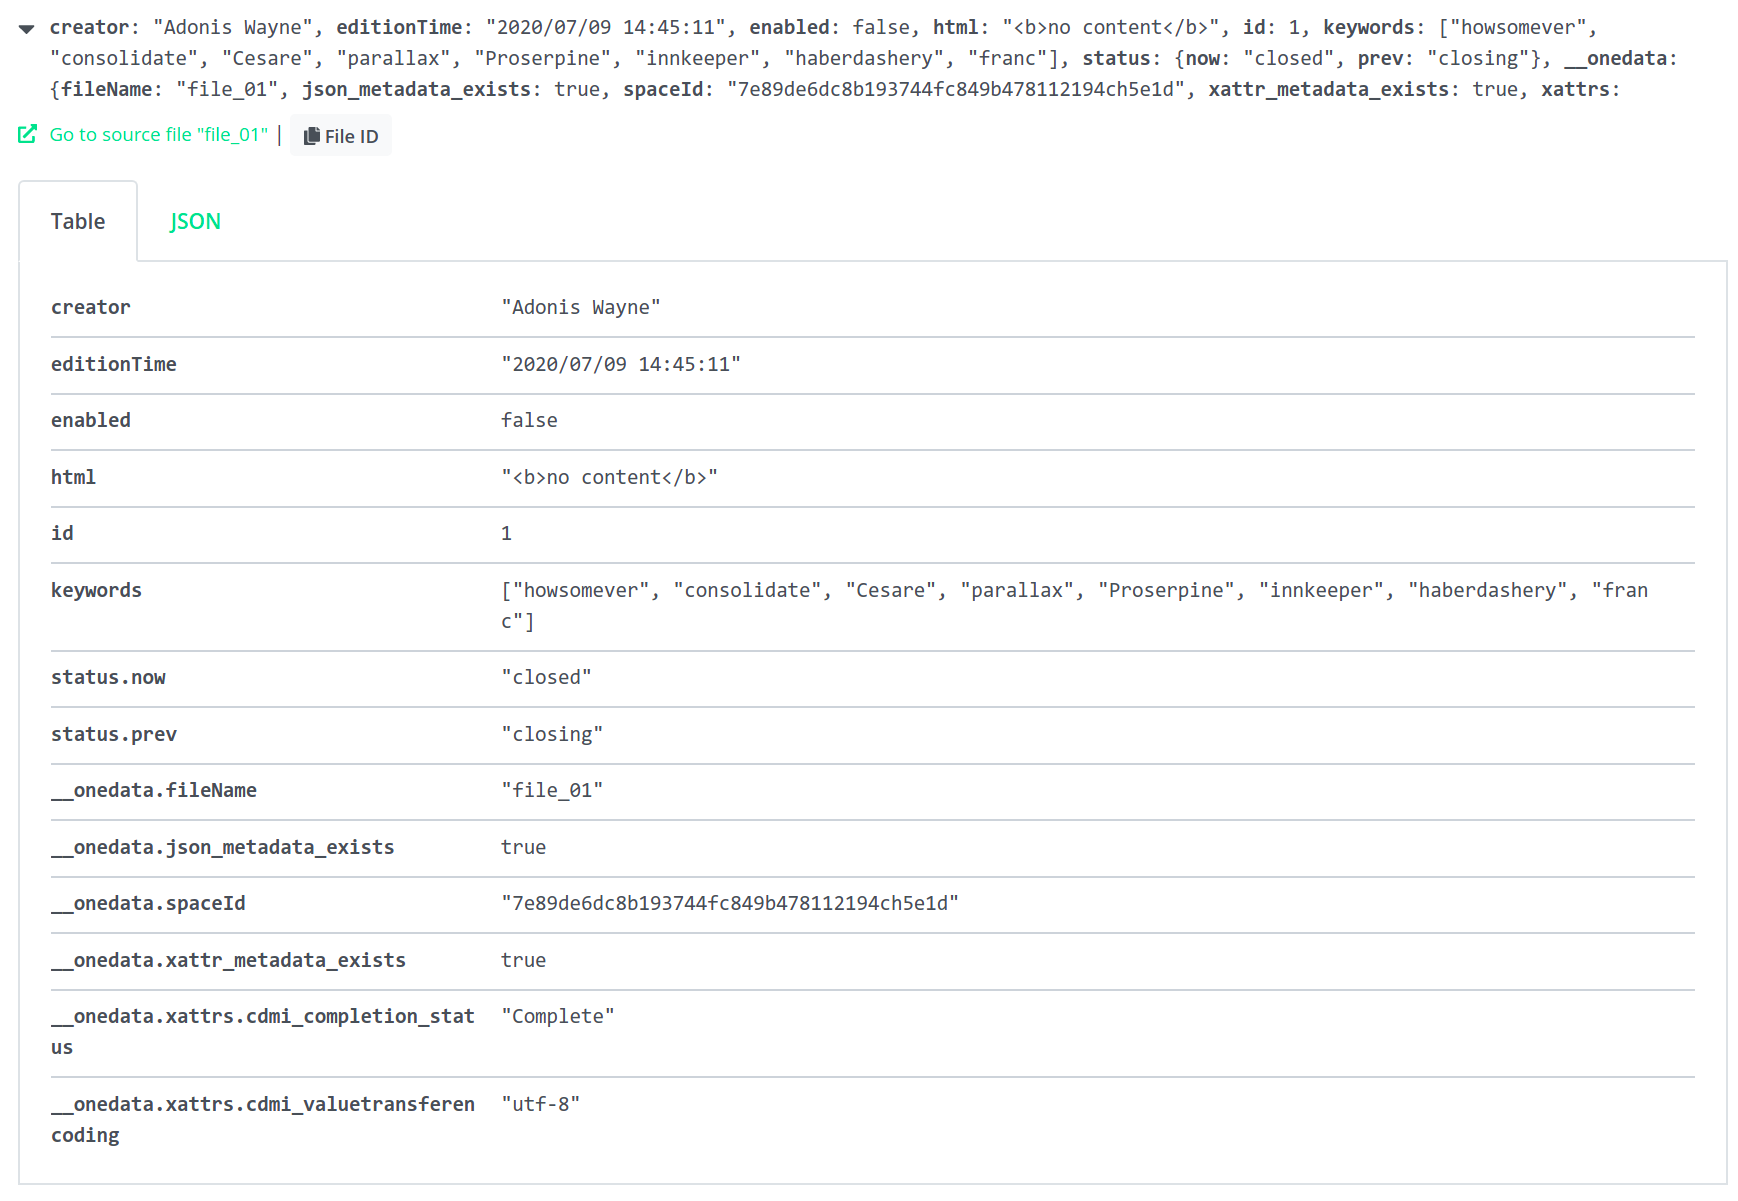
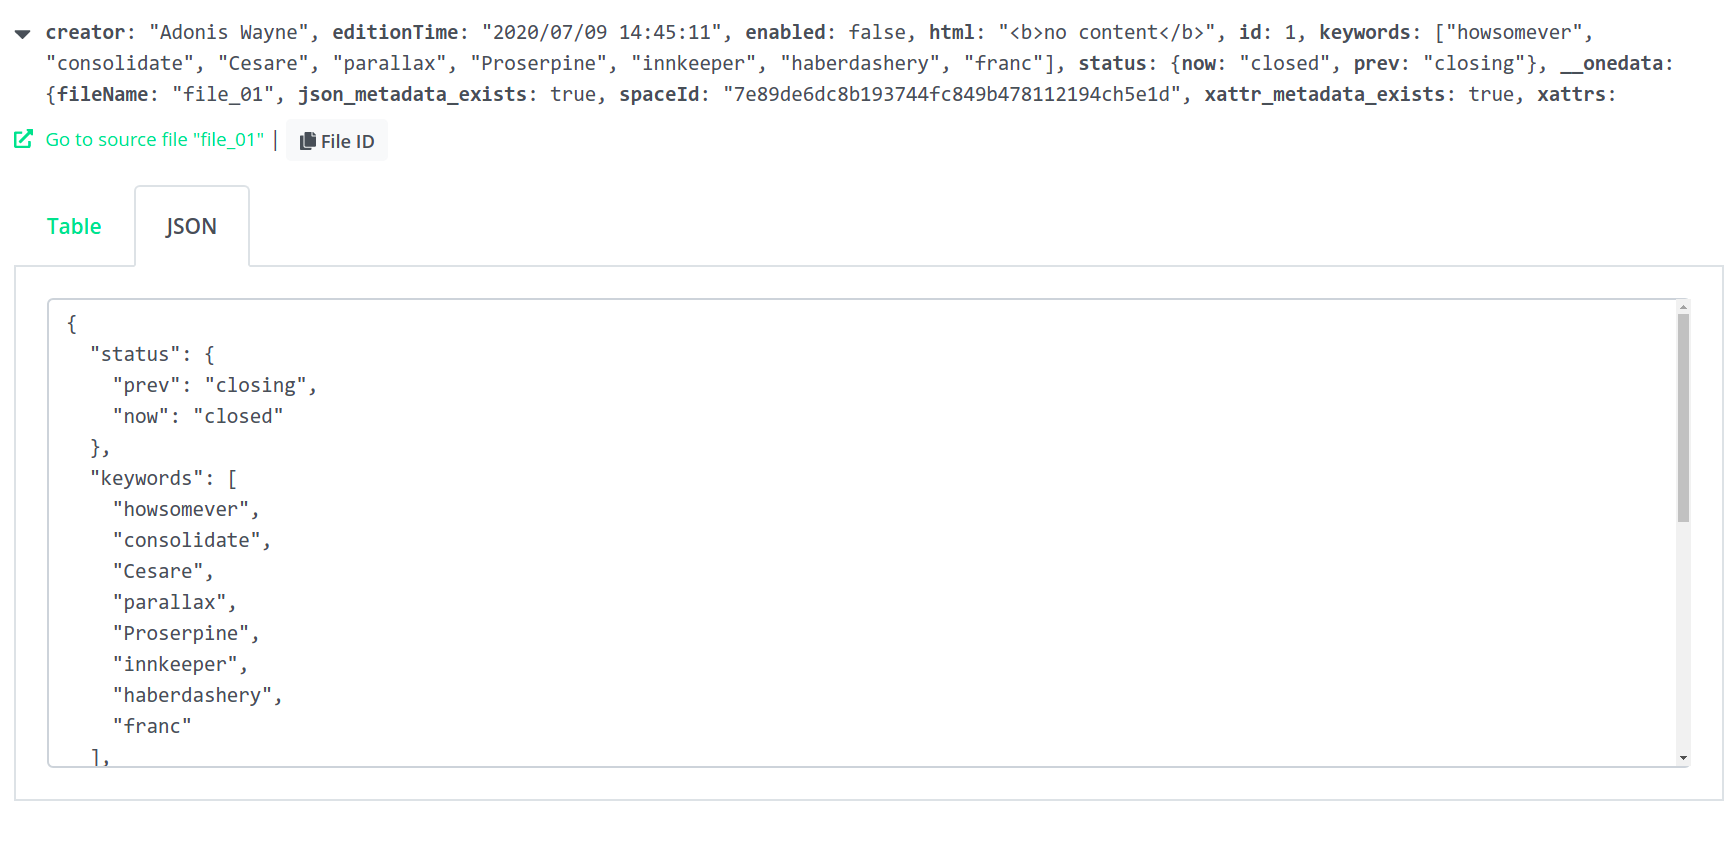
You can switch between table and JSON views.
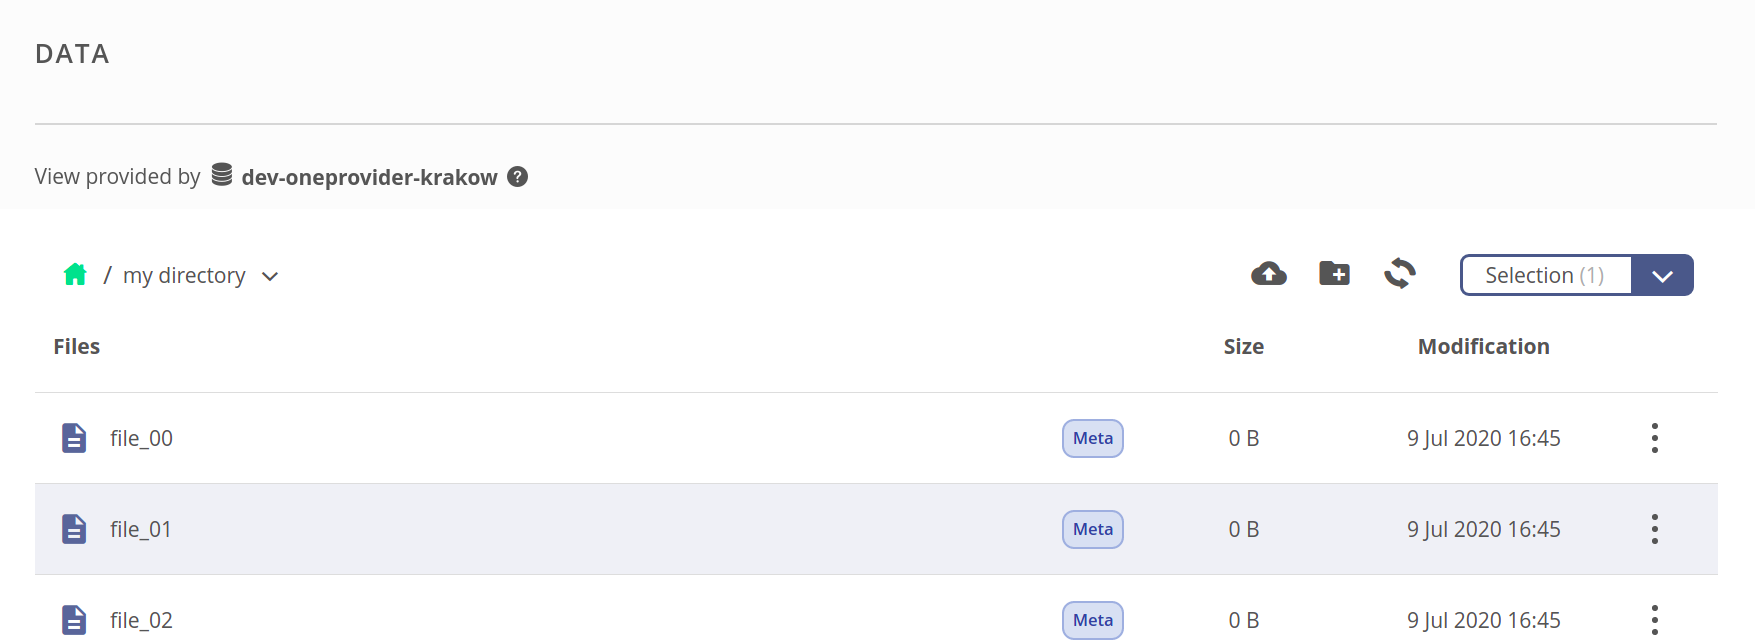
You can easily go to the source file using the green link (see above) - you will be taken to the directory that contains the indexed file.
Back to the data discovery view — you can use the query builder to compose custom queries which will narrow your search results. Building the query starts with a single placeholder that can become a direct condition, or branch into a more complex expression using chosen operator.
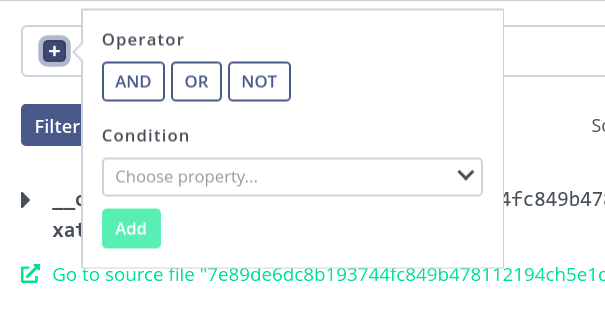
If an operator is chosen, new placeholders appear in that place, which can be recursively filled with further conditions or operators. This example shows the
ORoperator, which will match a file if the left-hand expression or the right-hand expression matches it.
The condition expression is composed of a property name, comparator and value to compare against. If the condition is true for a file, it will be included in the results (subject to other expressions in case of a complex query).
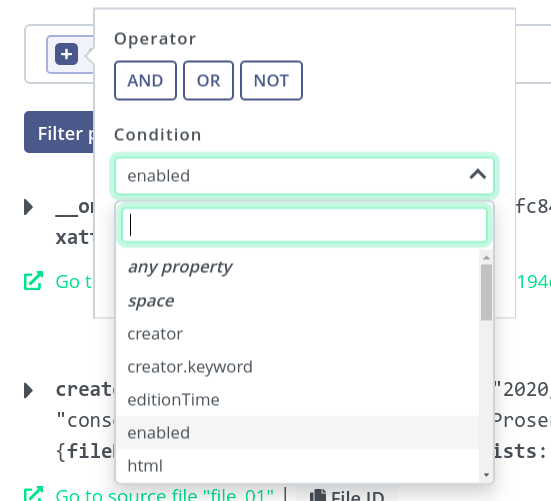
Complete condition — matches if the
enabledproperty in file metadata equalstrue.
Now, for the right-hand expression — another condition that matches if
idis equal to16.
Complete query might look like the following — quick on the Query button to perform the search.

The results are presented on a paged view — you should see all the files that match the specified query, split to pages. Use the paging menu at the bottom for navigation.
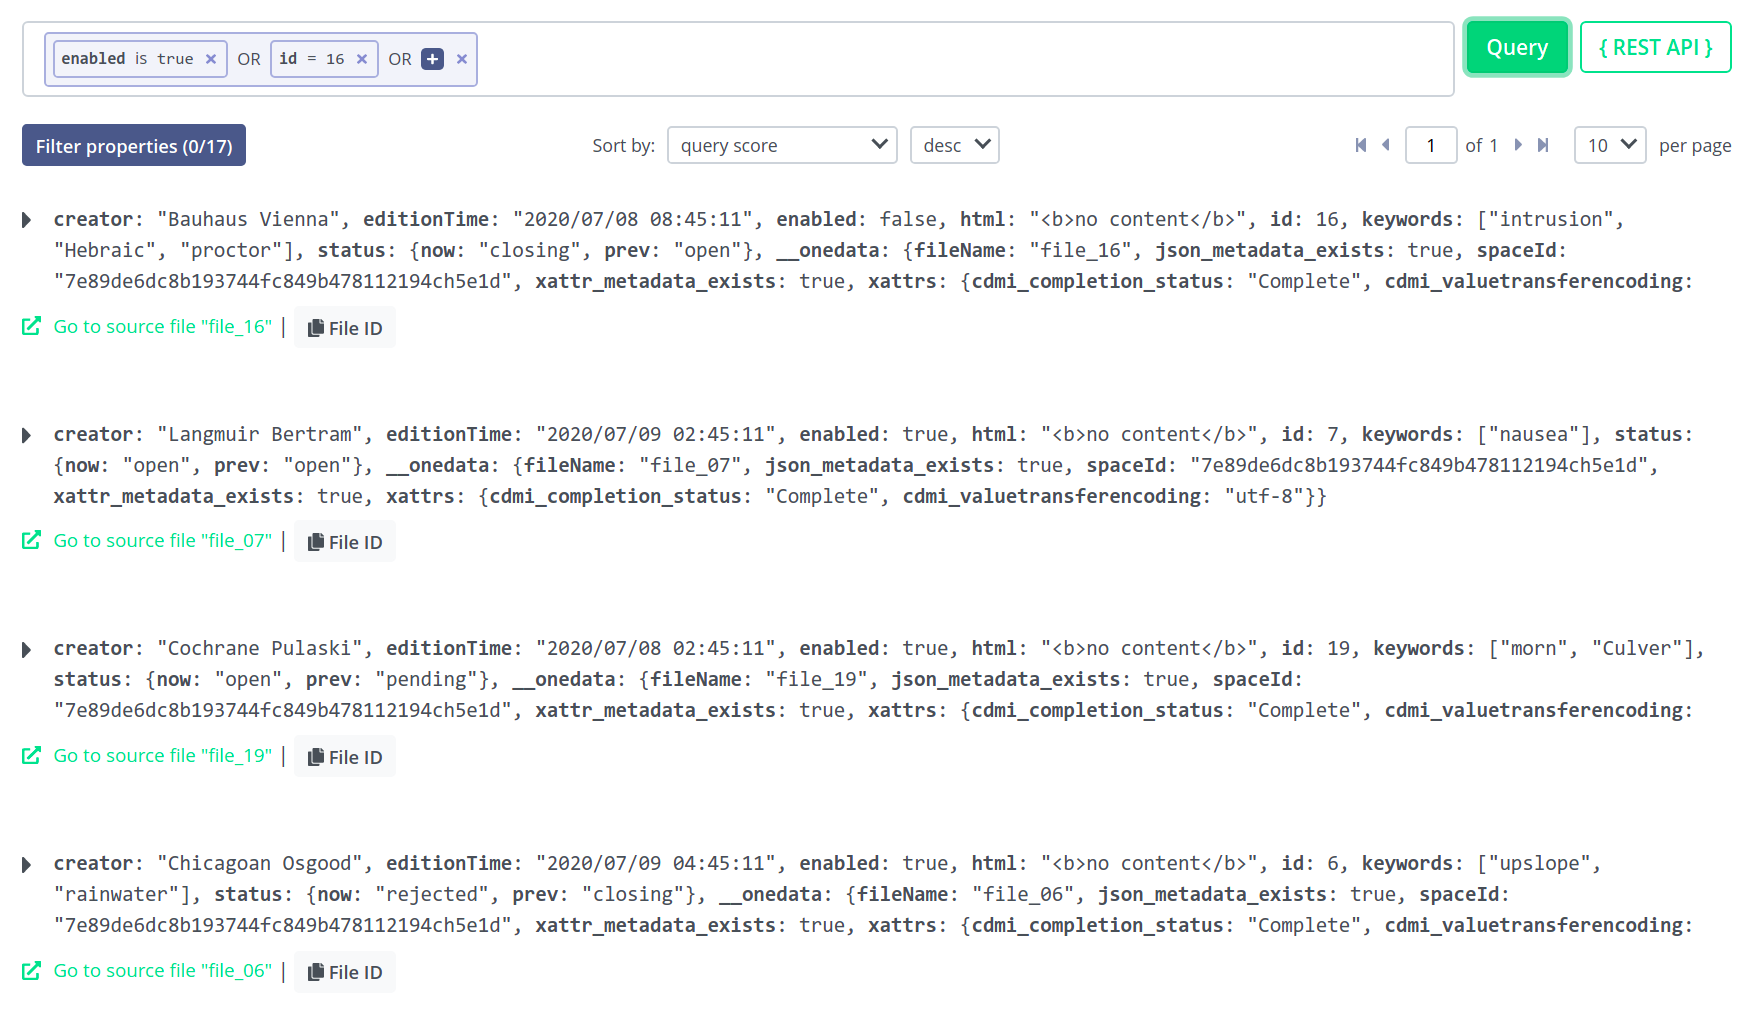
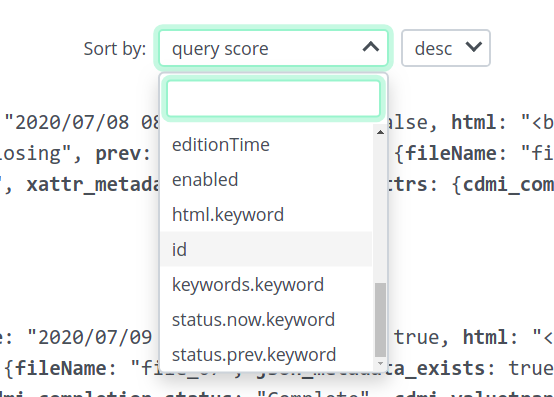
Results can be sorted by desired property and in ascending or descending order.
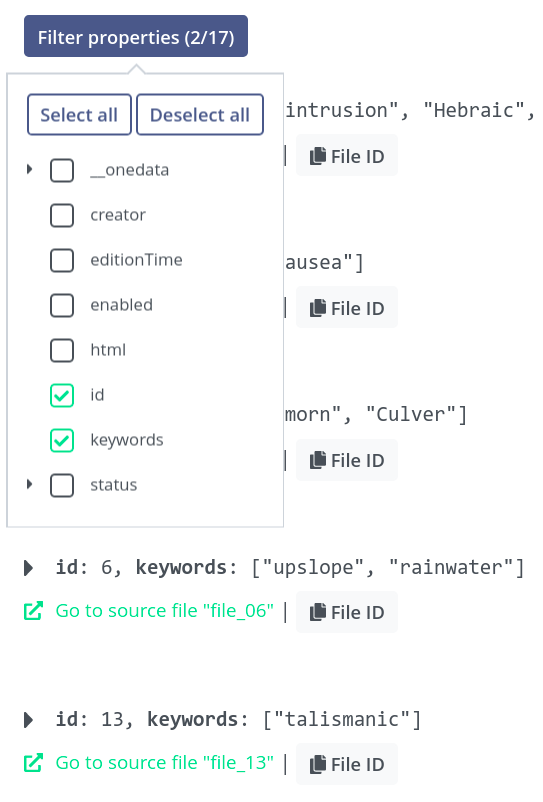
To refine the search, you may apply some filters based on properties. In our example, the results constitute 17 accumulated unique properties to filter by.
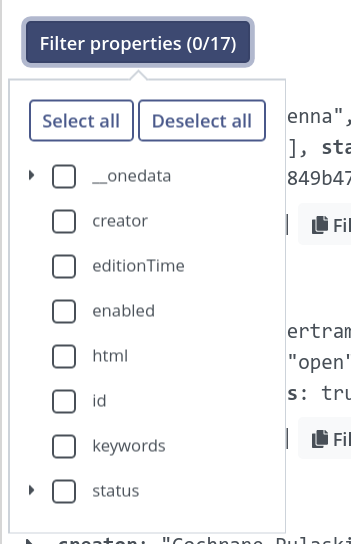
Filtering is applied live. Behind the scenes, the query is not repeated - the unwanted properties are hidden from the view for convenient browsing, but the list of matching files does not change.
If you wish to use the REST API for queries, you may find the
{REST API}button useful.
Click on the button to generate a
curlcommand that will perform a query equivalent to the one currently built in the editor, including the filters and sorting parameters. See the REST API for more information.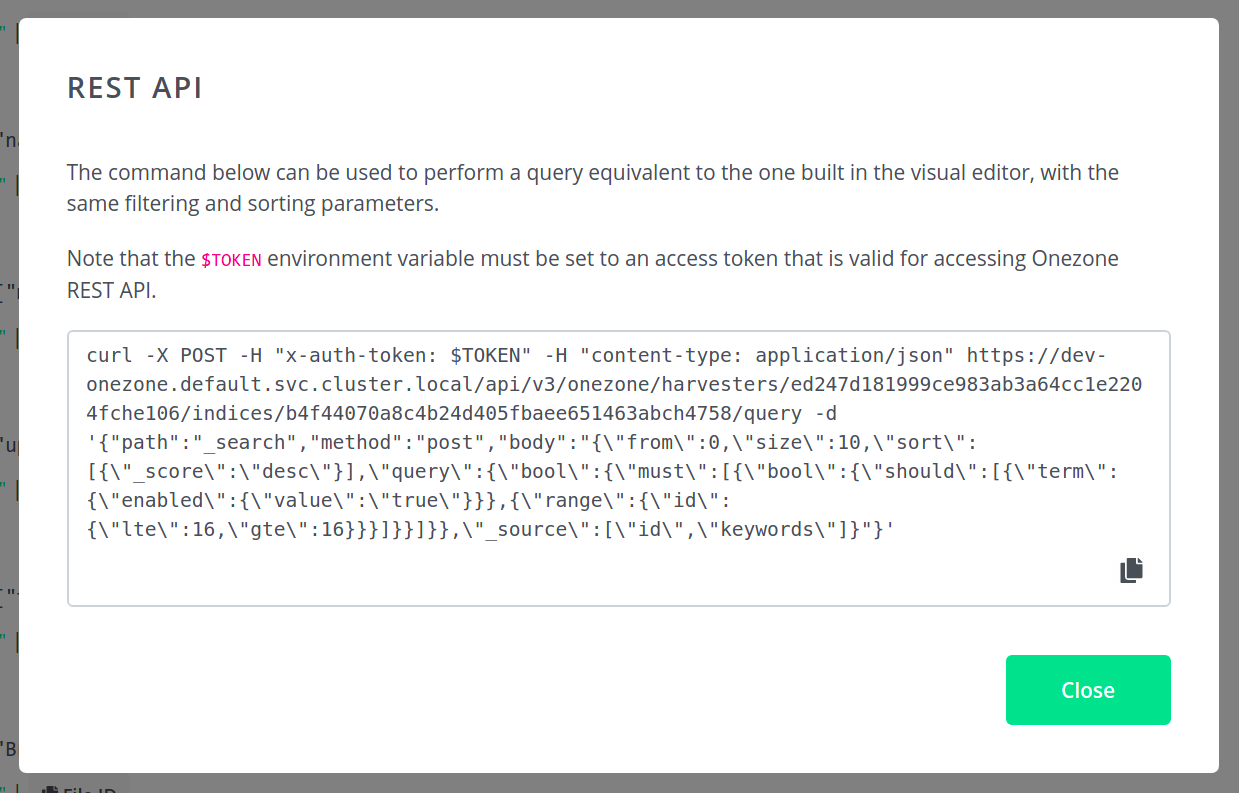
# REST API
Onezone's REST API allows performing queries in Elasticsearch, where Onezone serves as a proxy — as the Elasticsearch server is usually deployed alongside the Onezone's cluster in an isolated, internal network.
Example query to the harvester looks like the following. The request body is
essentially a specification of the request to be made by Onezone to the
Elasticsearch server, and the response is fed back to the client. The body
value is a string — encoded JSON expressing the Elasticsearch query.
curl -X POST -H "x-auth-token: ${TOKEN}" -H "content-type: application/json" \
    https://hub.archiver-otc.eu/api/v3/onezone/harvesters/ed247d181999ce983ab3a64cc1e2204fche106/indices/b4f44070a8c4b24d405fbaee651463abch4758/query \
    -d '{
        "path": "_search",
        "method": "post",
        "body": "{
            \"from\": 0,
            \"size\": 10,
            \"sort\": [
                {\"_score\": \"desc\"}
            ],
            \"query\": {
                \"bool\": {
                    \"must\": [
                        {
                            \"bool\": {
                                \"should\": [
                                    {
                                        \"term\": {
                                            \"enabled\": {
                                                \"value\": \"true\"
                                            }
                                        }
                                    },
                                    {
                                        \"range\": {
                                            \"id\": {
                                                \"lte\": 16,
                                                \"gte\": 16
                                            }
                                        }
                                    }
                                ]
                            }
                        }
                    ]
                }
            },
            \"_source\": [
                \"id\",
                \"keywords\"
            ]
        }"
    }'
Note that the ${TOKEN} variable must be set to an access token
of a user that is a member of this harvester — unless the harvester is
public, then the x-auth-token header can be simply removed.
The response will contain the raw response from the Elasticsearch server. If
filters are enabled, only the specified properties will be included in the
results (for the bove example — id and keywords). Furthermore, by default
only the first 10 entries will be returned — override by changing the
\"from\": 0, \"size\": 10 parameters of the query.
# Data discovery FAQ
# Why only administrators are privileged to create a new harvester?
The harvesting backend is typically deployed alongside the Onezone cluster by the Onezone administrators and maintained by them. By granting privileges to create harvesters, the Onezone admins can designate a group of trusted users that can use those resources.
What is more, the harvesting process analyzes all changes performed on the files in spaces attached to the harvester. When these spaces are large — e.g. with a few millions of files or more - that analysis and metadata submission significantly impacts the overall system performance — mostly Onezone service and external harvesting backend. Hence the ability to create and configure harvesters is narrowed to a privileged group of users so that the system load can be controlled.
The admin privilege required to create a harvester is oz_harvesters_create.
It can be granted or revoked using the
REST API (opens new window).
# Why some of my metadata is not present in my index?
The decision which metadata is (not) persisted in an index depends on its index schema, with rules describing an acceptable format of incoming data. If the metadata does not fit the schema, it is rejected and will not appear in the index.
Another reason might be the index settings. For instance, if you configured index to accept only JSON metadata, then all other types of metadata will be ignored and not submitted to the index.
NOTE: If you did not provide a custom index schema, then Onedata uses a default one which — in most cases — generates acceptable data format just-in-time depending on incoming data. It means that if you had file metadata where field myFavField was initially a number, then the myFavField field must always be a number (for every file). The data types in harvested metadata must match all initially detected types for each field in the index, otherwise submissions will be rejected.