# Spaces
Spaces are a fundamental concept of user data organization in Onedata. A space can be perceived as a logical container for data — a layer that hides the complexity of different storage systems and the physical location of files. It offers a unified storage space in the Onedata virtual file system, where files and directories are referenced by logical paths or global IDs. Each space can have multiple members — users or groups. Only the members of a space have access to the stored data.
# Space support
A space is merely a logical container that requires at least one physical storage backend attached to be functional. Attaching physical storage is called supporting the space and is done by a data provider — an institution that entered the Onedata environment by configuring a Oneprovider service for managing access to its storage resources. Users can request support for their spaces, and provider admins can decide to grant some quota on physical storage governed by the corresponding data center.

Each space may be supported by one or more providers and the data produced by the space users will be distributed among the assigned storage backends. Users do not need to be aware of the physical distribution of the data to use the platform, as all the files are visible in a unified logical space and universally available under the logical paths and global IDs. However, understanding how the distribution works and consciously managing it can greatly improve the performance of data access, e.g. by pre-staging data sets in the provider in which computations are to be performed. There are several tools in Onedata that can be used by advanced users to manage the underlying physical distribution and redundancy of data (such as data transfers or QoS).
When a file within a space is written (e.g. uploaded), its content is written to one of the supporting physical storage backends. Similarly, during a file read, the physical data is read from the storage and then returned to the requesting client. Onedata stores information about the mapping between logical and physical files in the file metadata, which is replicated and synchronized between all supporting providers.
NOTE
A space can be supported with an imported storage. This way, a preexisting data-set can be made available in a Onedata space. Learn more here.
# Space members
Access control to Onedata spaces is built around the concept of user and group memberships. Space is accessible only to its members — in a typical scenario, this can be a group of scientists that work on the same research project and share the related data collections. They may have different affiliations, but their view on the common space is the same, regardless of their institution of origin. Each user or group can be assigned different privileges in the space, depending on the capabilities they should have. In the case of group memberships, each member of a group that belongs to a space inherits the group's privileges. For example, one may create a group called space XYZ admins and grant all admin privileges in space XYZ. Any user that is added to the group will inherit the privileges and gain access to the space XYZ with admin privileges.
# Space privileges
Privileges define what individual users or groups can do in the space. As an owner of the space or user with appropriate privileges, you can manage what other users or groups can do in the space. Privileges that can be set are about managing space like viewing, modifying and removing space, and viewing or setting privileges.
# Space owner
After creating a space, you become an owner of that space, which means that you are authorized to perform all operations, regardless of the assigned privileges. As an owner, you can pass ownership to another user that belongs to that space. The space must always have at least one owner, but there may be more. As an owner you can not leave the space if there are no other owners in that space, first, you should pass ownership to another user.
# GUI guide
Below is a section showing how to create a space and perform basic operations in that space.
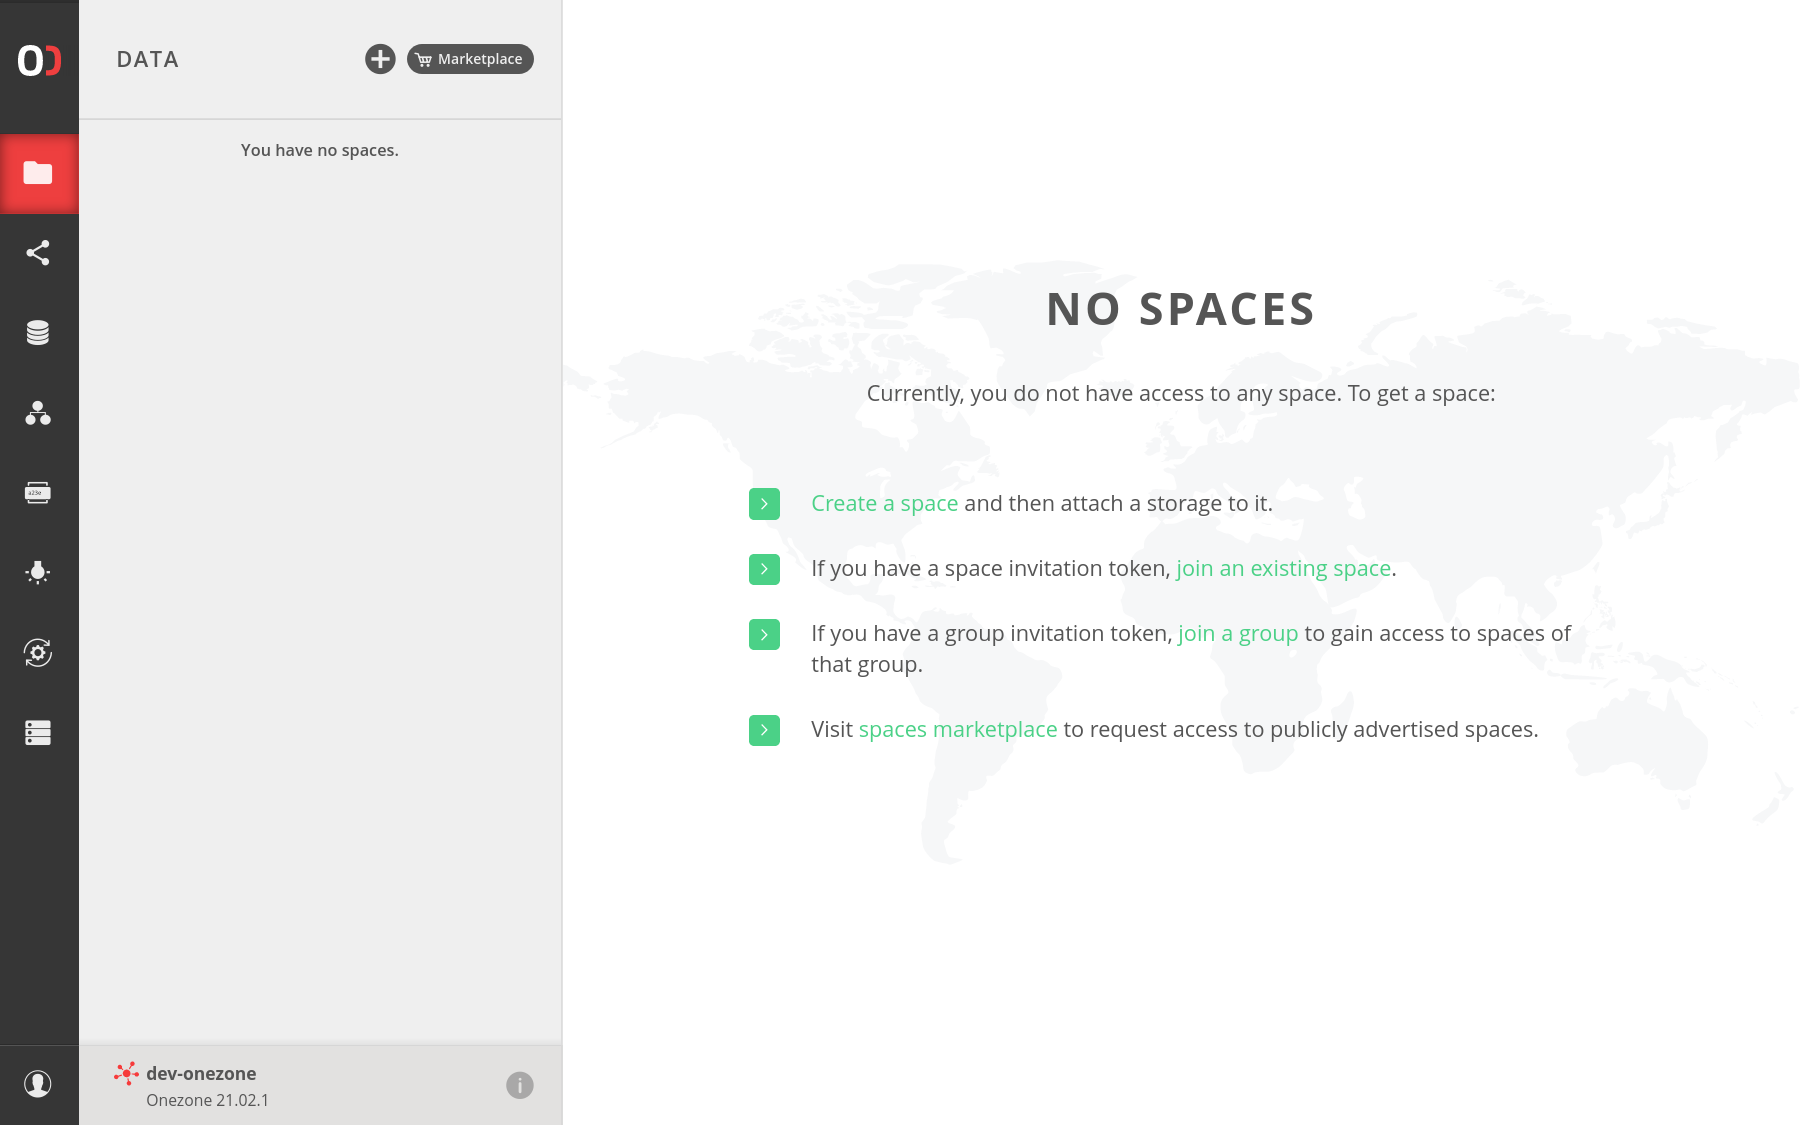
# Create or join a new space
Navigate to the DATA tab to create your first space. You may also join an
existing space using the Consume action in the
Tokens GUI, in case you
received an invite token from another user.
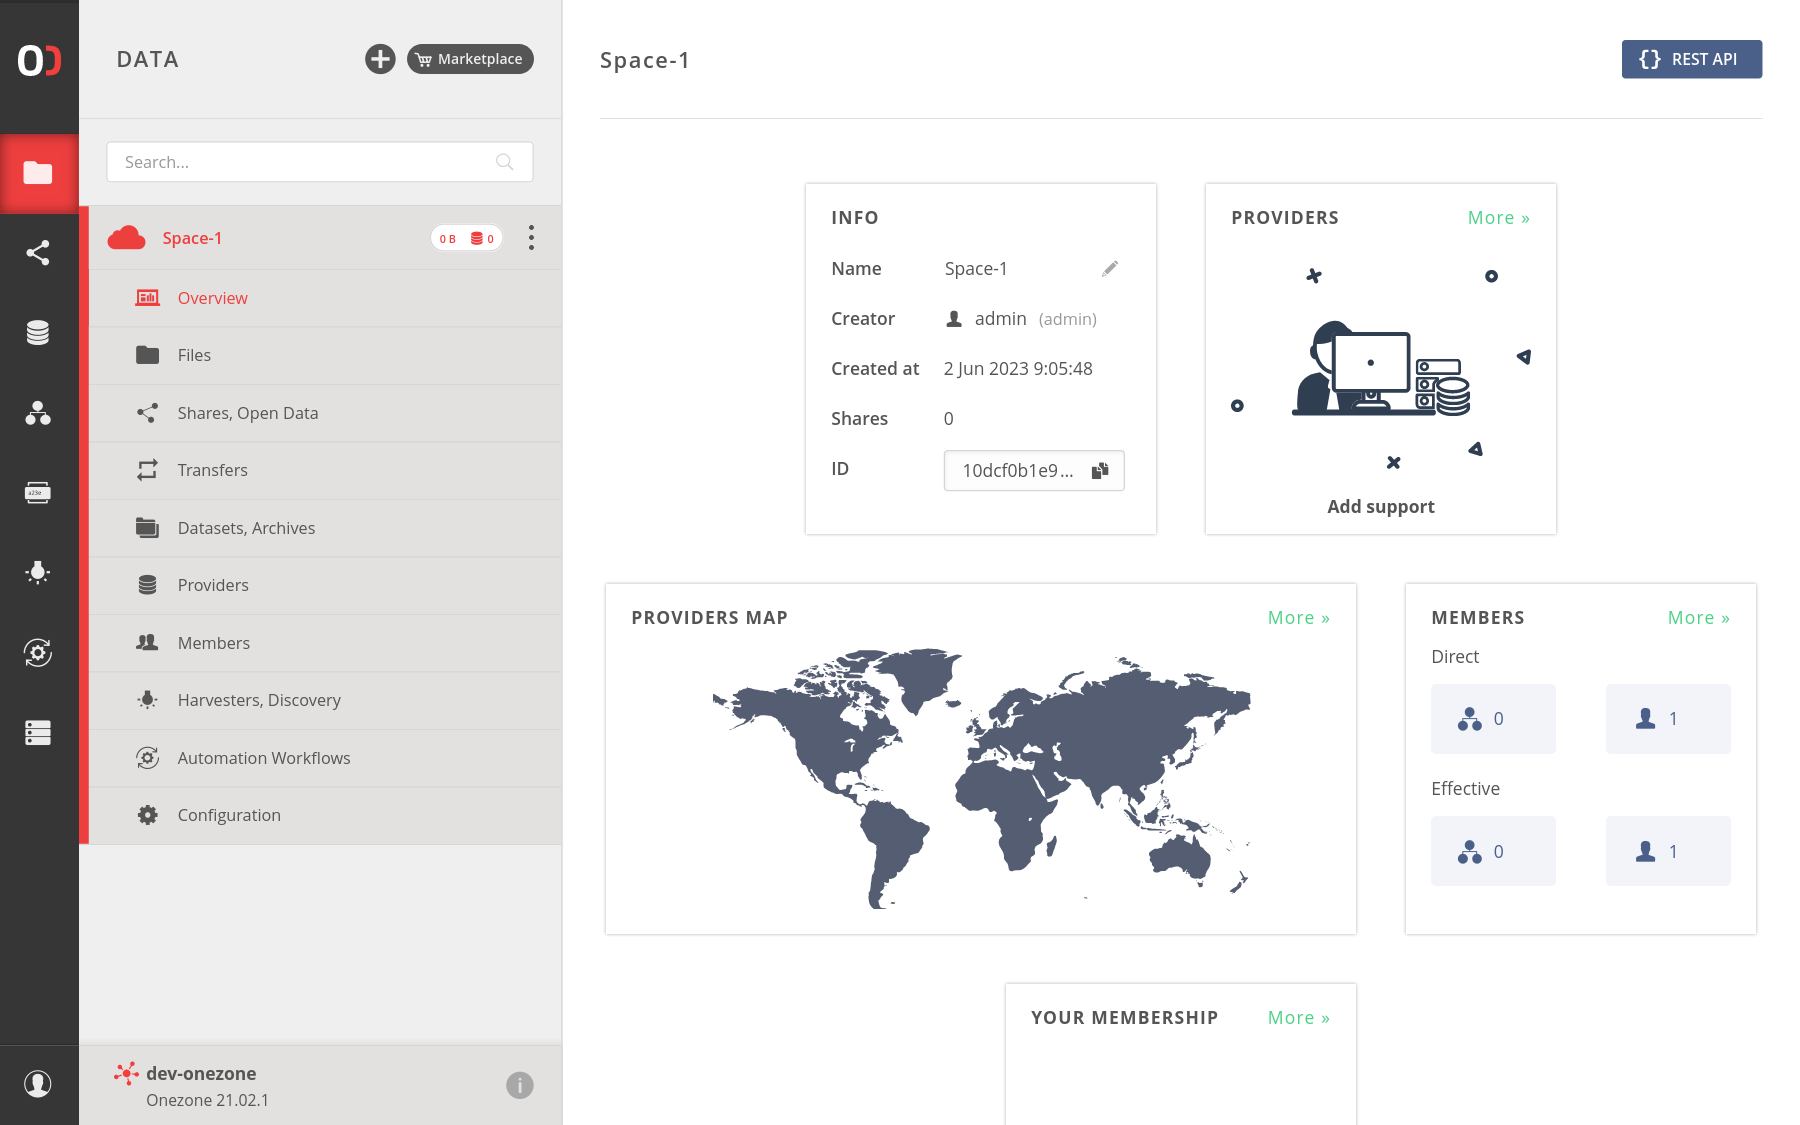
# Request support for space
To request support for your space, click on the PROVIDERS tile
in the overview, which will invoke the Add support action. Alternatively,
navigate to the space's Providers submenu.
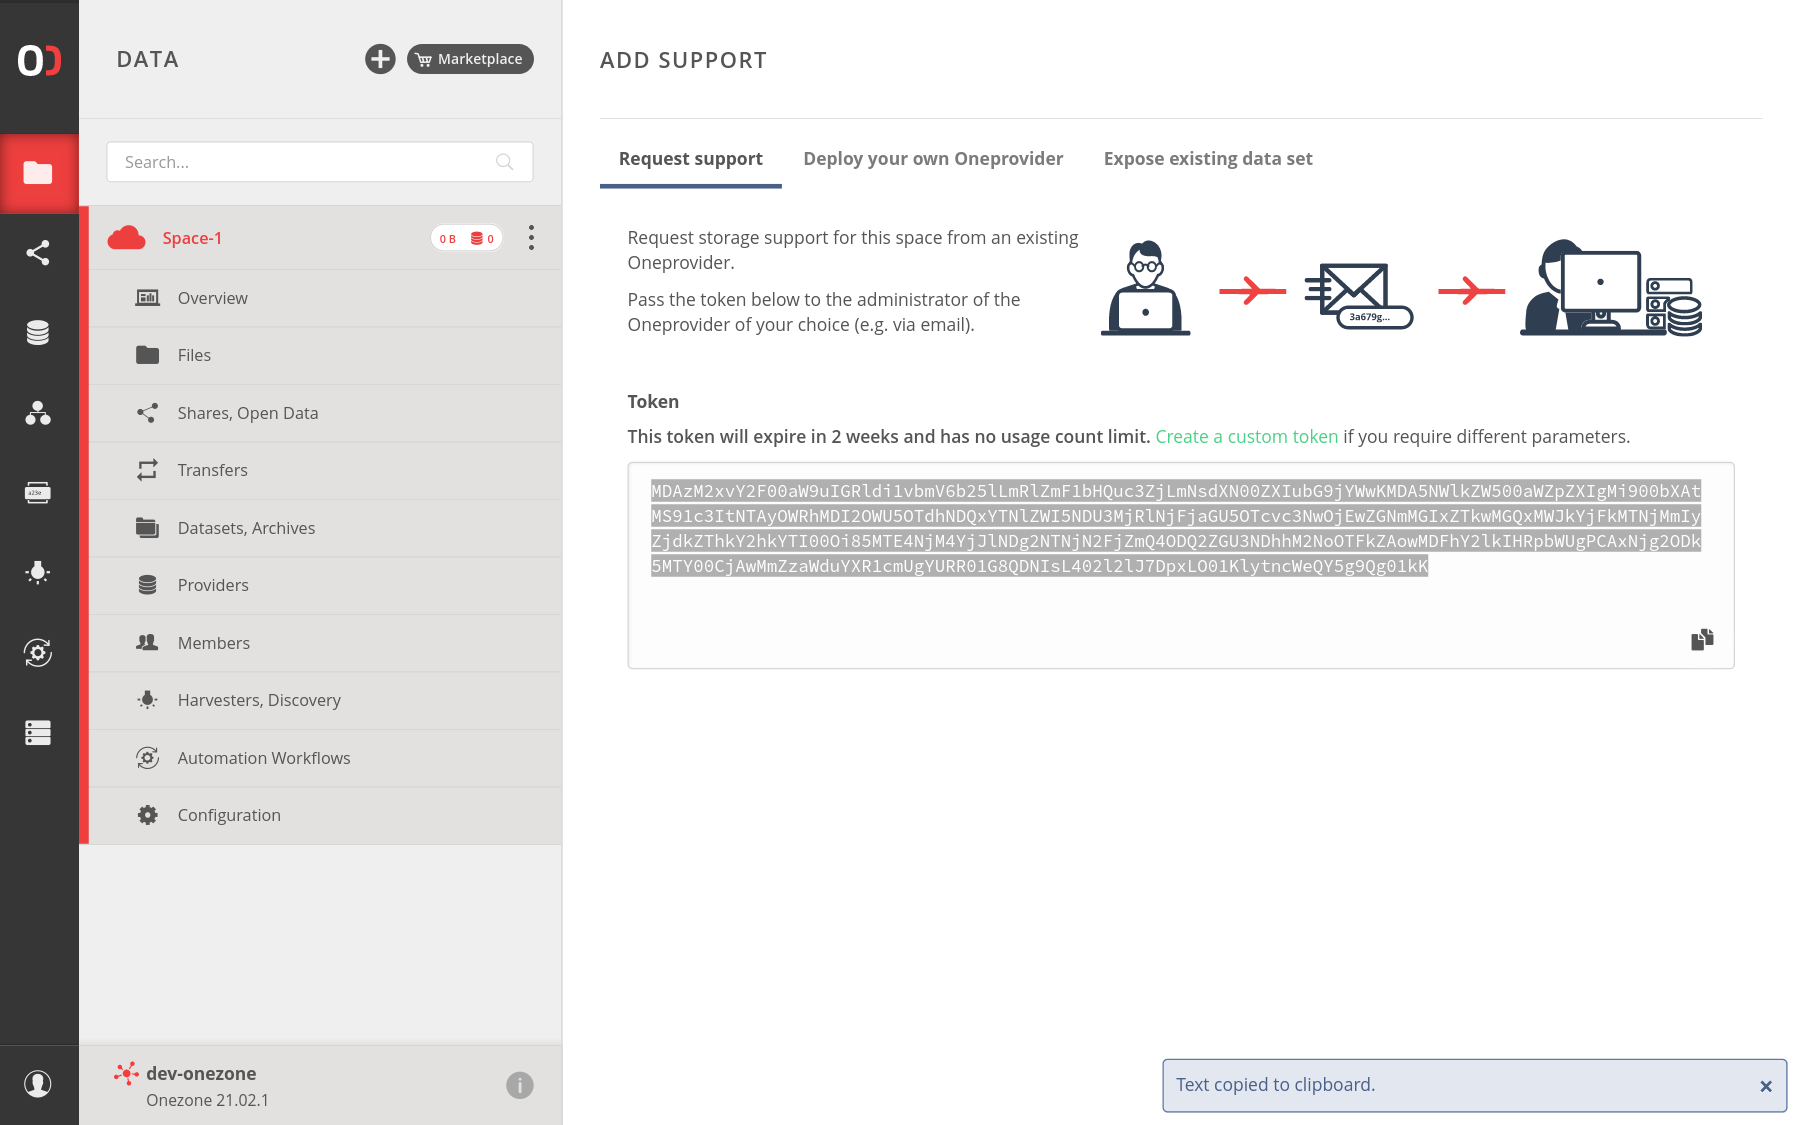
You should obtain a space support token — pass it to a provider admin so that
they can grant support for your space.
The token is multi-use and valid for a day.
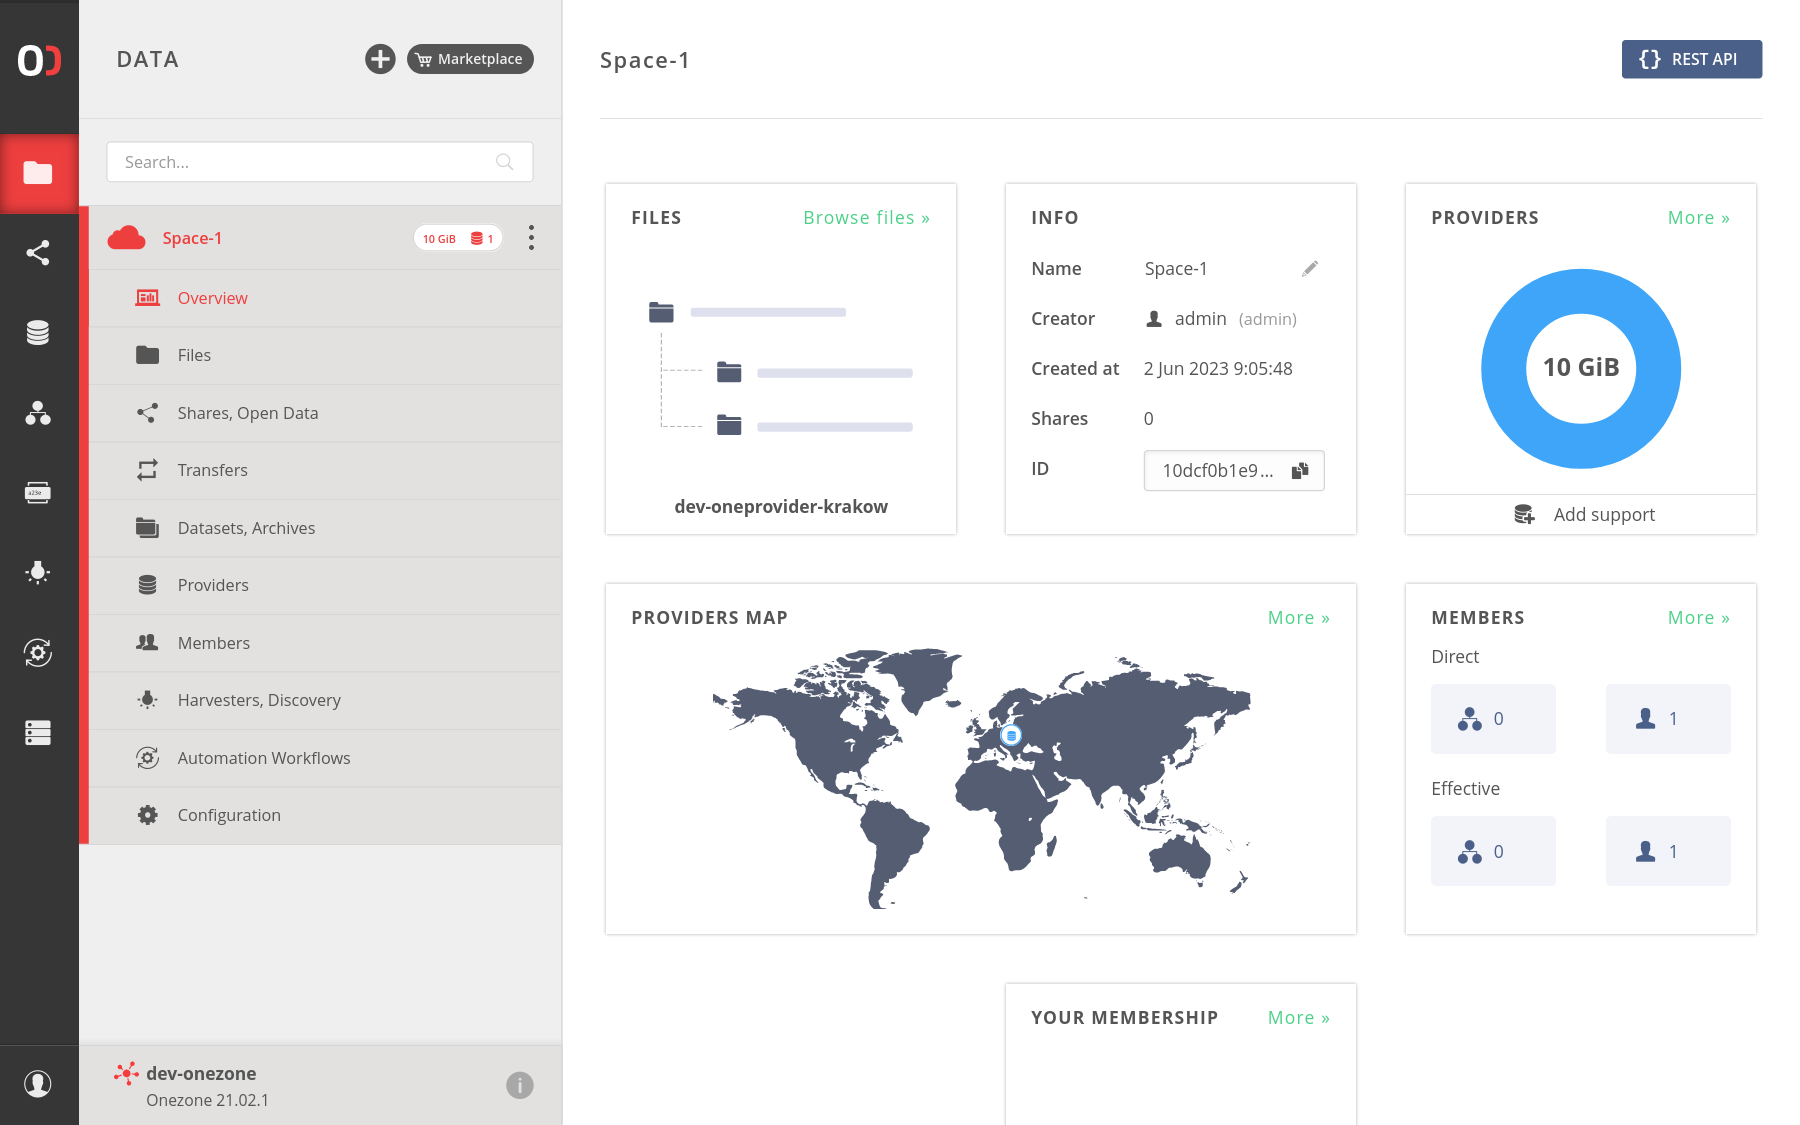
After the support is granted, you will see that the new provider has
appeared and a certain quota has been assigned.
# Space management
Navigate to the DATA tab and choose your space, next click on the menu button, to choose some option.
There are a few options, which you can perform on the space: rename, leave, remove.
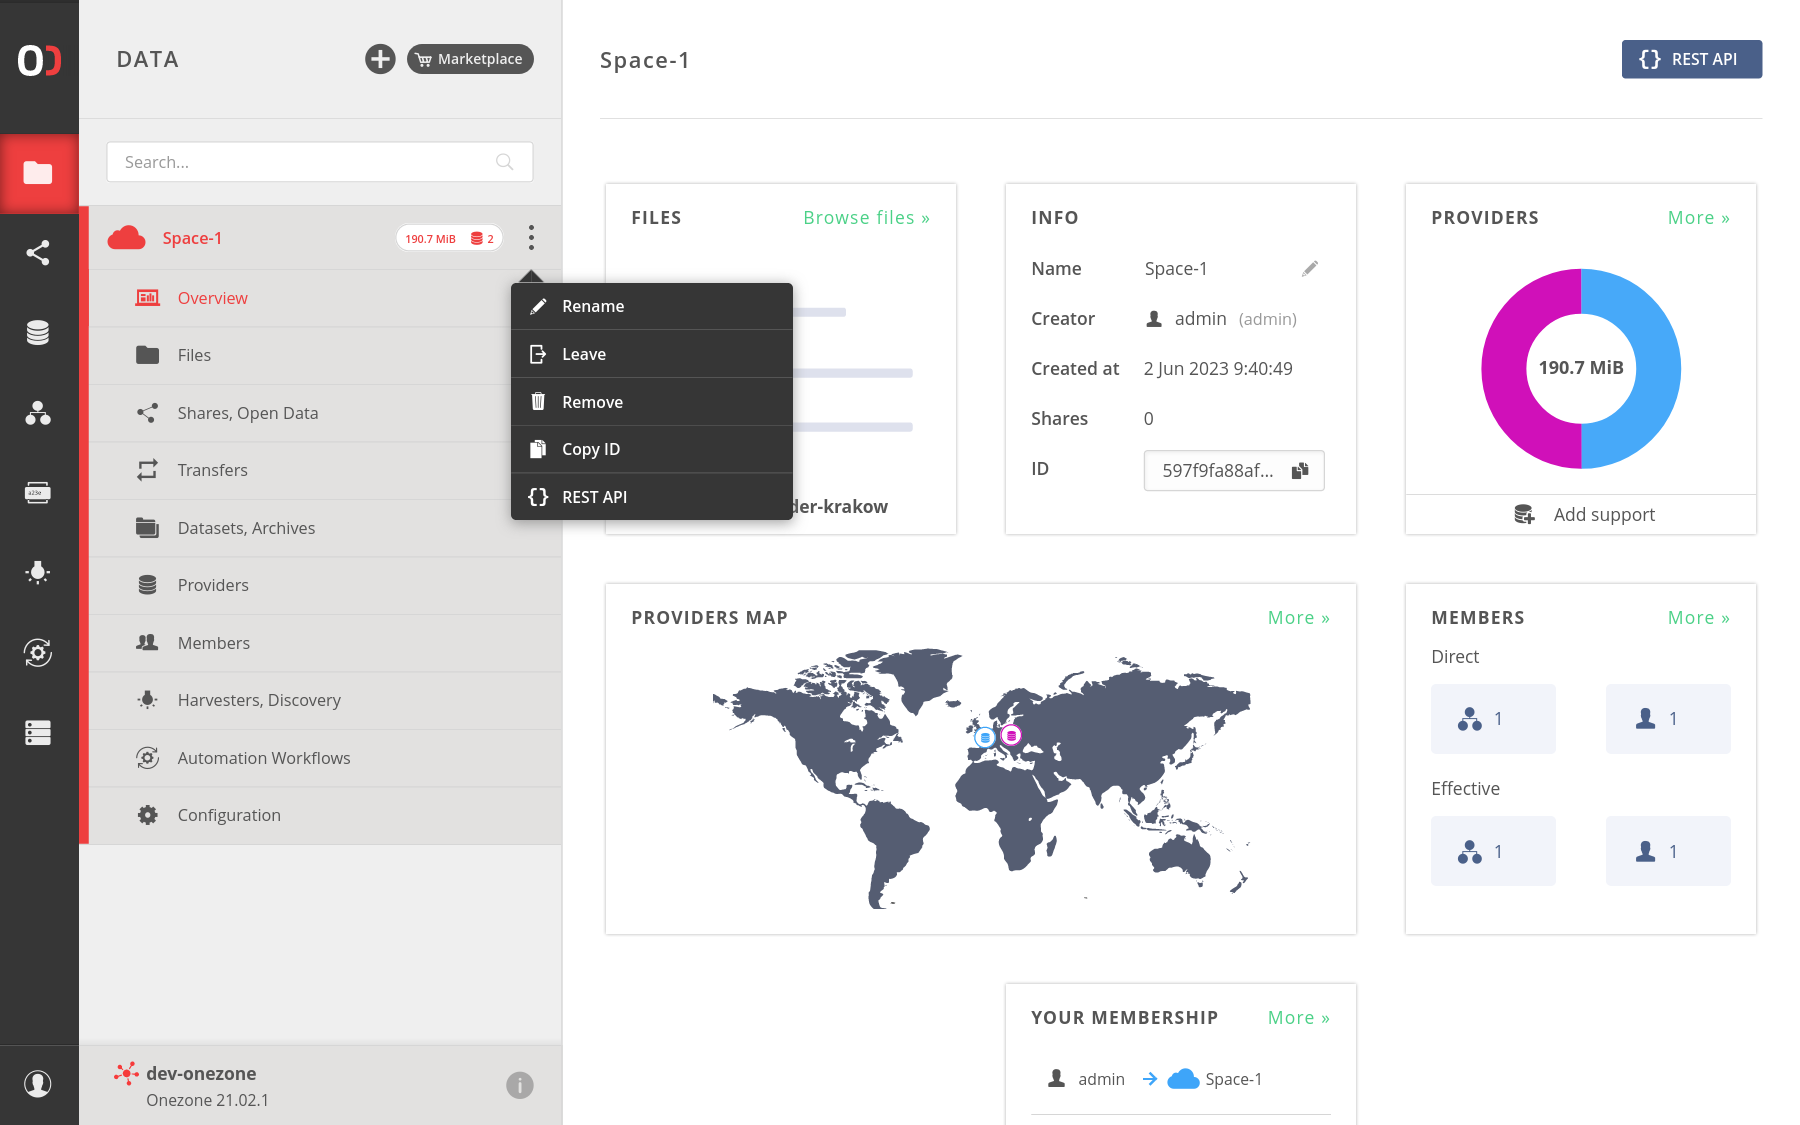
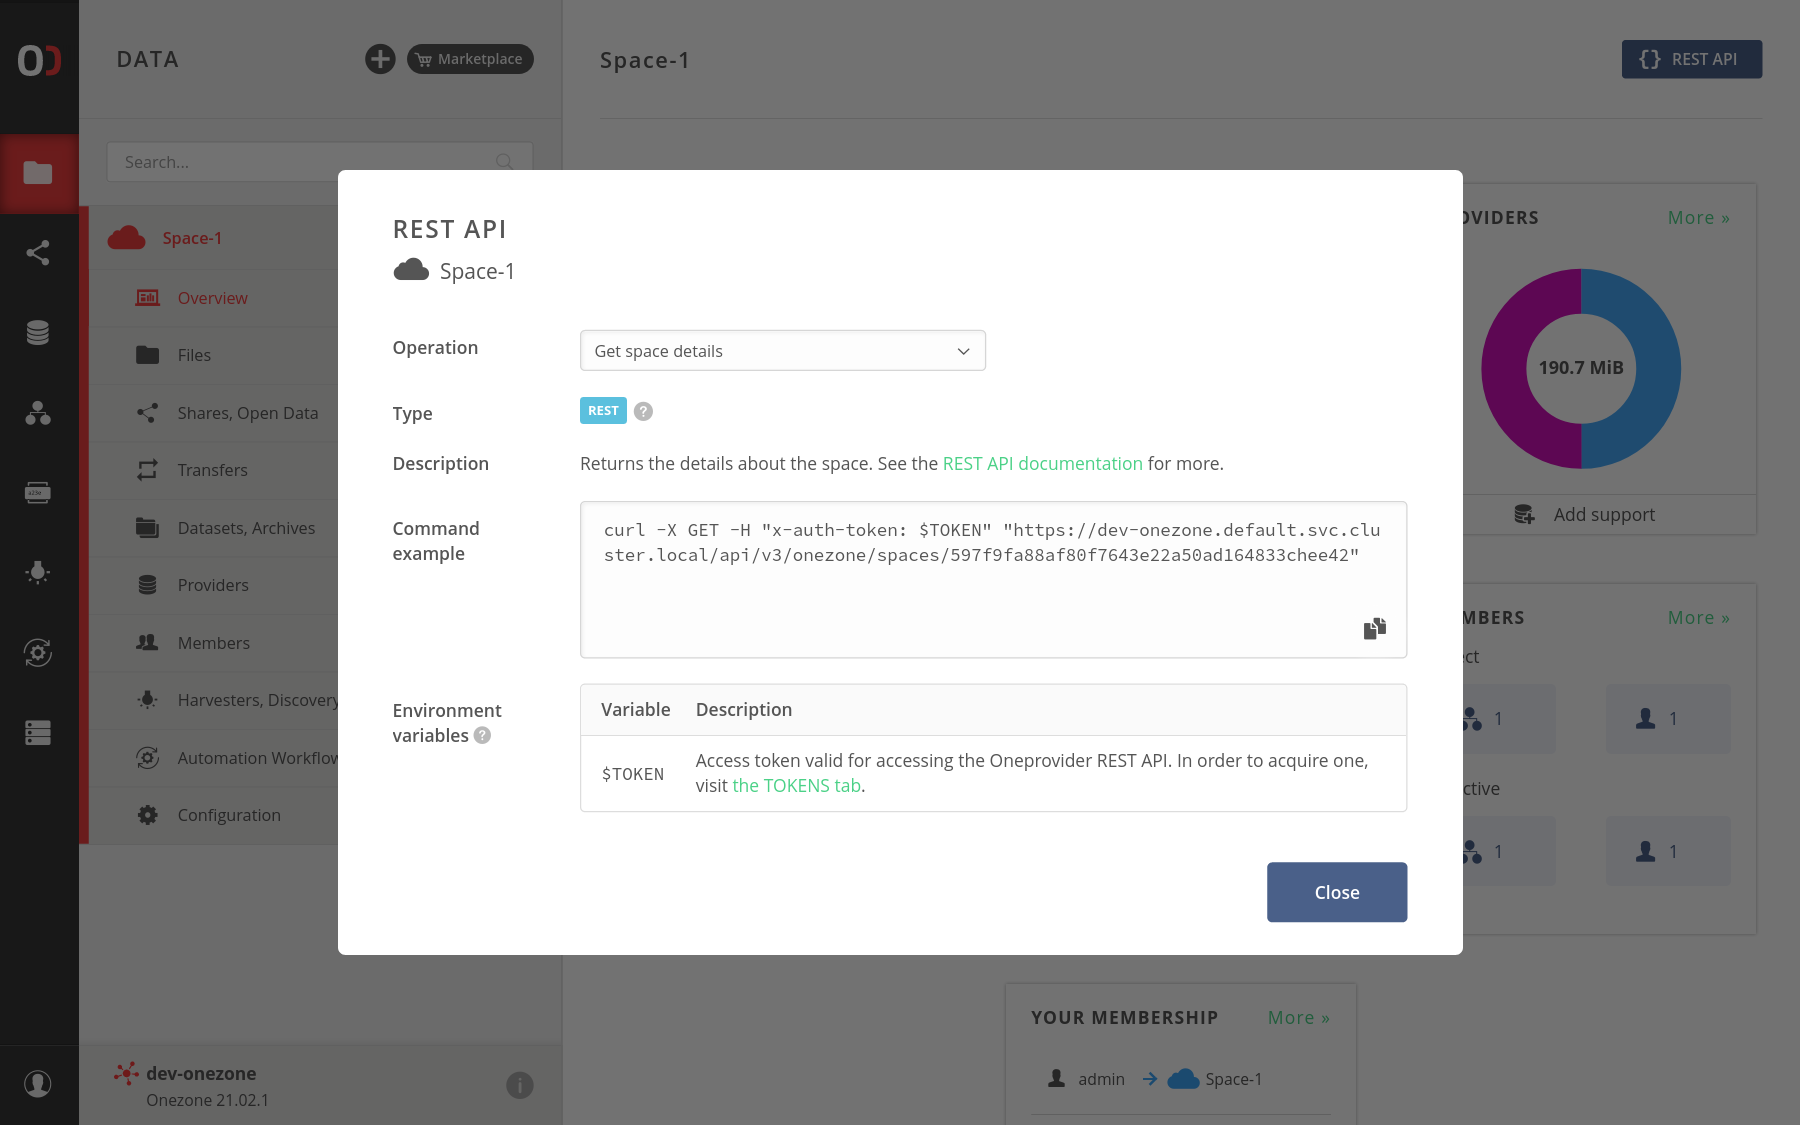
Also, you can copy the space's id, which is helpful for performing some REST API requests.
You can also open a modal with basic rest command examples, that you can perform on this space.
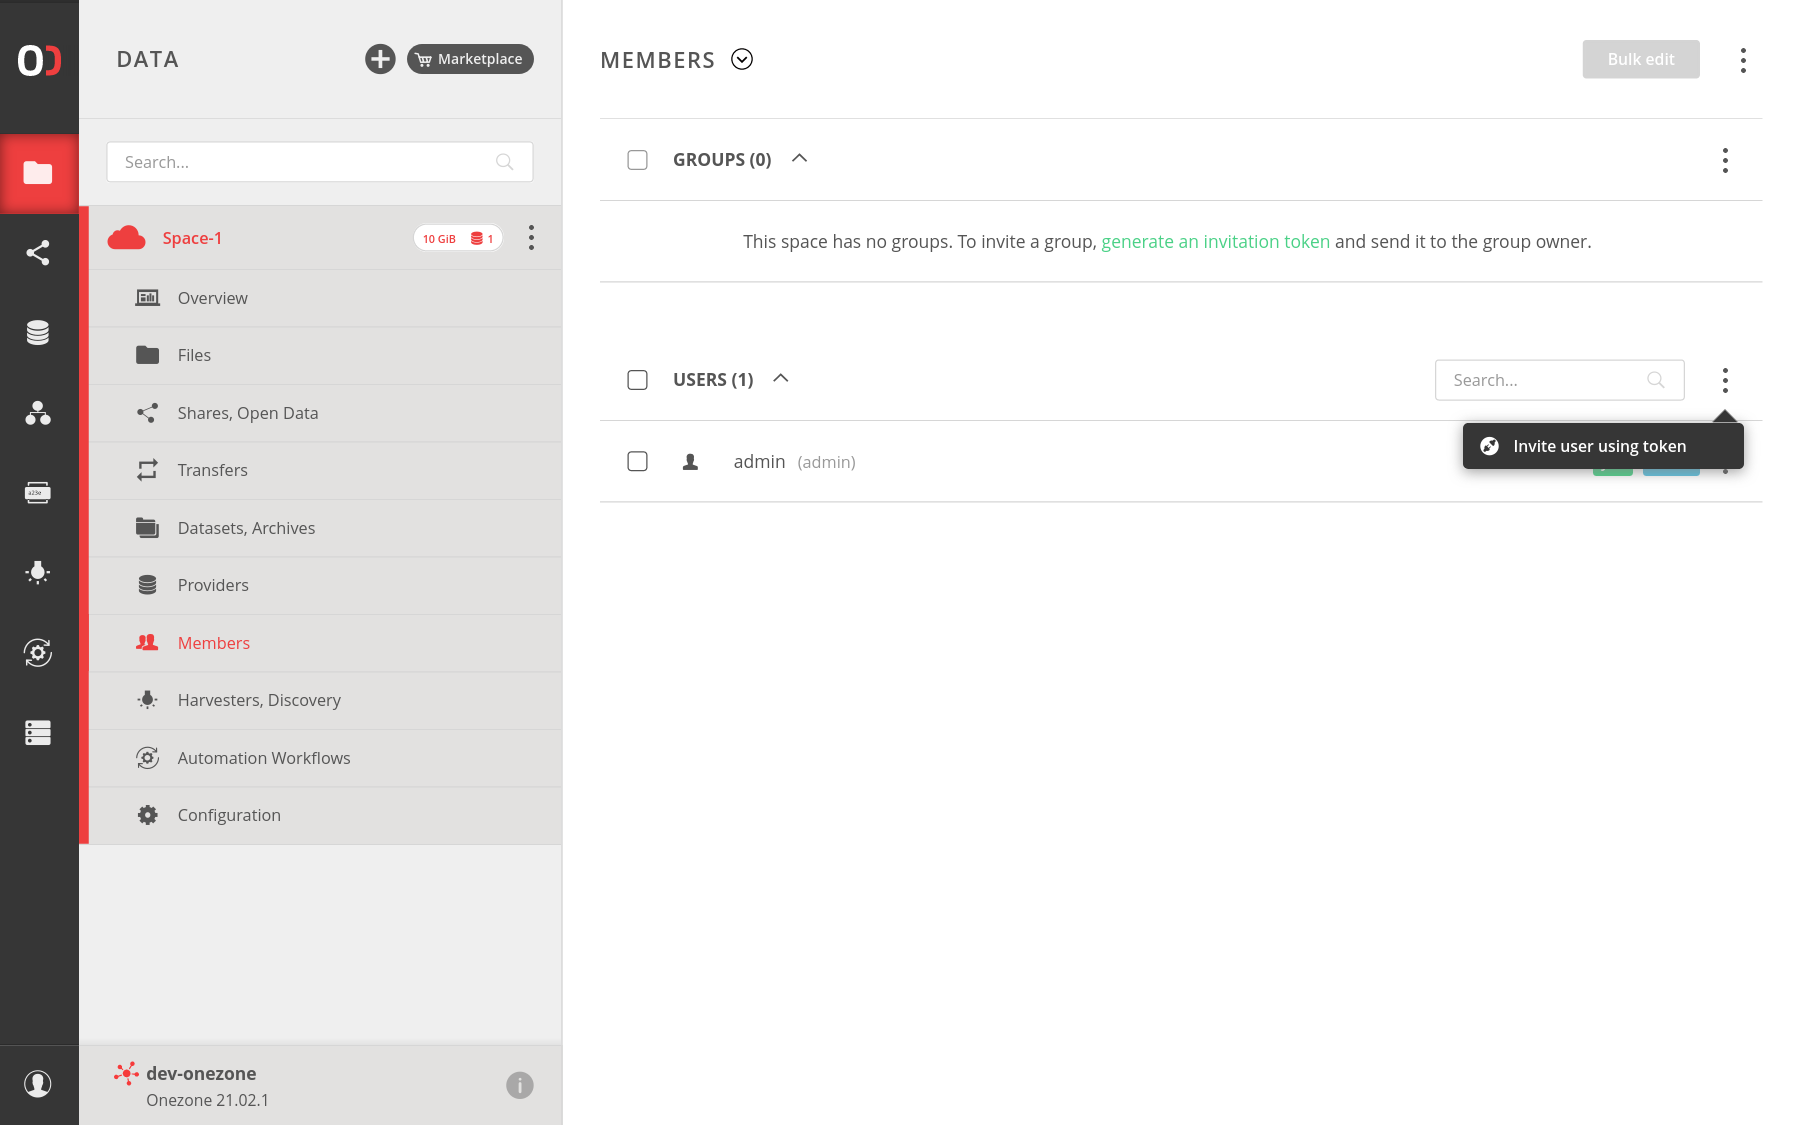
# Invite a user
Navigate to the Members submenu. Here, you can manage the users and
groups that belong to the space. To invite a new user, you would click on the
token generation action, copy the acquired token and pass it to another user.
# Invite a group
To invite one of the groups that you belong to, go to the Members submenu and click on
Add one of your groups action from the menu on the group's header.
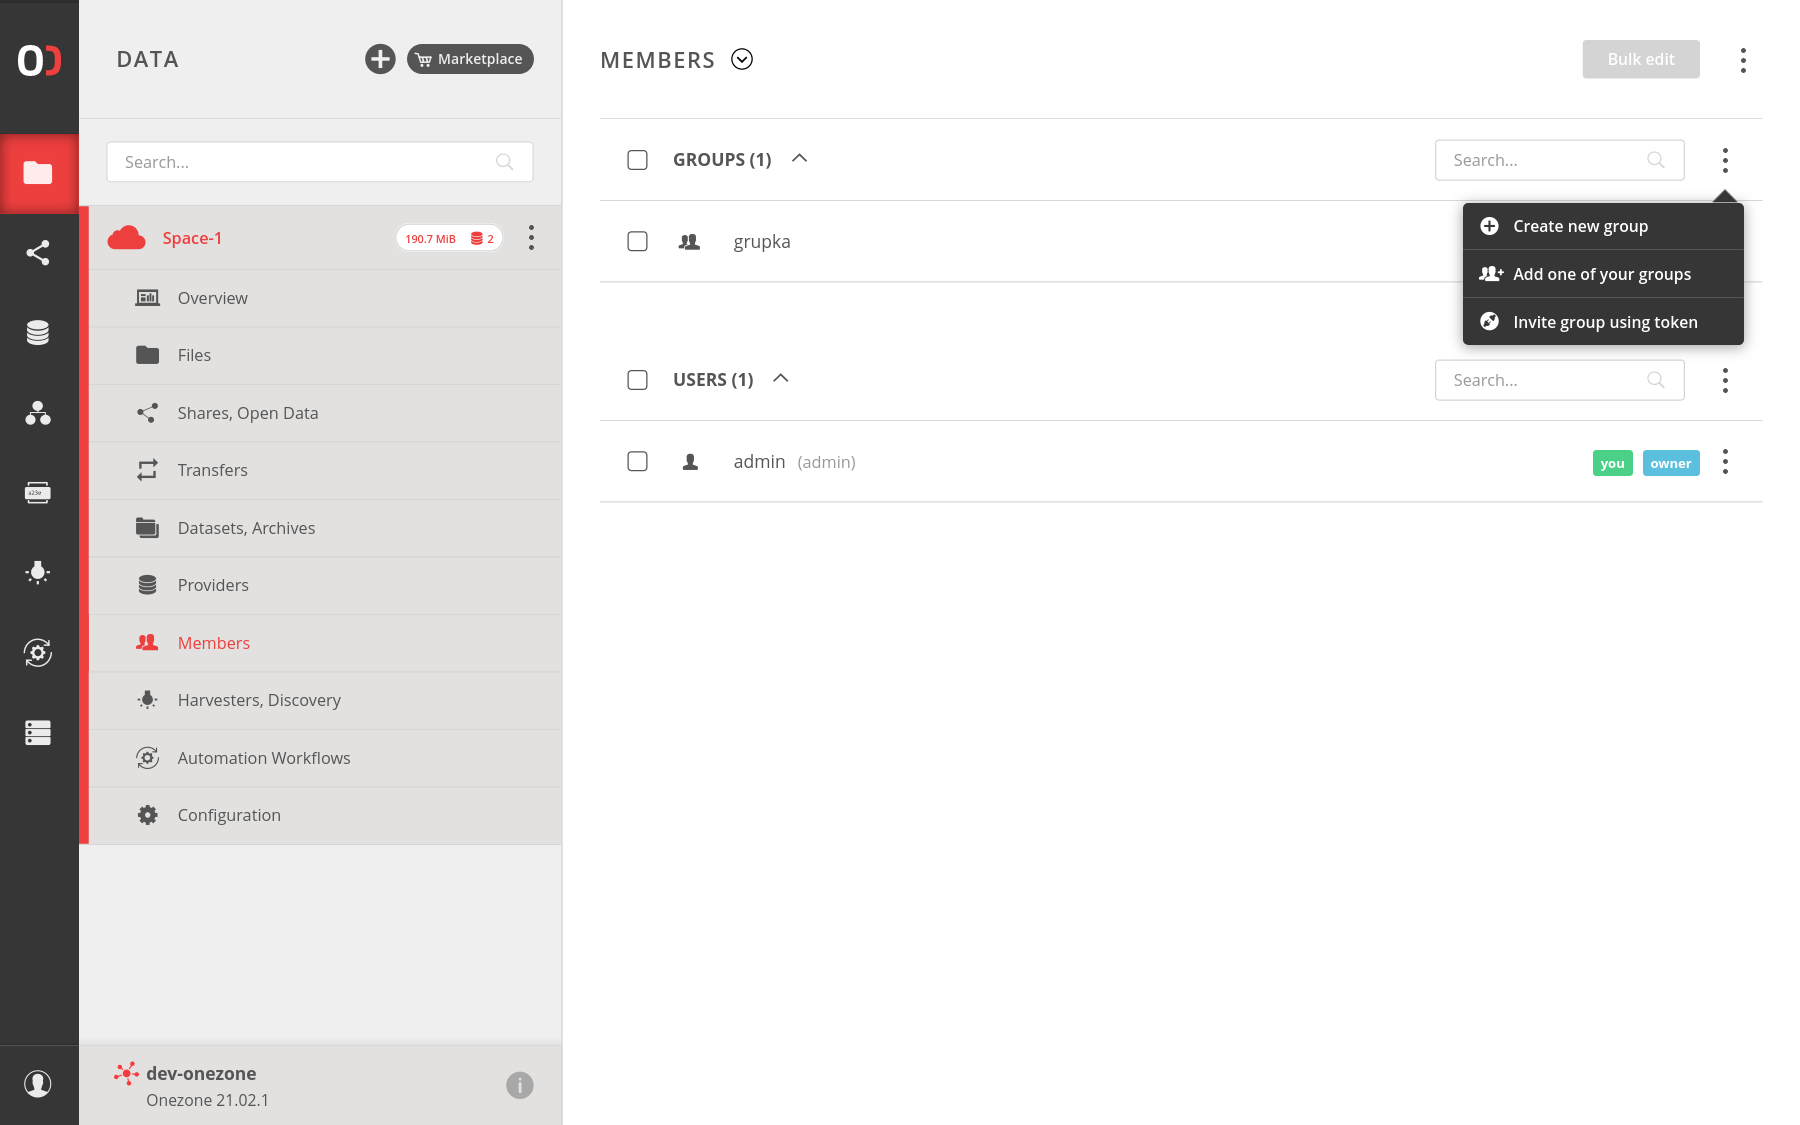
You can also create a new group, that will belong to that space and choose
from menu appropriate option.
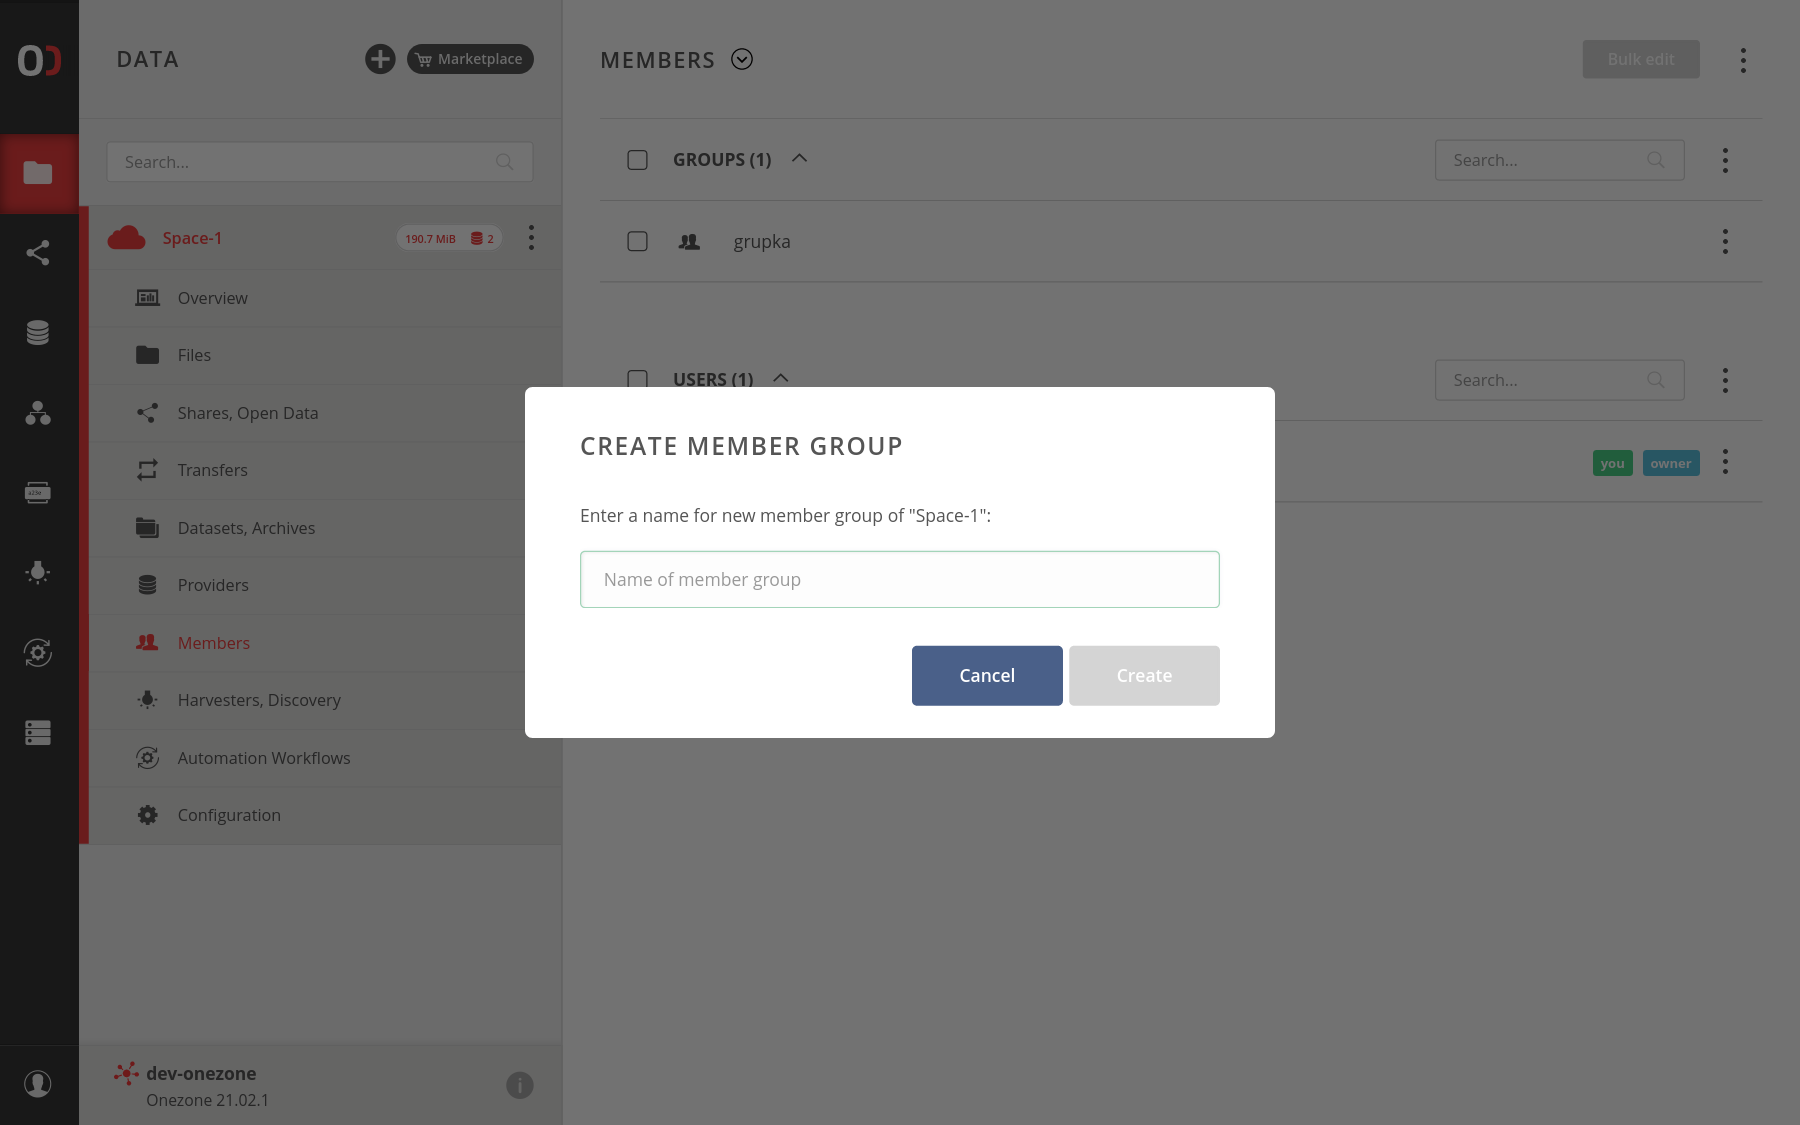
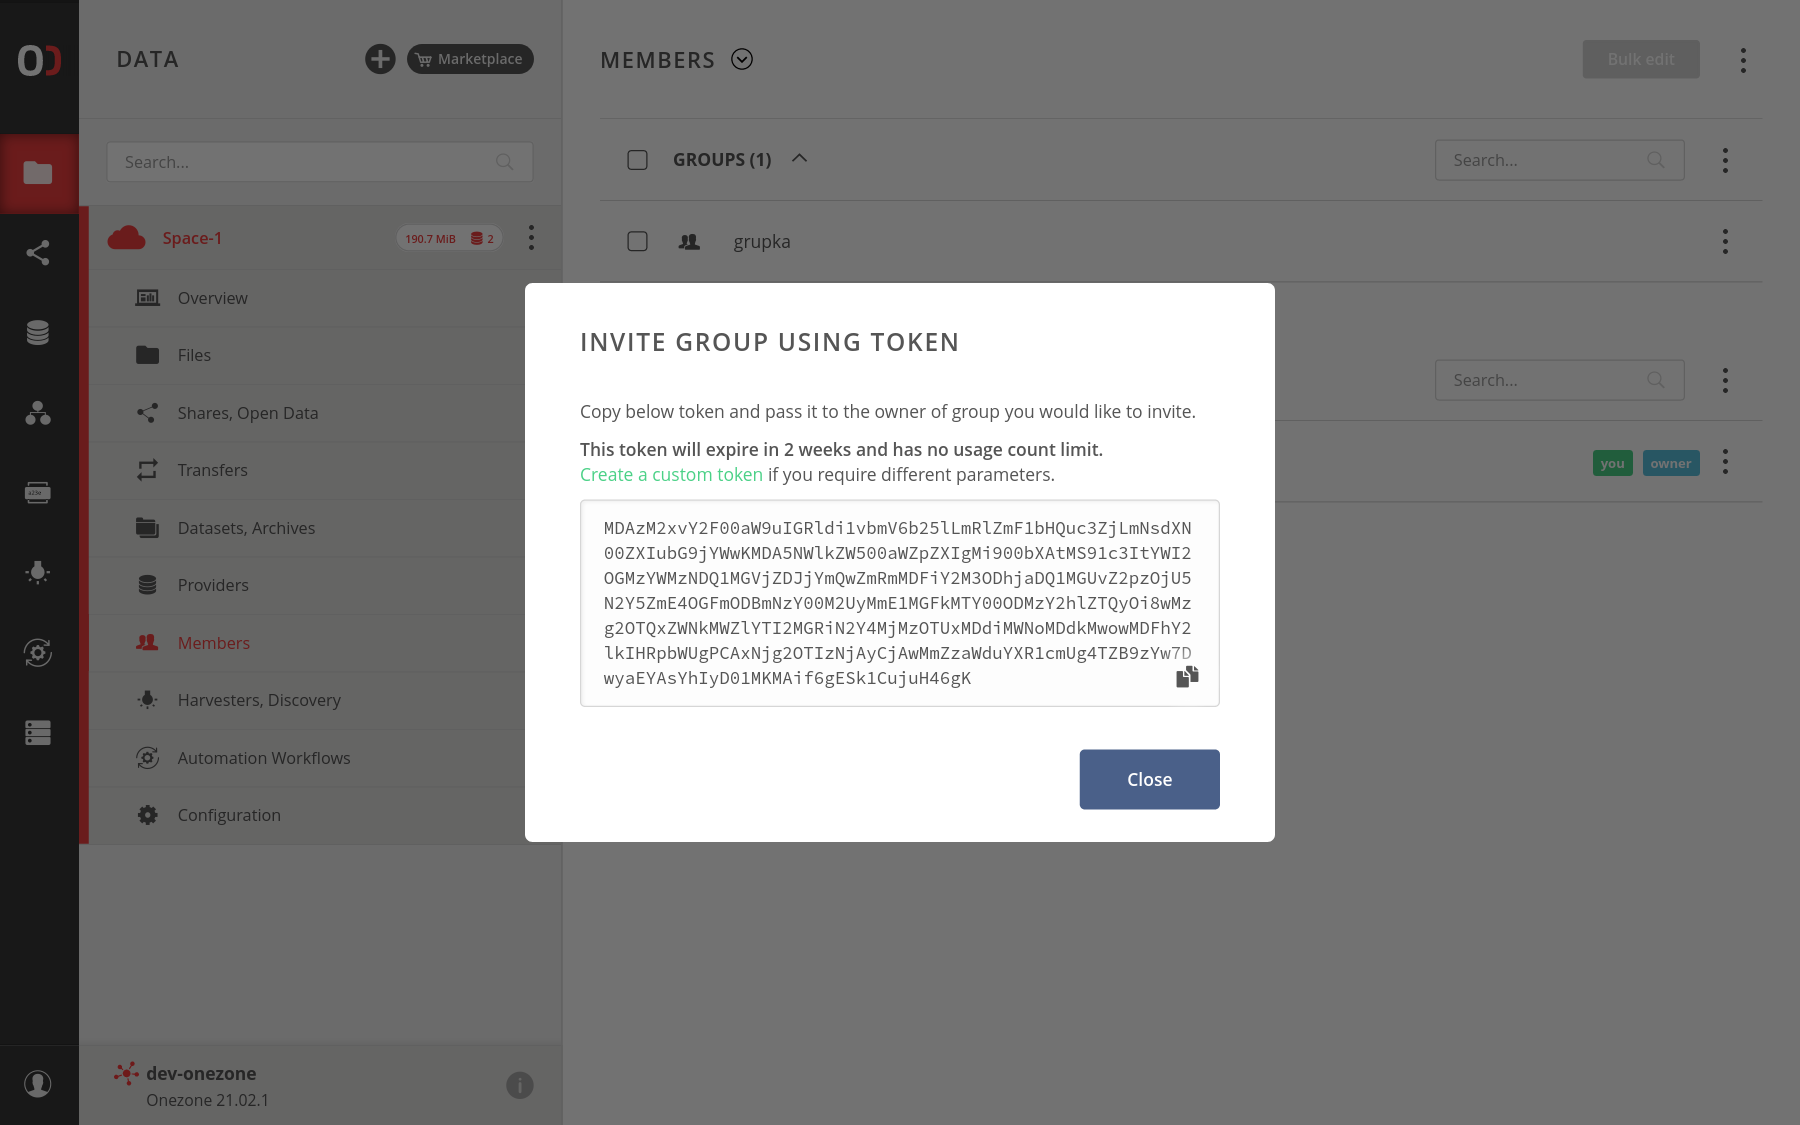
If you want to invite a group, that you do not belong to, create a group invite token
and pass it to a user that has appropriate privileges in that group. To do that click on the
Invite group using token action from the menu on the group's header. A user that gets that token
should use the Consume action in the Tokens GUI.
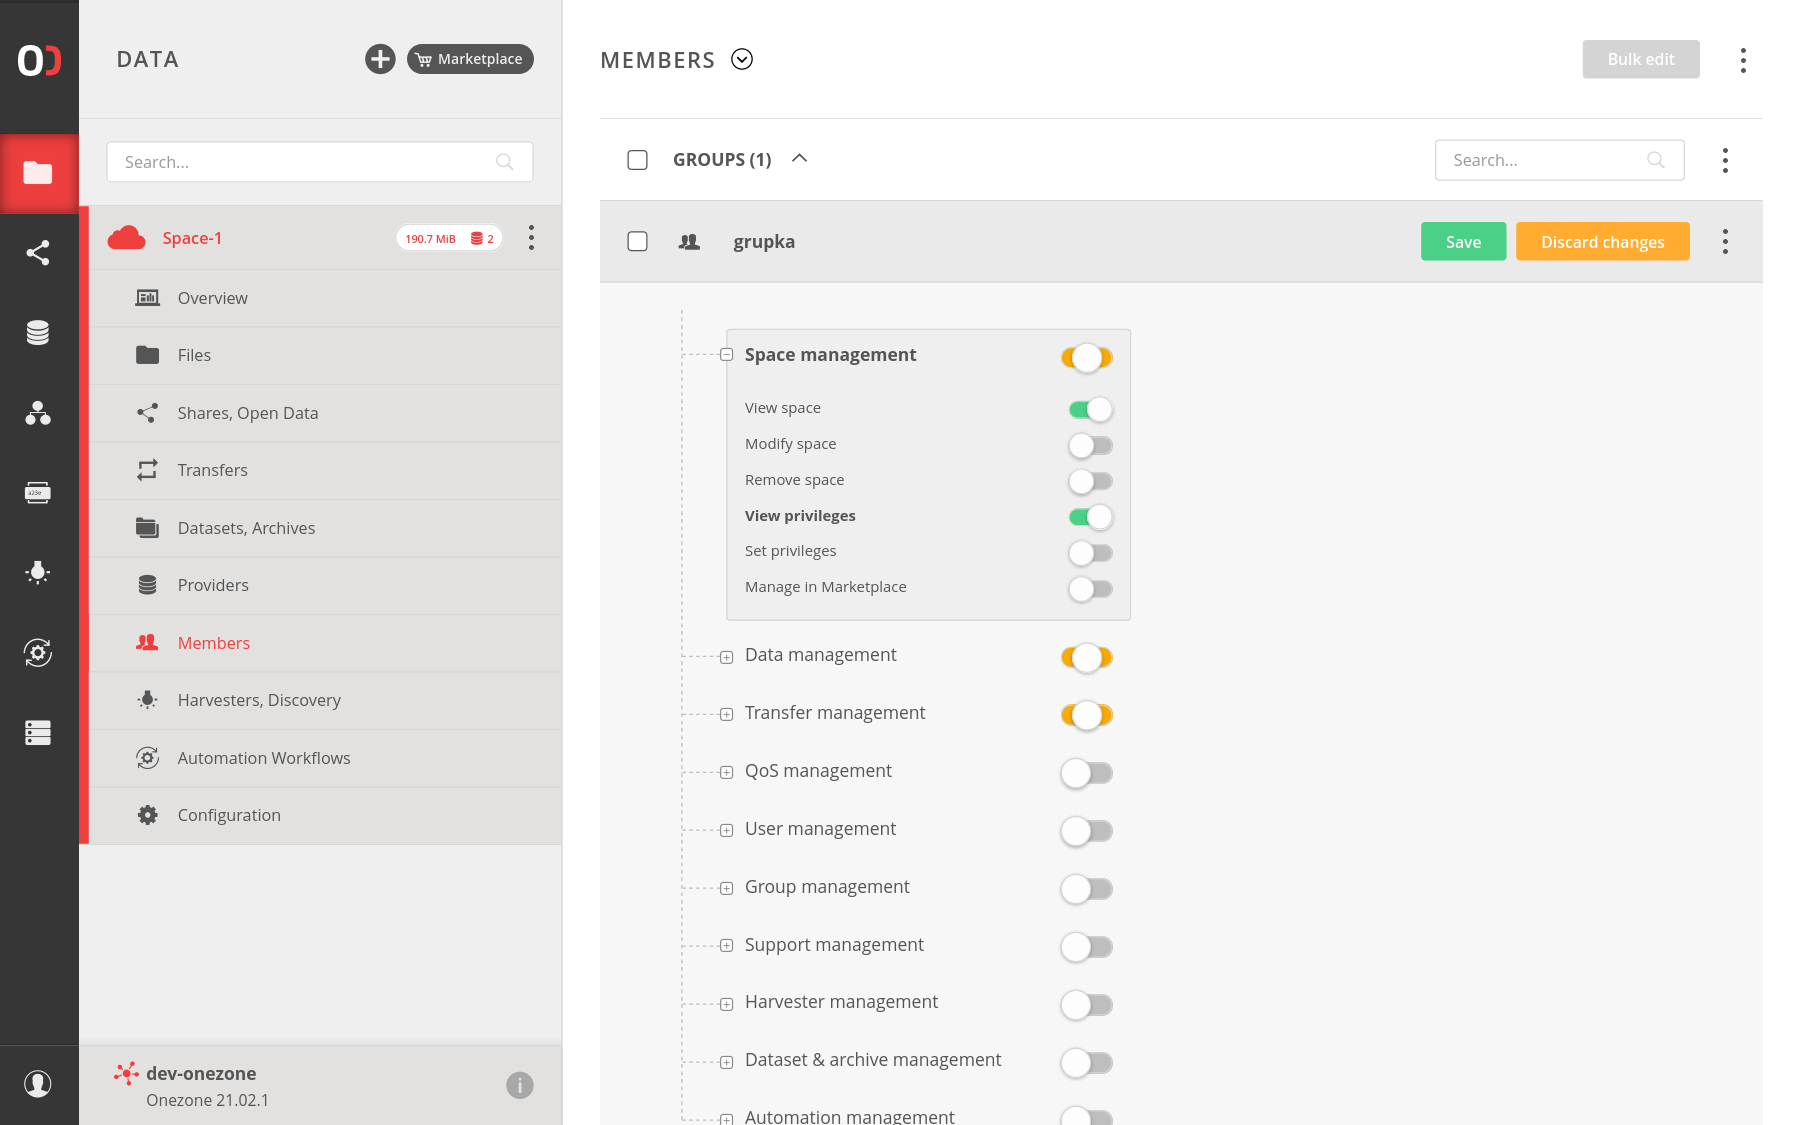
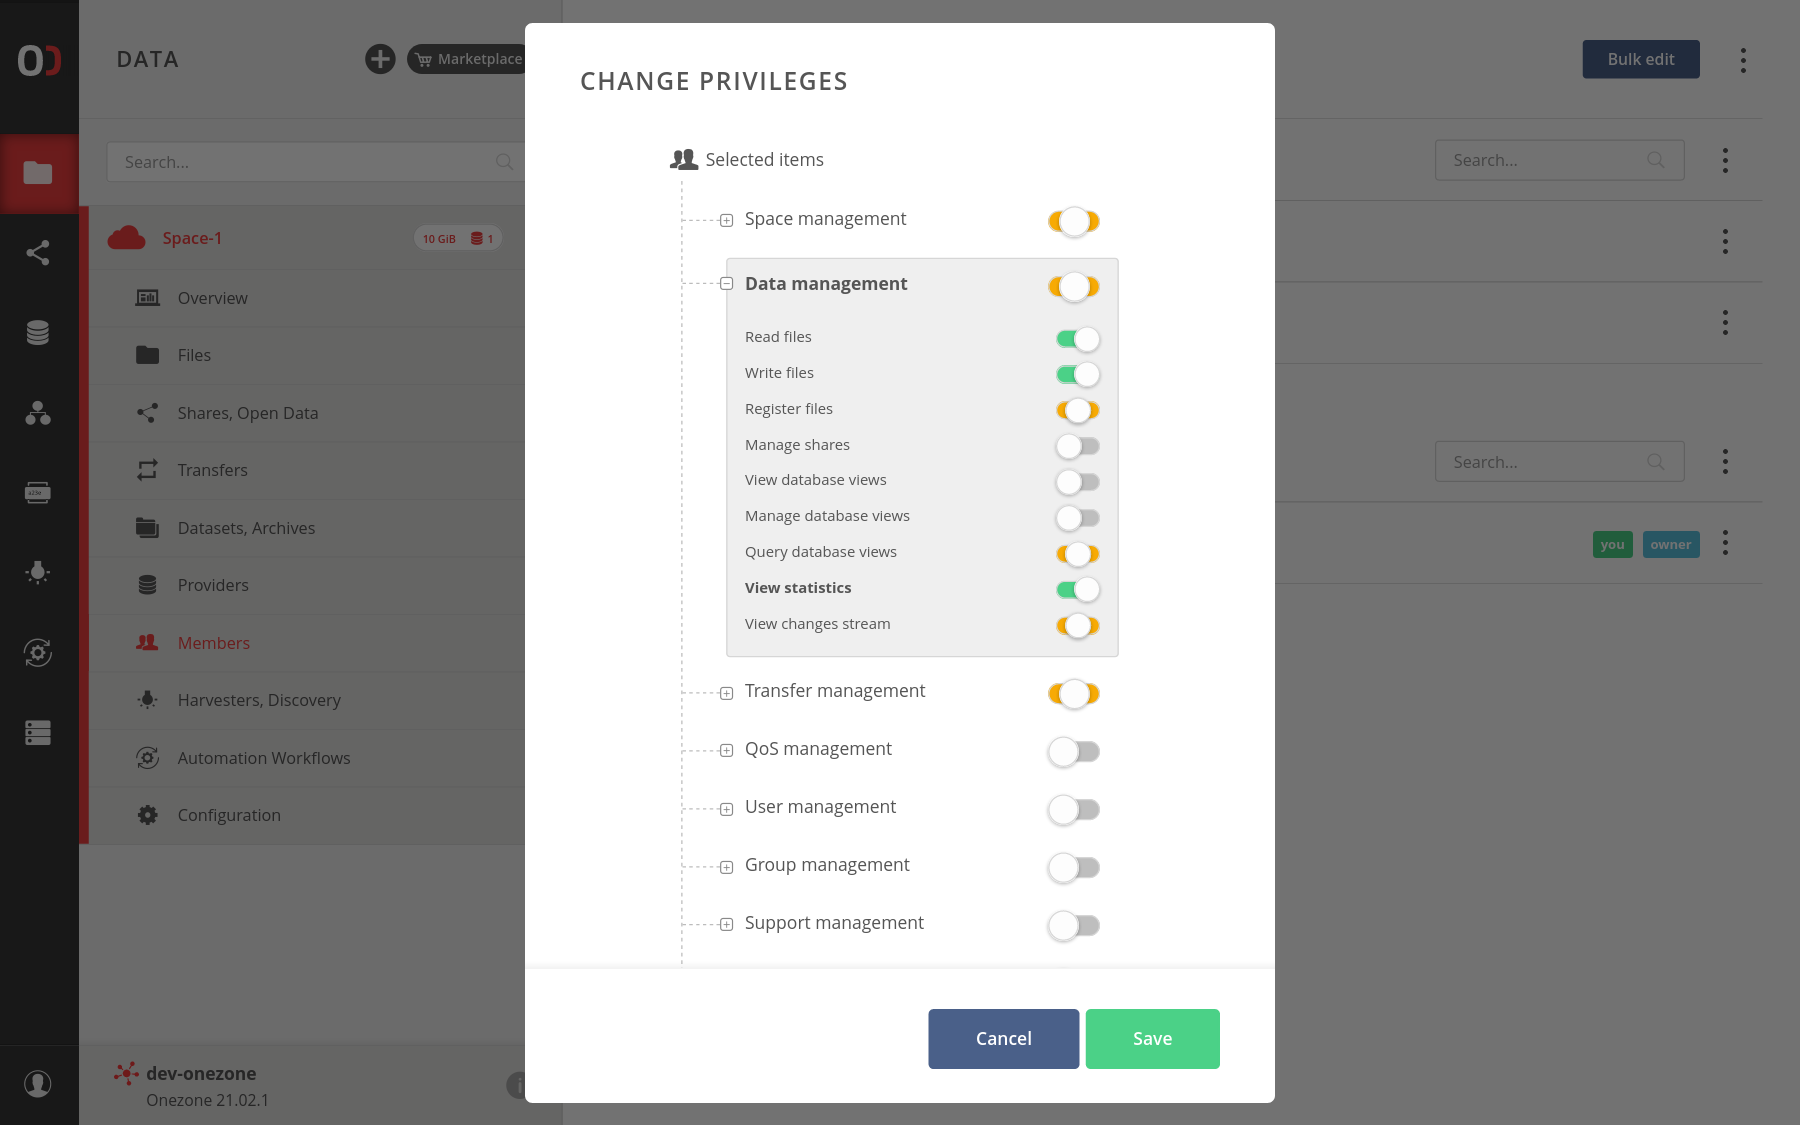
# Modify space privileges
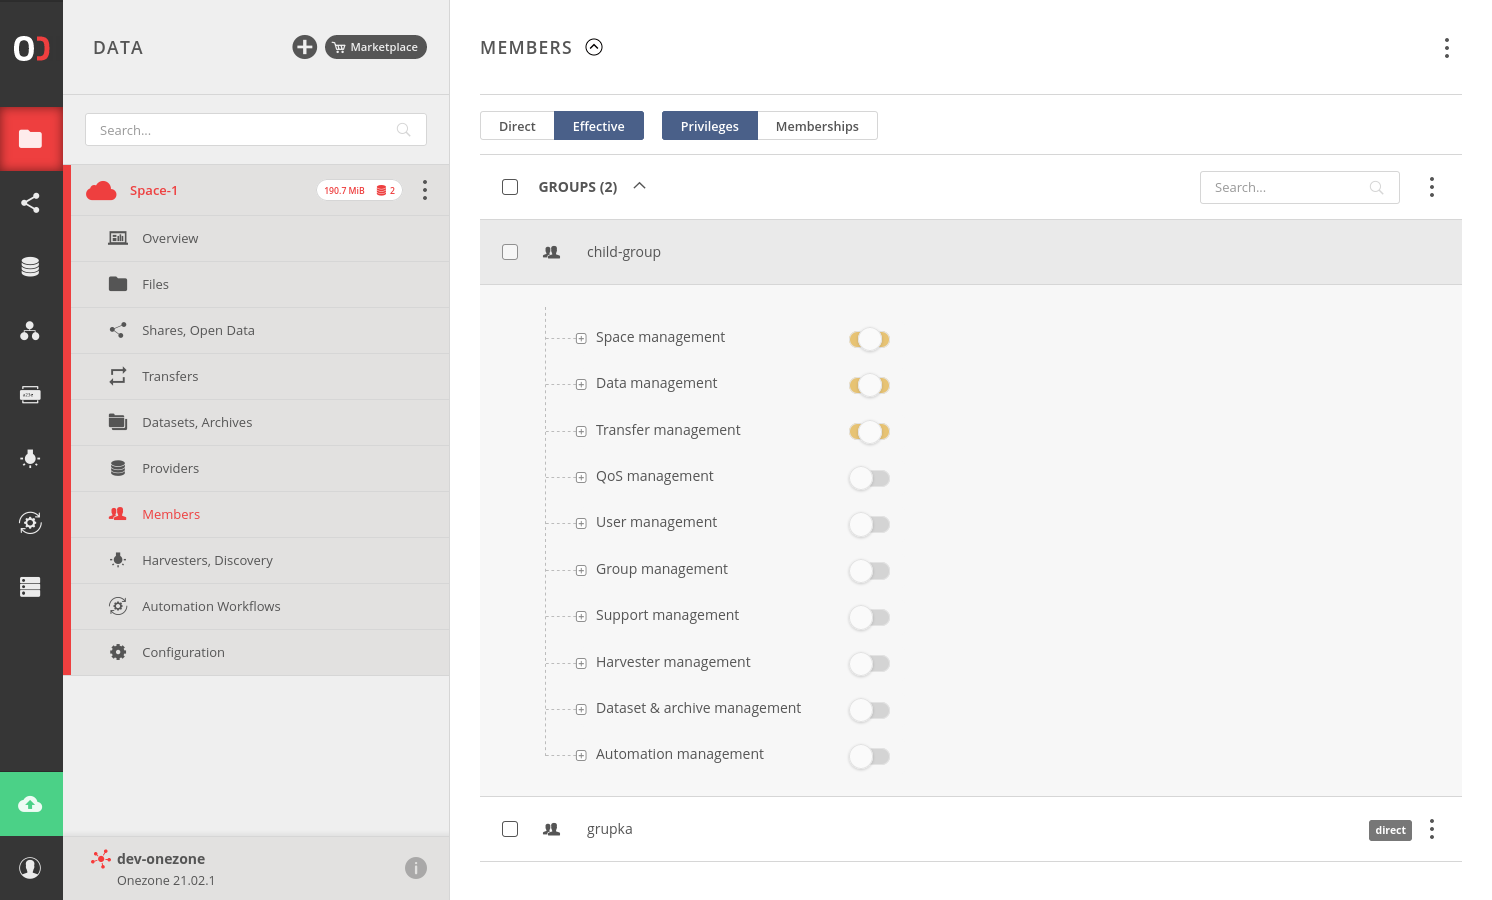
You can view and modify privileges for members of the space, to do that go to the Members submenu
and expand one of the users or groups, and using toggles, adapt privileges for your case.
The privileges are grouped into sections — you can grant or revoke the whole section, or expand
for a more granular setting. Make sure to save your changes afterward.
# Bulk edit of privileges
You can use the Bulk edit action after selecting several groups and/or
users to update the privileges for all of them at once. The new settings will
overwrite the old ones to identical values.
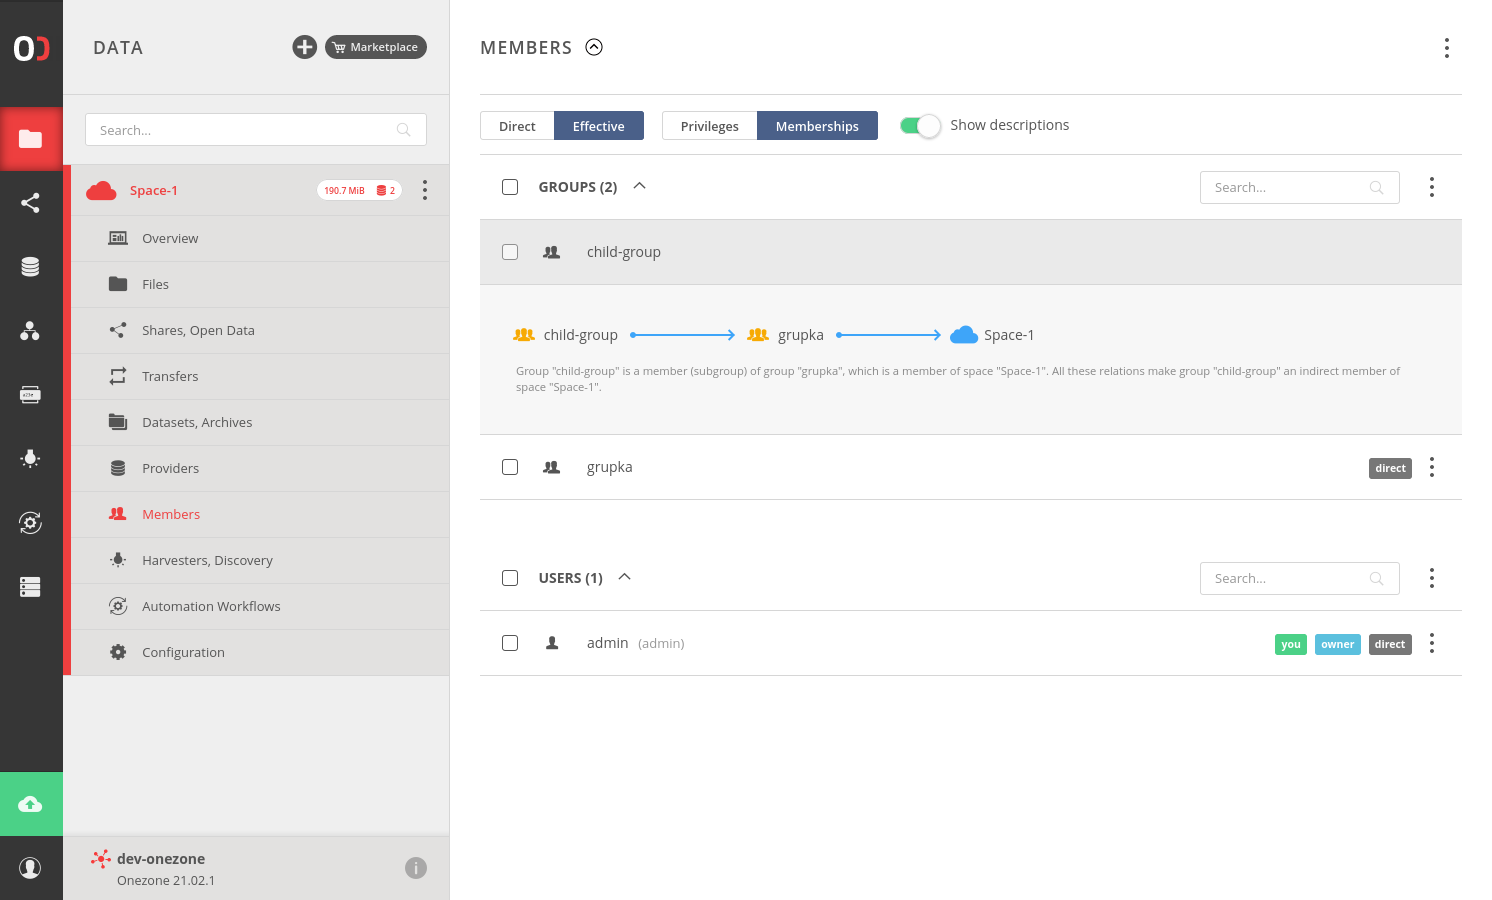
# Effective members
To see not only direct members but also members that belong to the space indirectly through groups,
go to the Members submenu, expand the view options, and choose Effective
to view all of the members. You can see that privileges are inherited from the members.
You can also view memberships of members by switching the view to Membership
(optional toggle Show descriptions switch) and expand member, which shows you direct and inherited memberships.
# Data browser
Go to the Data submenu in your space to navigate to the file browser.
Refer to the Web file browser guide for further instructions.
