# Web file browser
# Introduction
The Web file browser is a graphical interface offering a broad spectrum of file management features, including basic file operations (e.g. filesystem navigation, file upload or download) and advanced capabilities, specific to Onedata (e.g. Quality of Service, data distribution, datasets & archives).
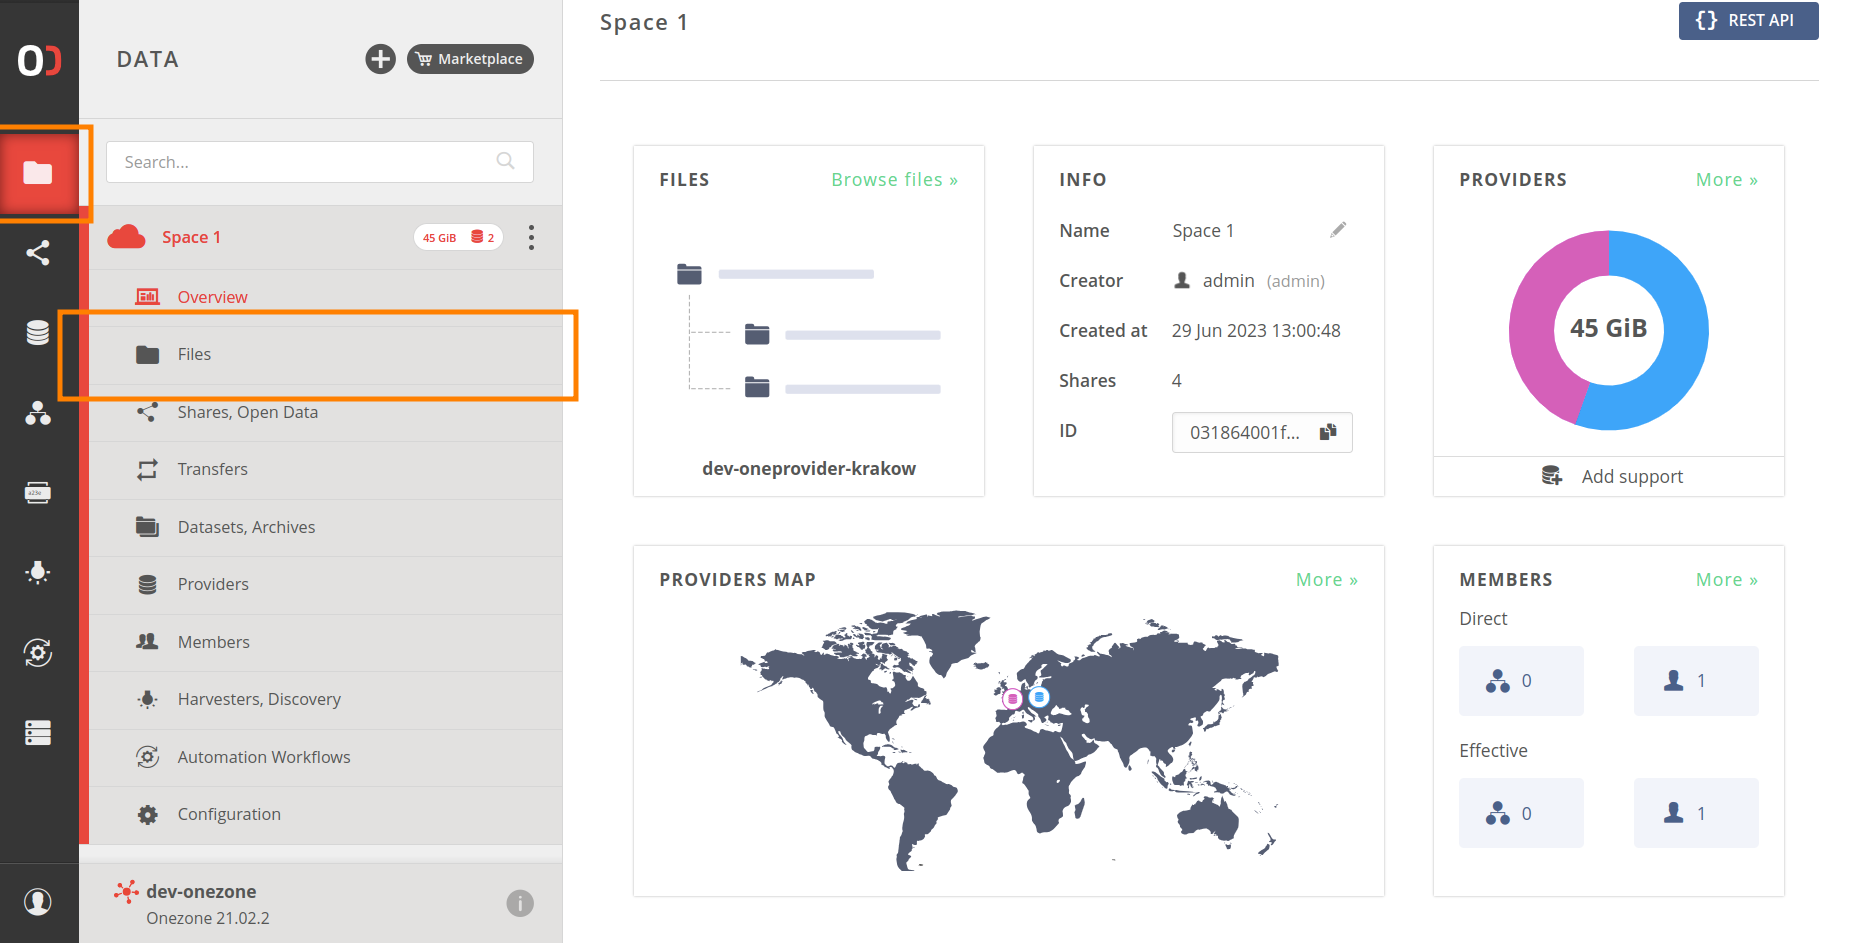
The file browser is always presented in the context of a single space. It becomes available when the space is supported by at least one provider and can be invoked by navigating to the DATA > Space name > Files tab, or clicking the FILES tile in the space Overview.
# Uploading data
An empty space will welcome you with the following screen:
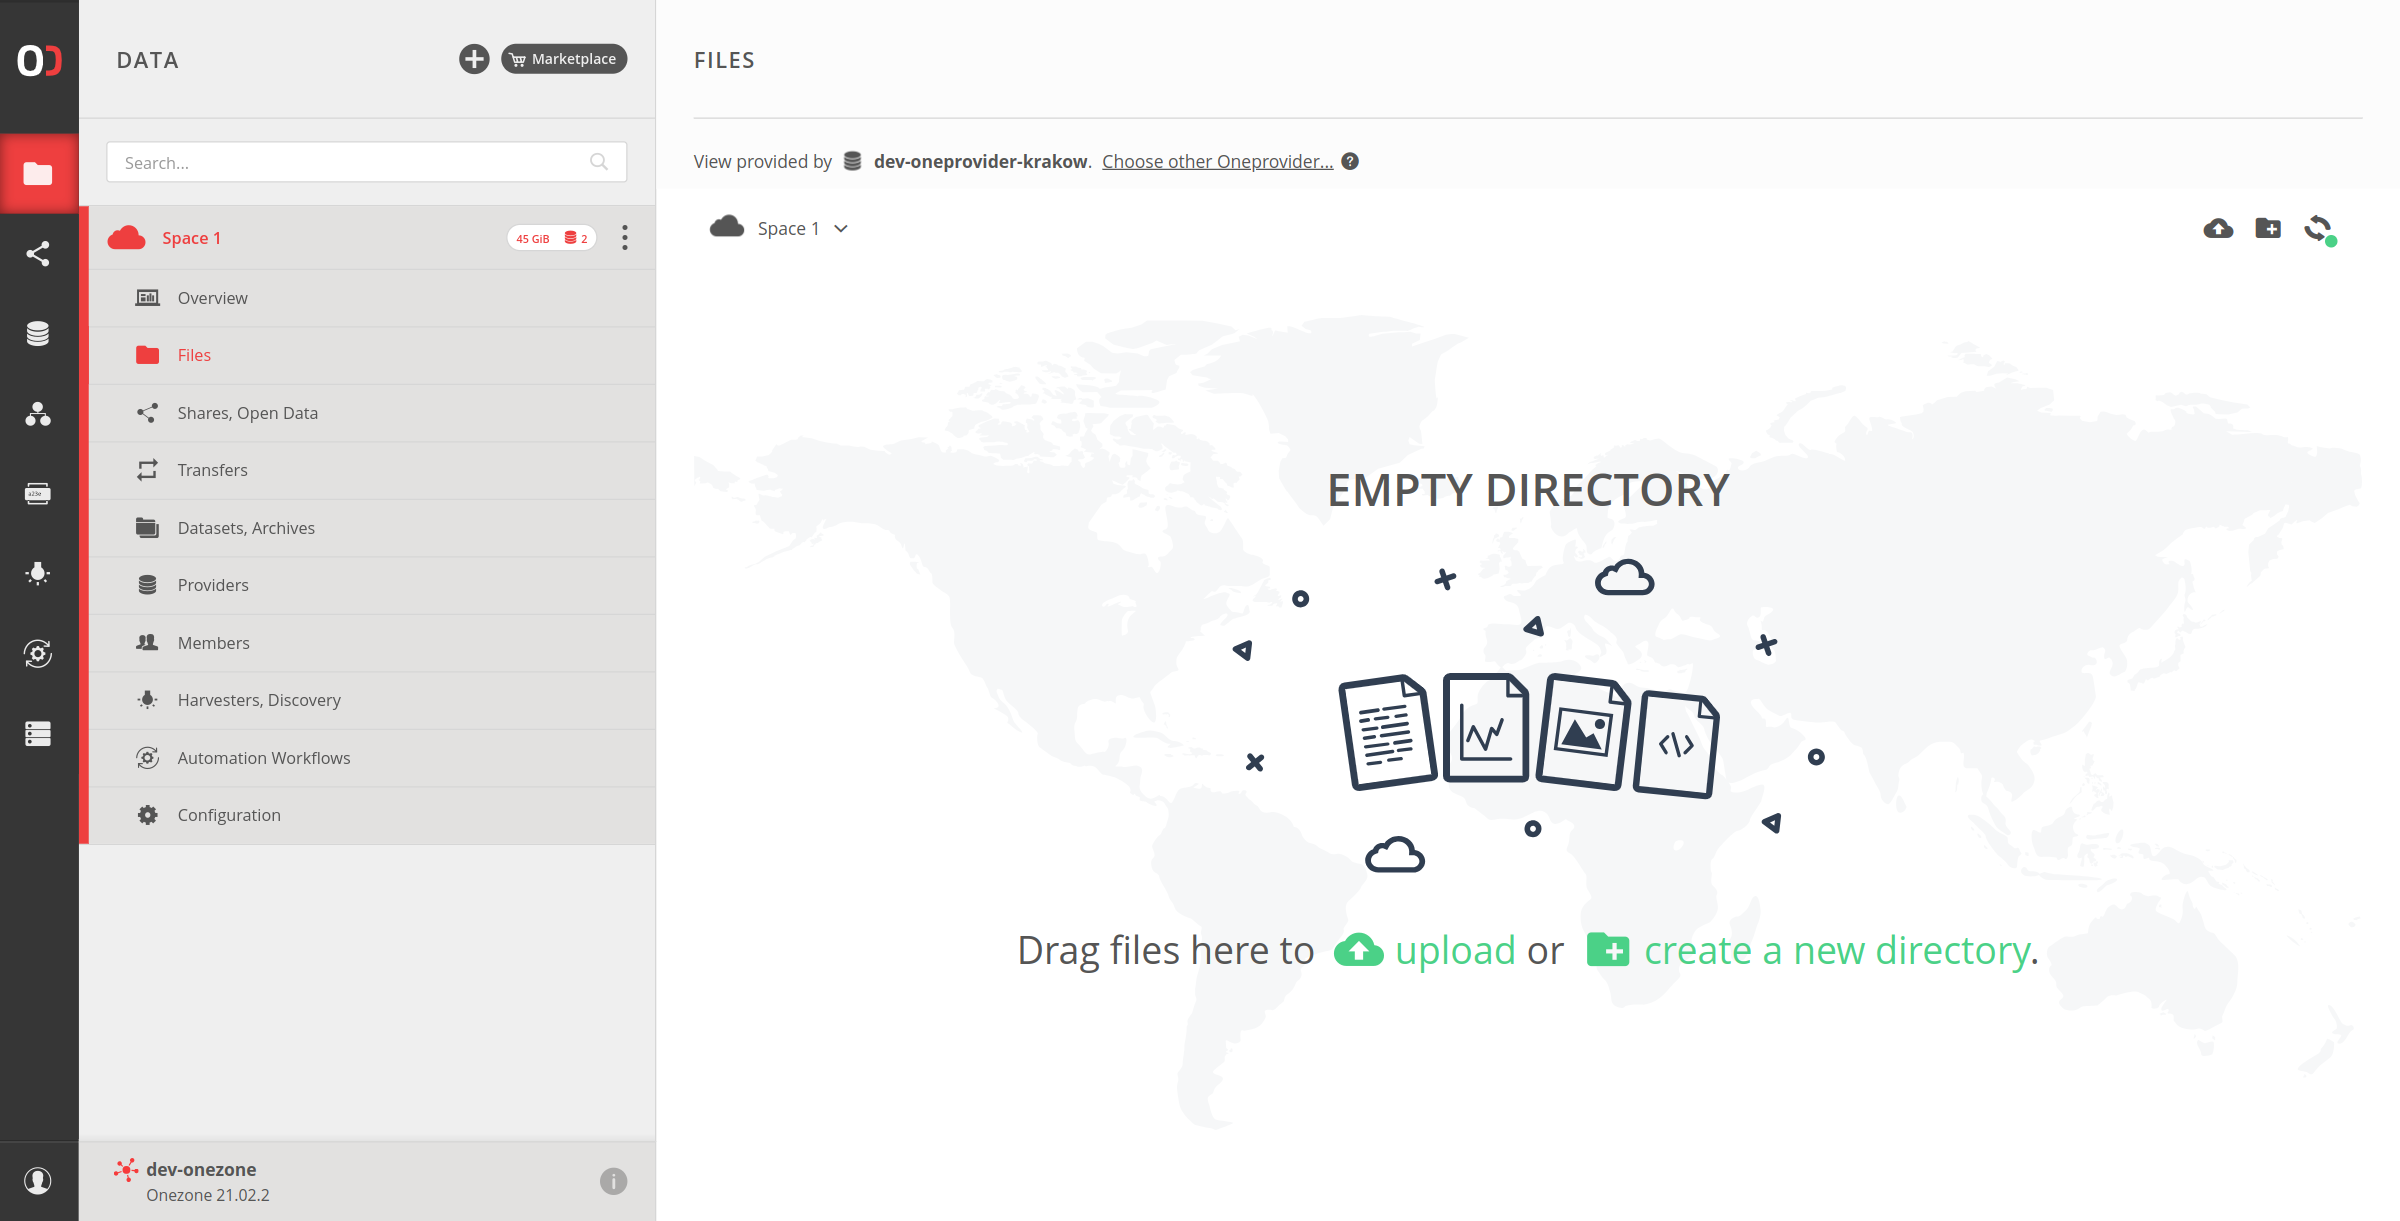
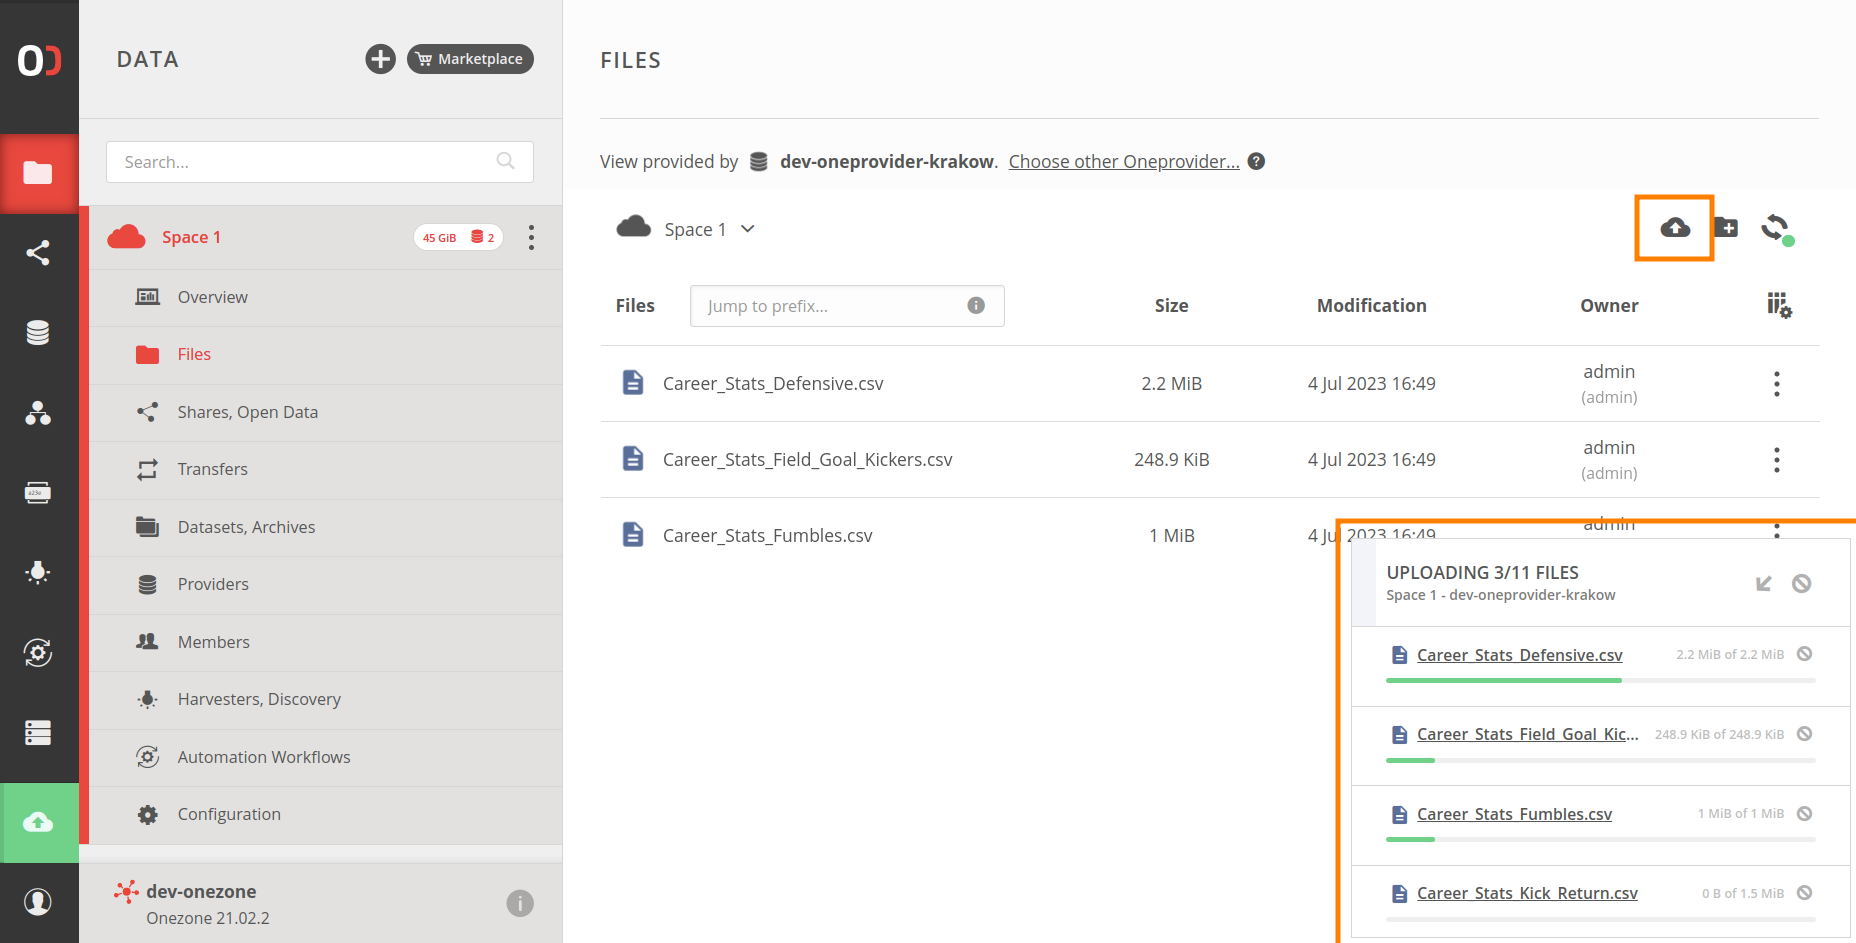
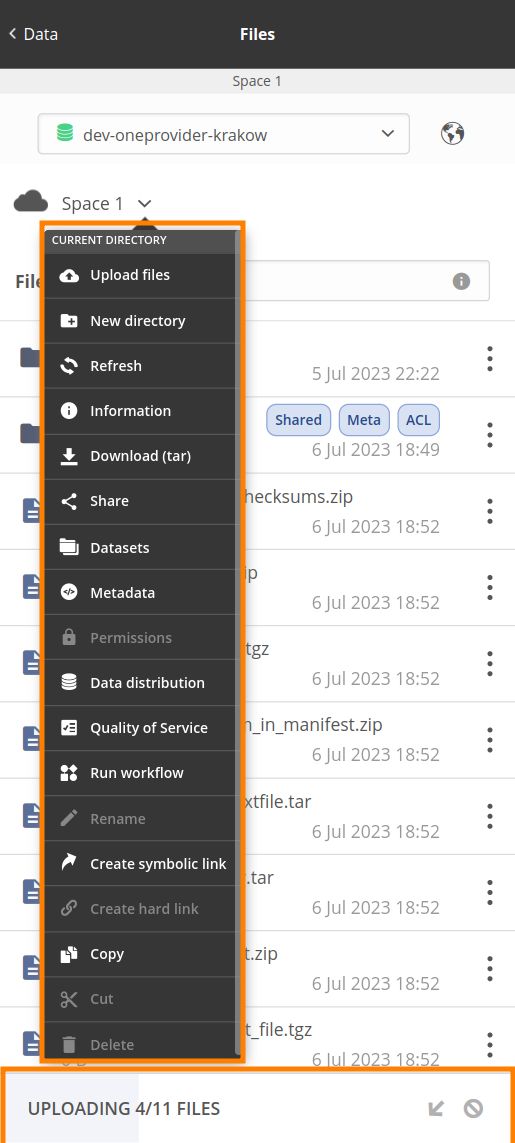
To upload new files, use the upload button or drag and drop them into the file browser area. While the data is being uploaded, a progress panel will appear in the bottom-right corner of your screen. You can upload multiple files simultaneously or add more files while an upload is in progress.
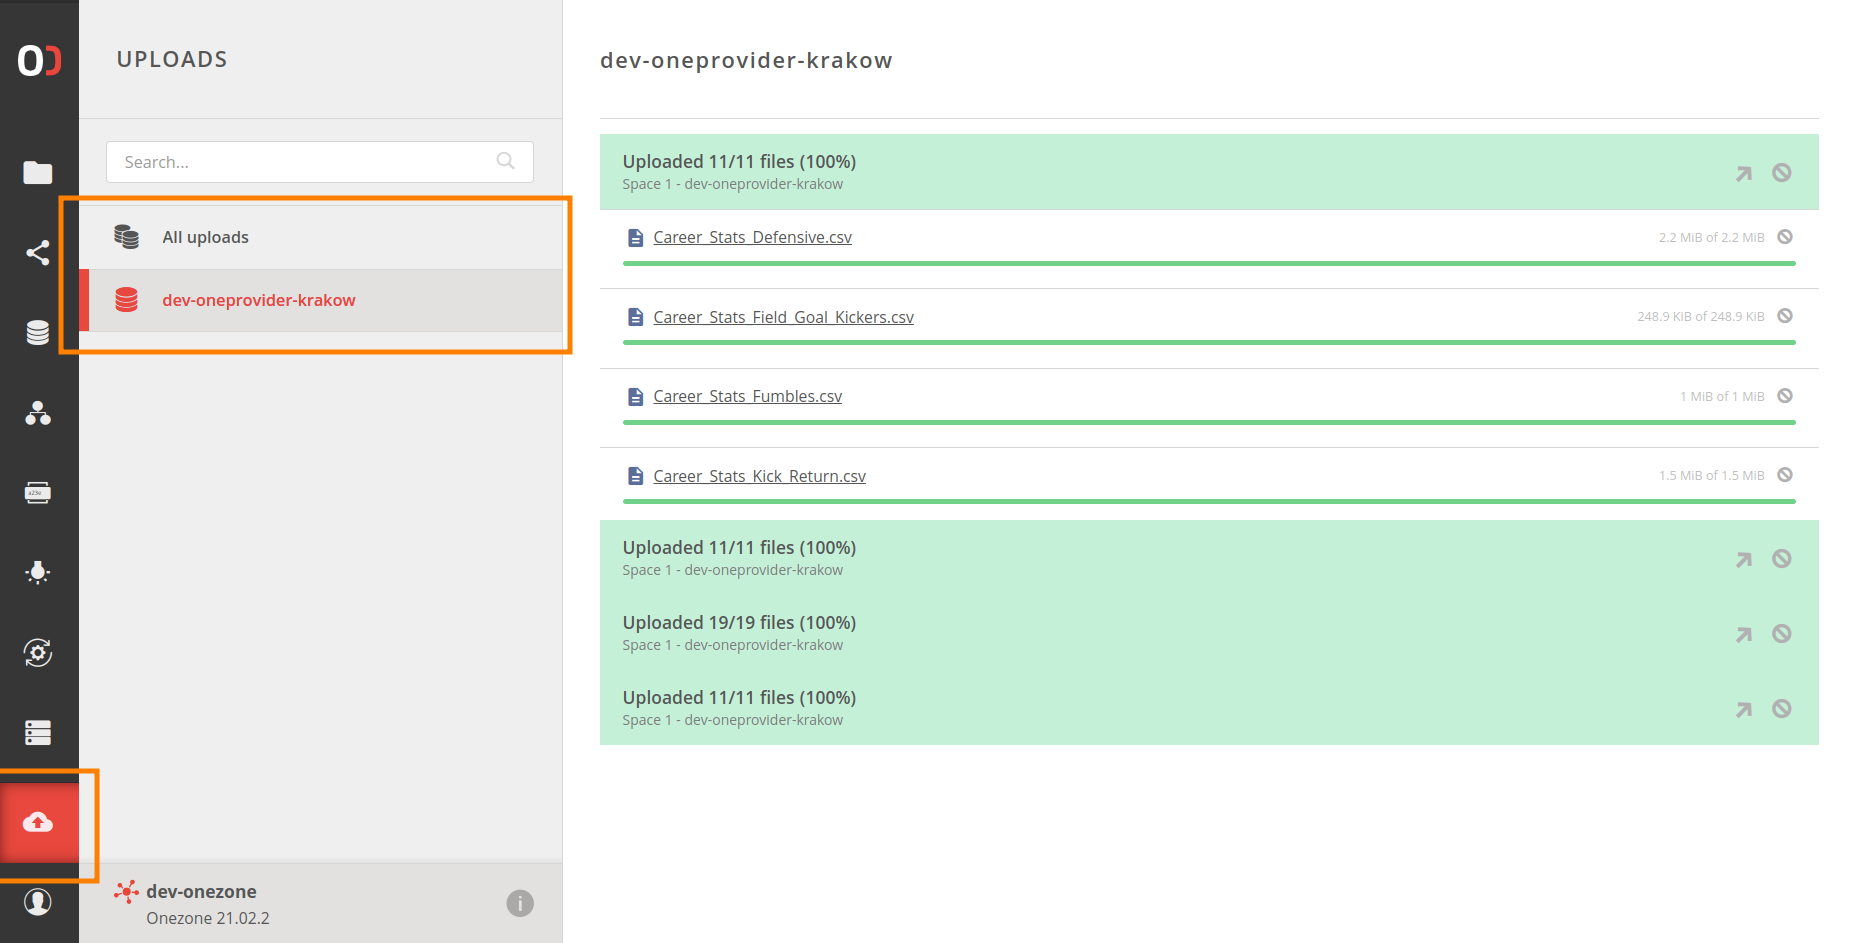
After any upload is started, the UPLOADS tab will appear in the main menu sidebar, providing a detailed view of all uploads that have been done in the current browser tab. View the information in a summarized form or per the target provider.
# File browser layout
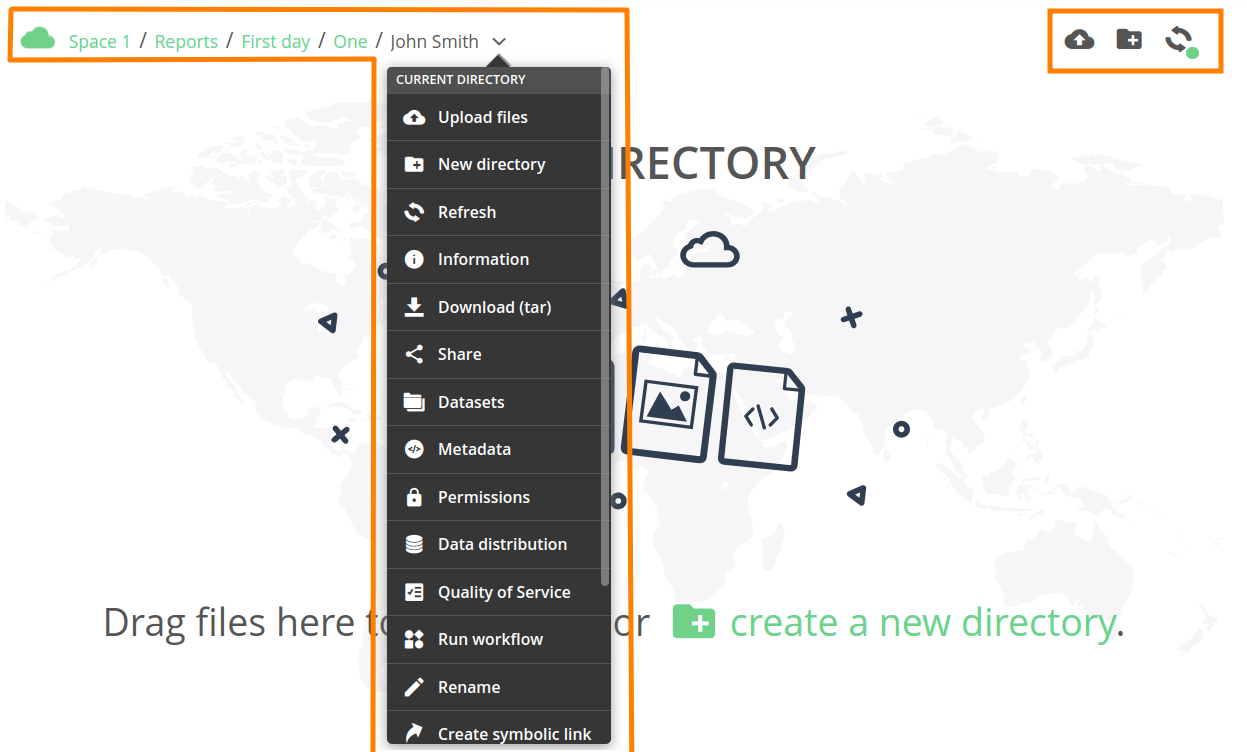
The top section of the file browser contains a breadcrumb navigator and a toolbox.
The breadcrumb navigator presents the path to the current working directory and allows navigation to its parent directories. The current working directory is the last element in the breadcrumbs and has a context menu with all available actions for the directory (identical to the context menus on the file list, described below).
The toolbox, located in the top right corner, contains shortcuts for common directory actions (upload files, create a new directory, and refresh the file list).
The remainder part of the file browser presents the list of files in the current working directory.
NOTE
File list navigation is slightly different on mobile devices and is covered later on.
You can select or deselect files by left-clicking on them. Hold down Ctrl
(or Opt on macOS) while clicking to select or deselect multiple files.
To select a range of files, hold down Shift.
A double click on an item opens a directory (sets it as a new current working directory) or downloads a file.
Right-click on an item or any of selected items to bring up a context menu with available actions.
You can customize the file browser layout by specifying what columns (file attributes) are displayed. Click the Configure columns button, in the upper-right corner of the file browser to choose the desired columns and their order. You can also drag-and-drop the columns to change their order.

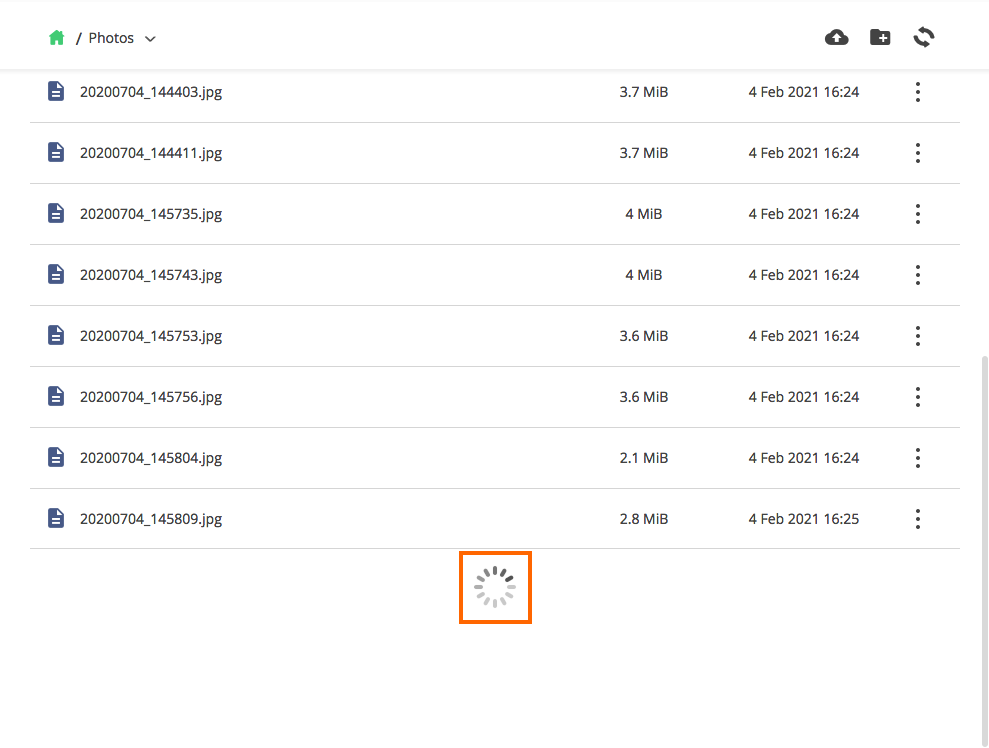
The file browser uses the “infinite scroll” method to display large directories — new items are dynamically loaded when the list is scrolled down.
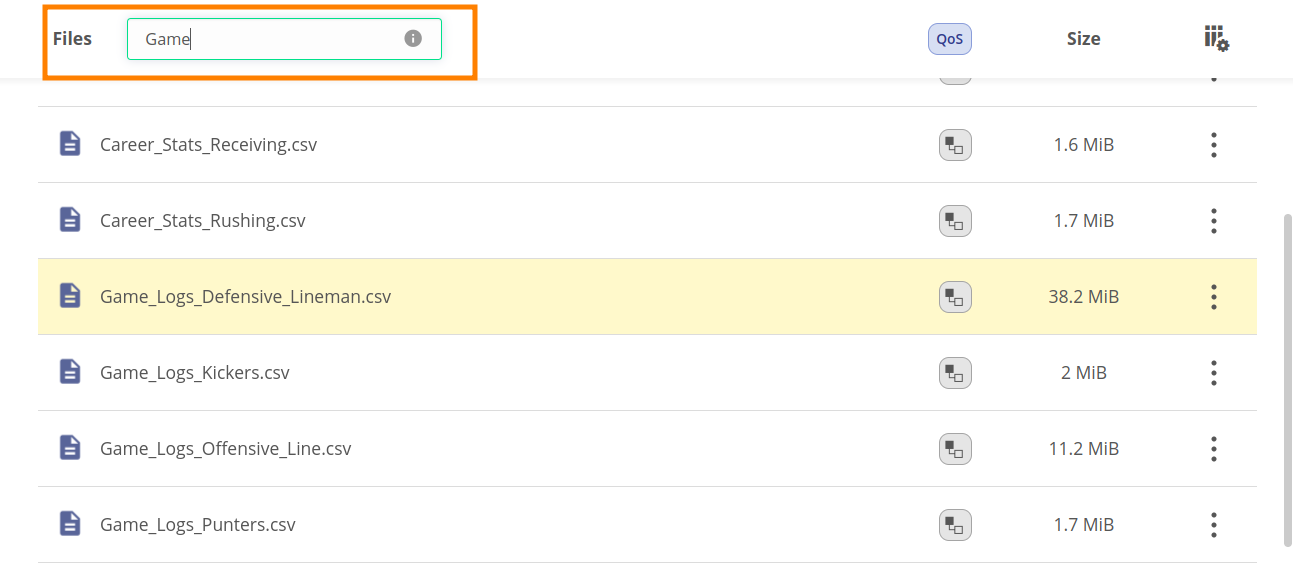
To quickly jump to a file or directory, type the beginning of its name in the search bar located below the breadcrumbs.
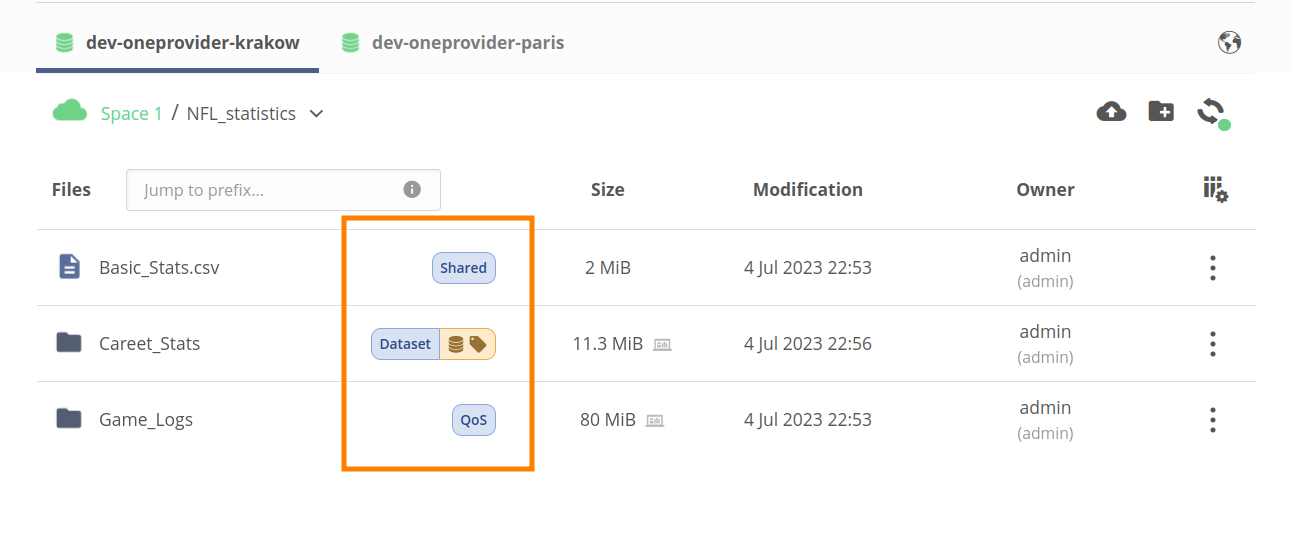
Apart from basic details displayed on the list, additional information and characteristics of files are presented using tags. For instance, the tags include information on whether a file is shared, has Quality of Service requirements attached, or is marked as Dataset.
# File browser features
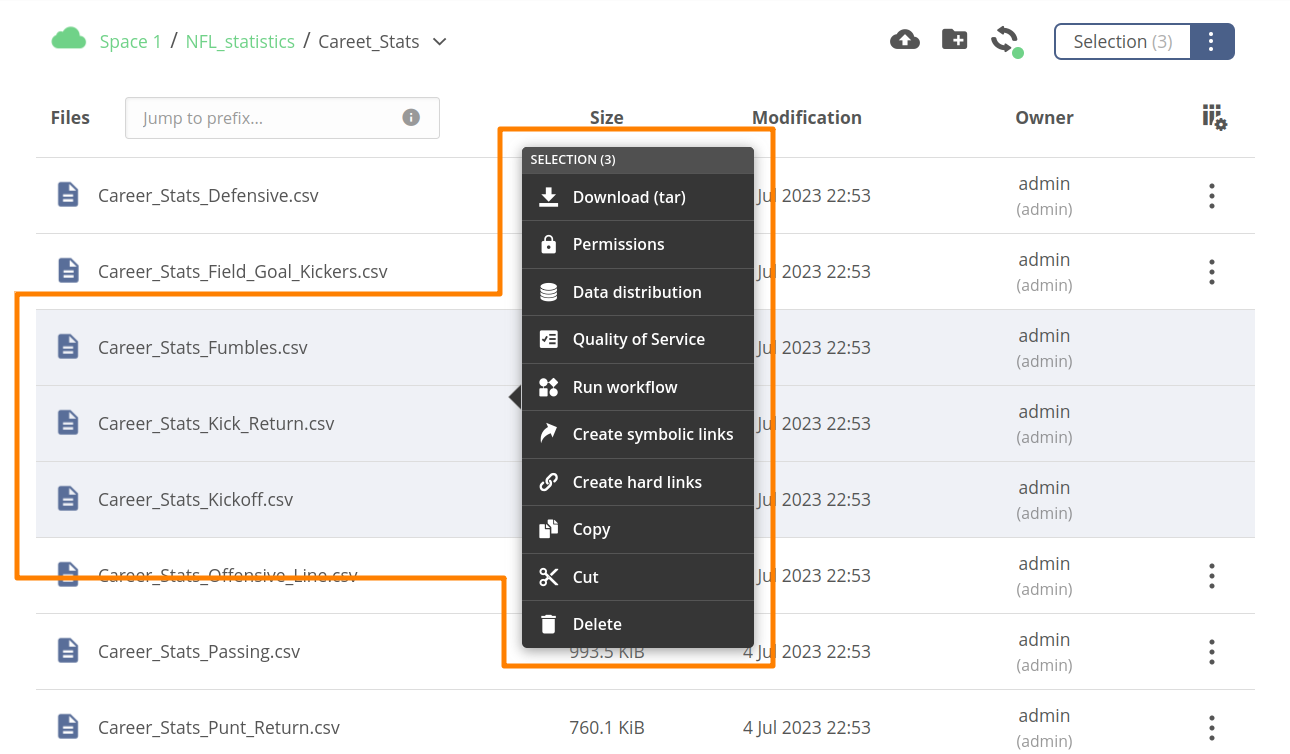
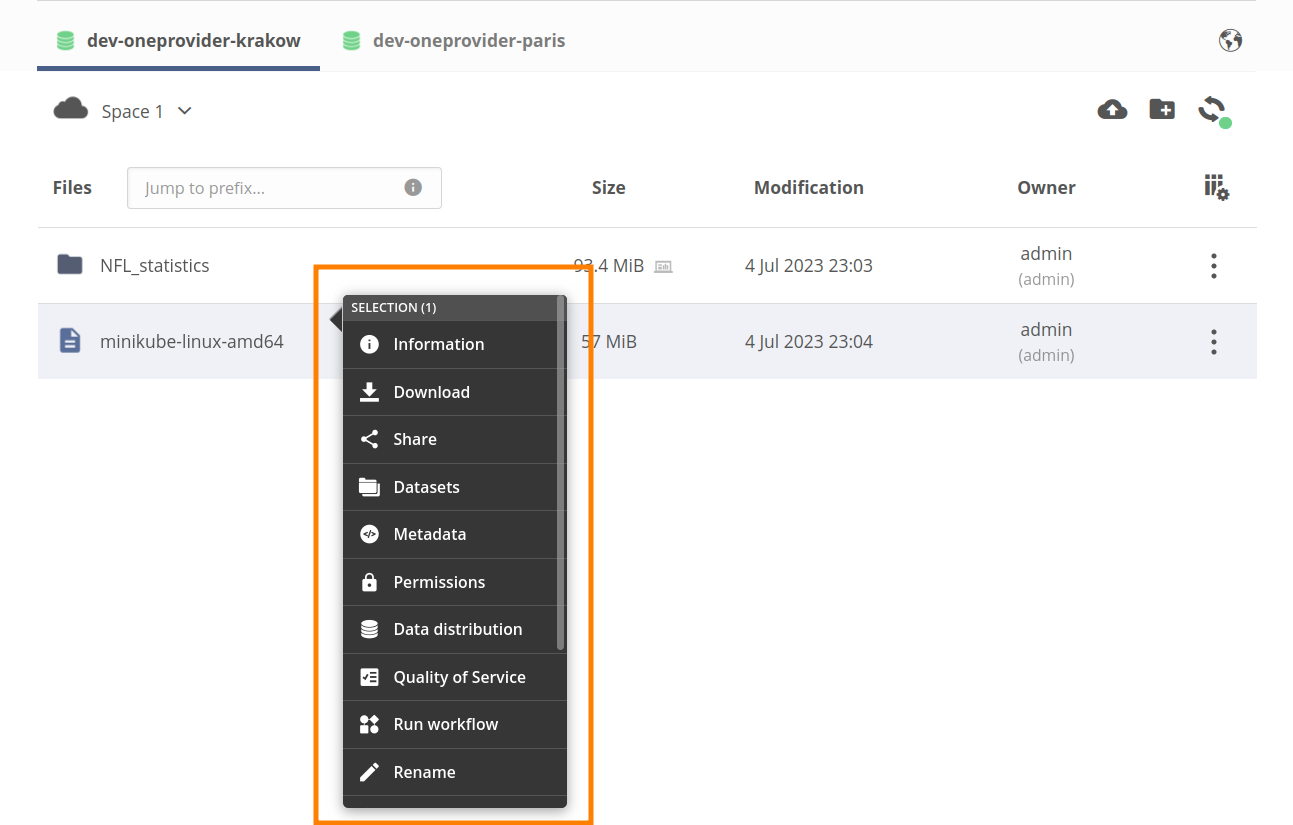
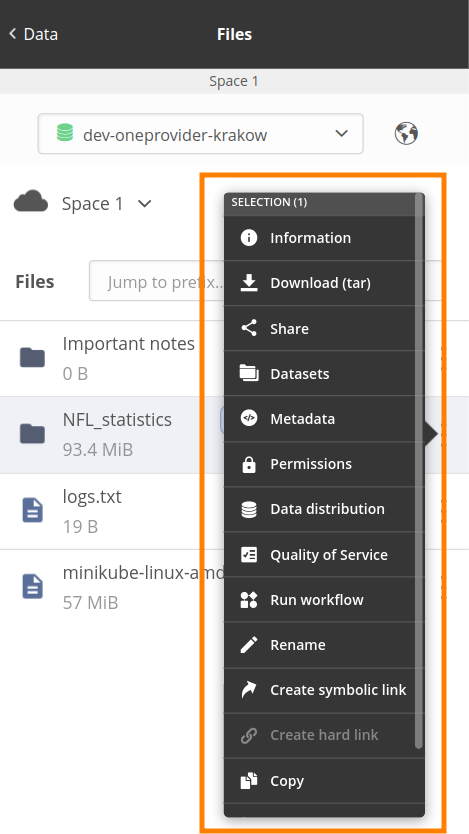
All file management operations offered by the file browser are available in the context menu invoked with a right-click or using the three-dots button on the right of each list entry.
TIP
Some operations require appropriate privileges in the space and are disabled in the menu in case the user's privileges are not sufficient.
TIP
It is possible to invoke the context menu for more than one selected item, but only some operations are available in this mode.
# Information
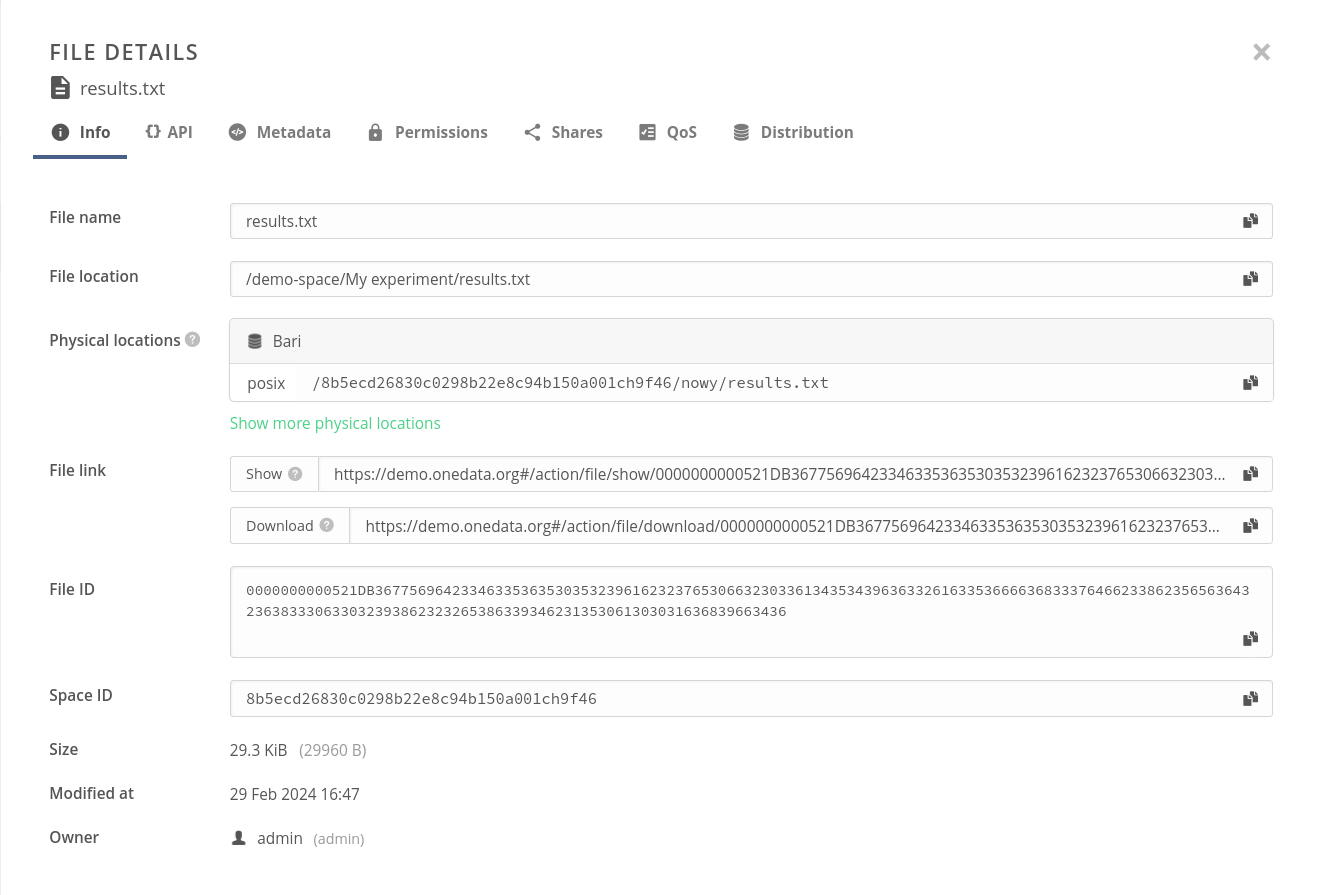
This action brings up the Info tab in a Details modal with information about a single file or directory. You can also access the Information tab by hovering over the icon of a file or directory.
# File links
In the Info tab (see above), you will find handy links to the selected file/directory, allowing a logged-in user to view the file in the browser or download it (given that they are authorized to access it). These links can be useful for linking to Onedata files from external applications or websites. They can be built knowing just the zone domain and the file ID:
- Show — a link that displays the file in GUI:
https://${ZONE_DOMAIN}/#/action/file/show/${FILE_ID} - Download — a link that prompts you to download the file:
https://${ZONE_DOMAIN}/#/action/file/download/${FILE_ID}
If you are looking for a method to publicly share a file/directory using a link, take a look at the share action.
# Download
This action simply downloads the chosen single file or directory. You can also download a single file with a double click.
# Share
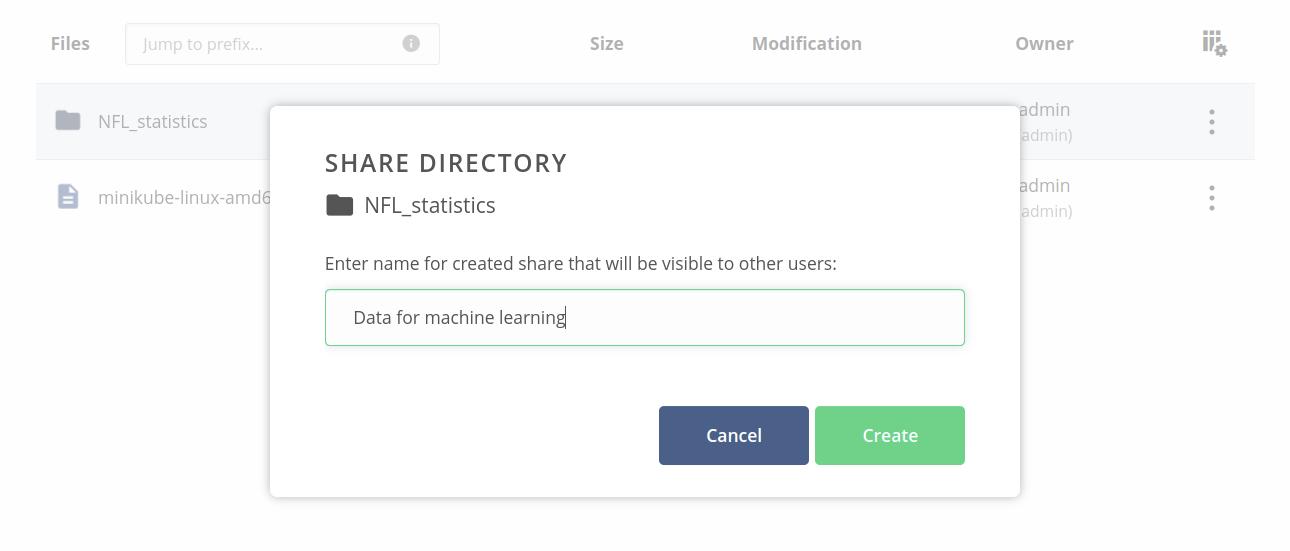
Using the Share tab in the Details modal, you can make a file or directory publicly accessible by anyone knowing the share link (no authentication or account in Onedata is needed). If the item has not been shared yet, this action will open a modal that allows the creation of a new share.
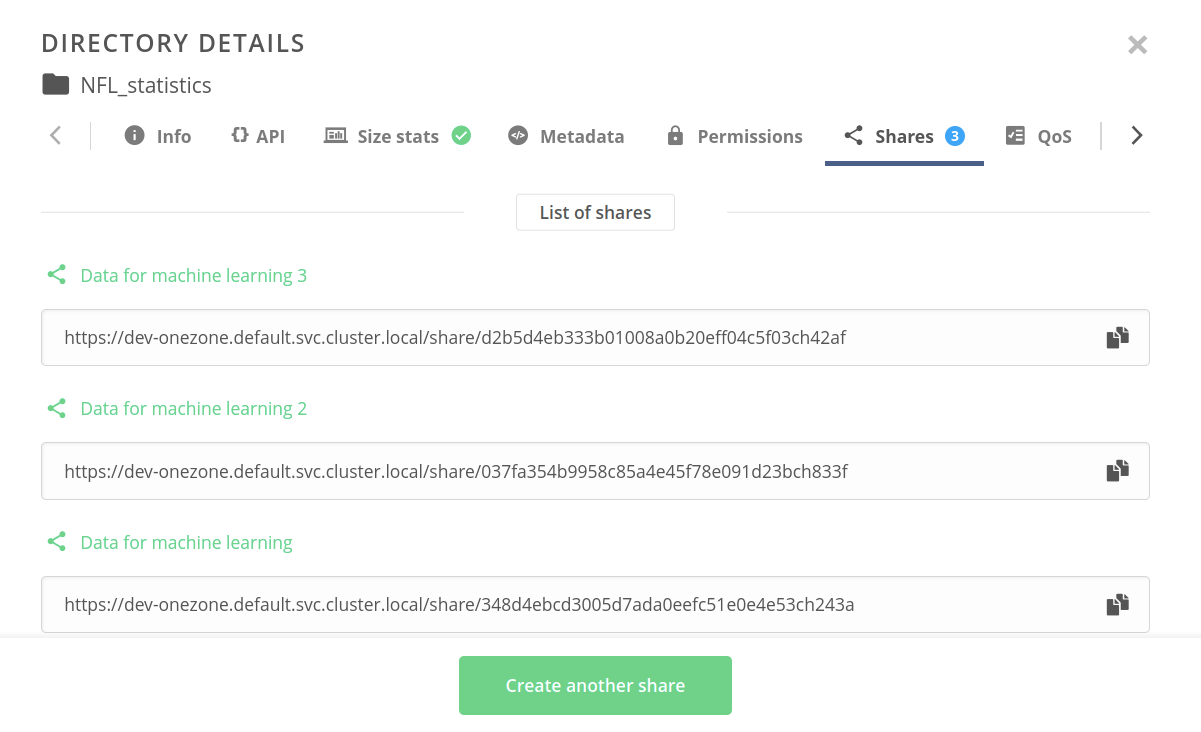
If the item has already been shared, you will see the list of existing shares, with the possibility to copy their public links, view their details (using the green links), or create another share.
# Datasets
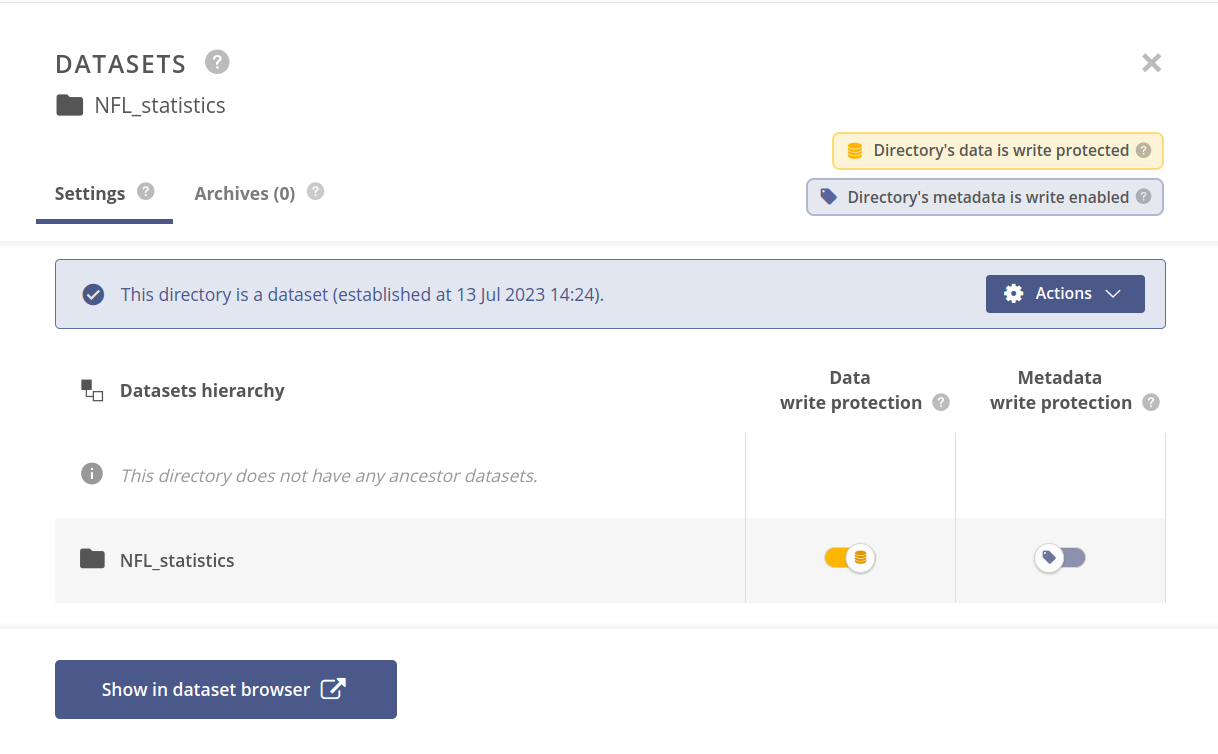
This action brings up the Datasets modal, where you can assign a dataset status to your file or directory. Datasets are files or directories that space users identify as meaningful data collections to them, as described in this chapter.
# Metadata
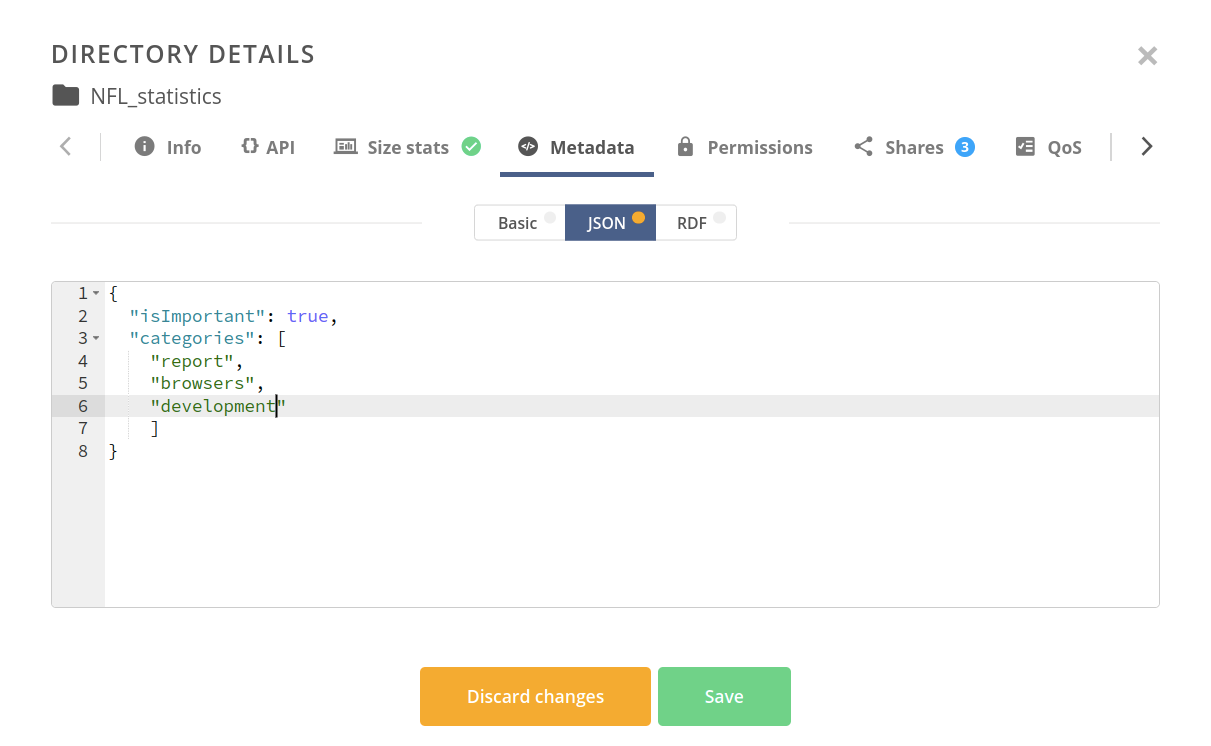
This action allows browsing end editing custom file metadata, divided into three classes: basic (key-value), JSON, and RDF. The last two feature a code editor with syntax checking and highlighting.
# Permissions
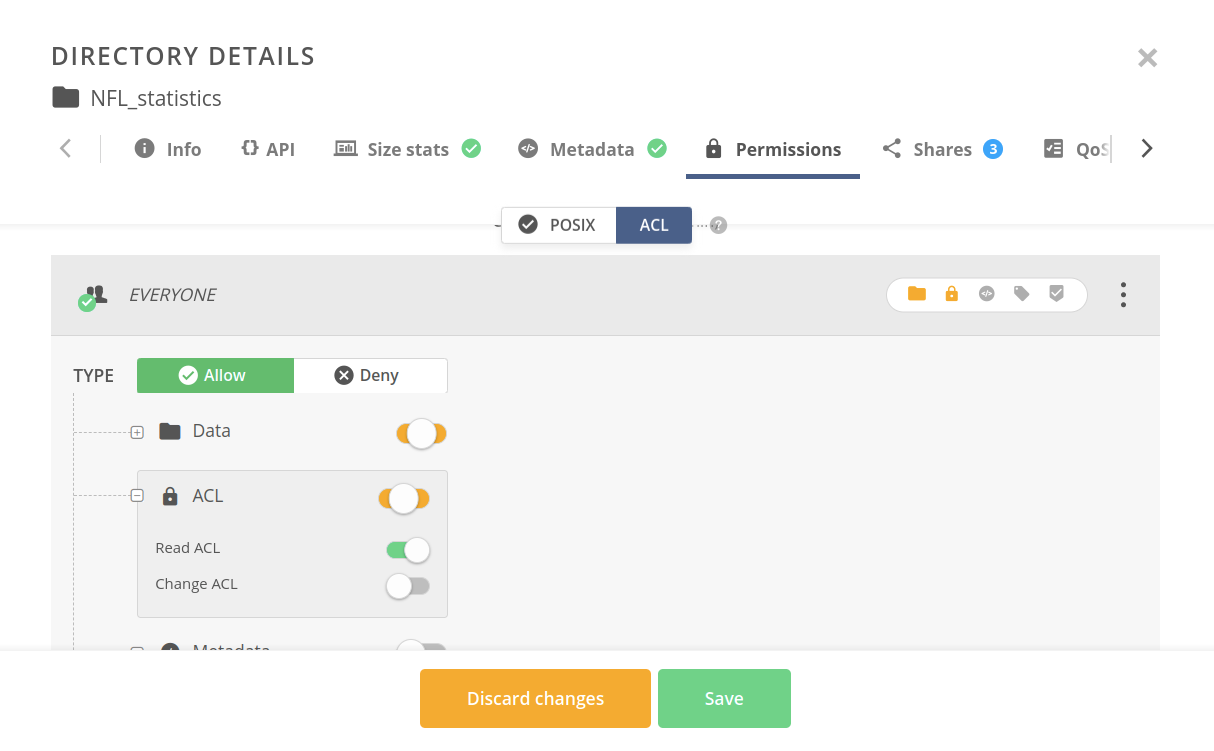
Invokes an editor of permissions assigned to the file — POSIX or Access Control List (ACL). A file can use only one of the permission types at a time. To select the currently applied one, use the Permissions type toggle.
POSIX permissions are the default type for every new file. You can edit them by using the octal representation field or manipulating the checkboxes.

Upon switching to the ACL type, a different editor is presented. It allows creating and editing entries for different principals in the space and assigning allowing/denying rules for granular operations concerning the file or directory.
# Data distribution
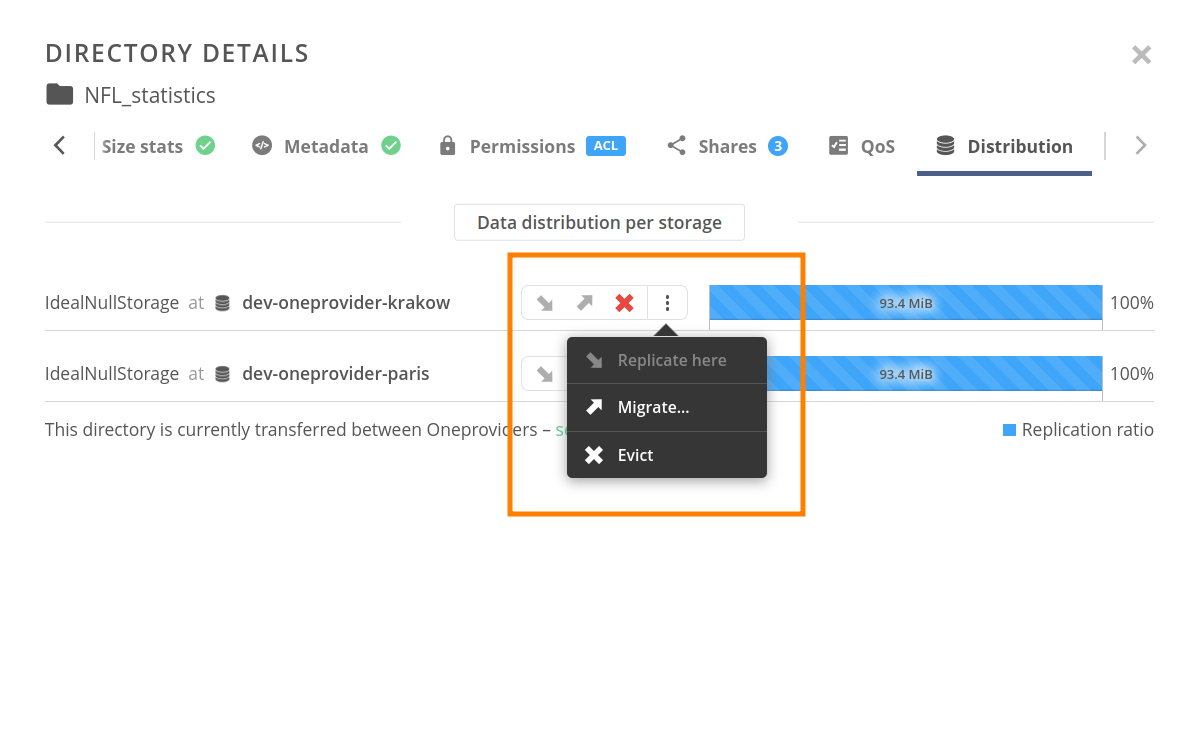
This tab is used to monitor and manage the distribution of file data among supporting providers. The blue bars visualize which blocks (fragments of the file) are stored on the storage systems of the corresponding providers. When more than one file is selected, the distribution can be viewed in a summarized or detailed manner.
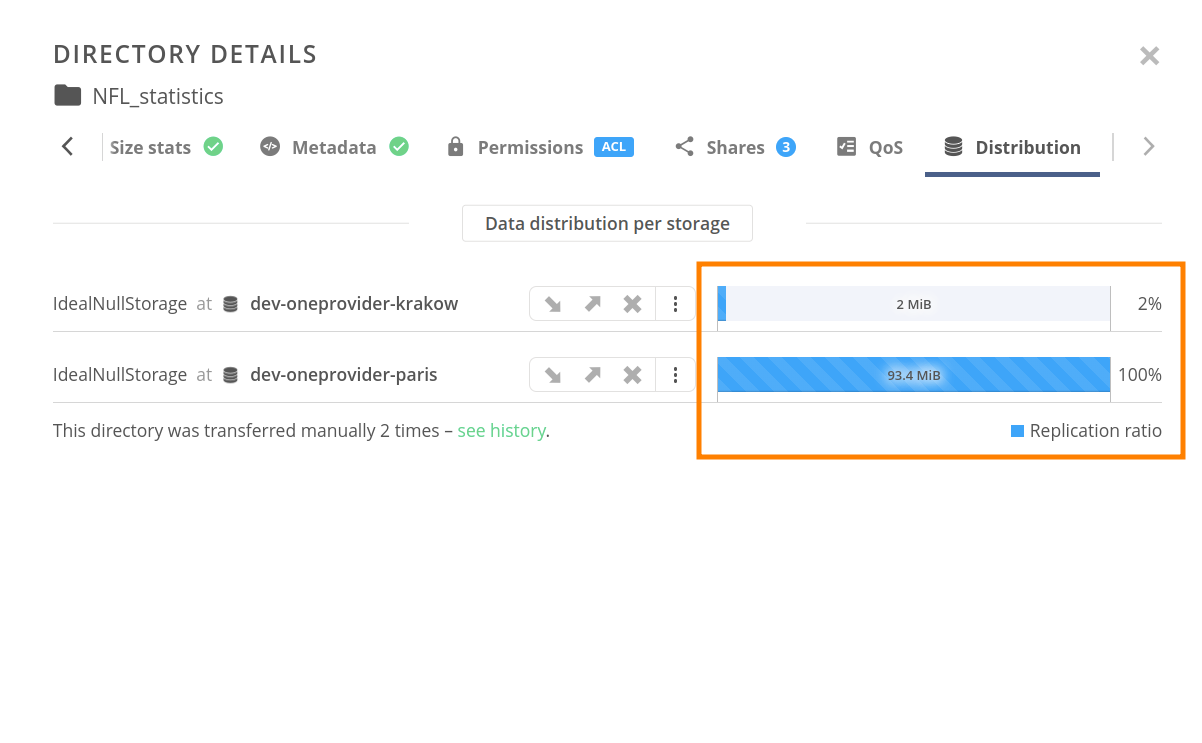
The handy status bar indicates ongoing replication, migration, and eviction jobs and allows you to schedule new ones for the corresponding provider. In the detailed view, you will find a shortcut to the history of data transfers for the subject file (as shown in the screenshot above).
# QoS
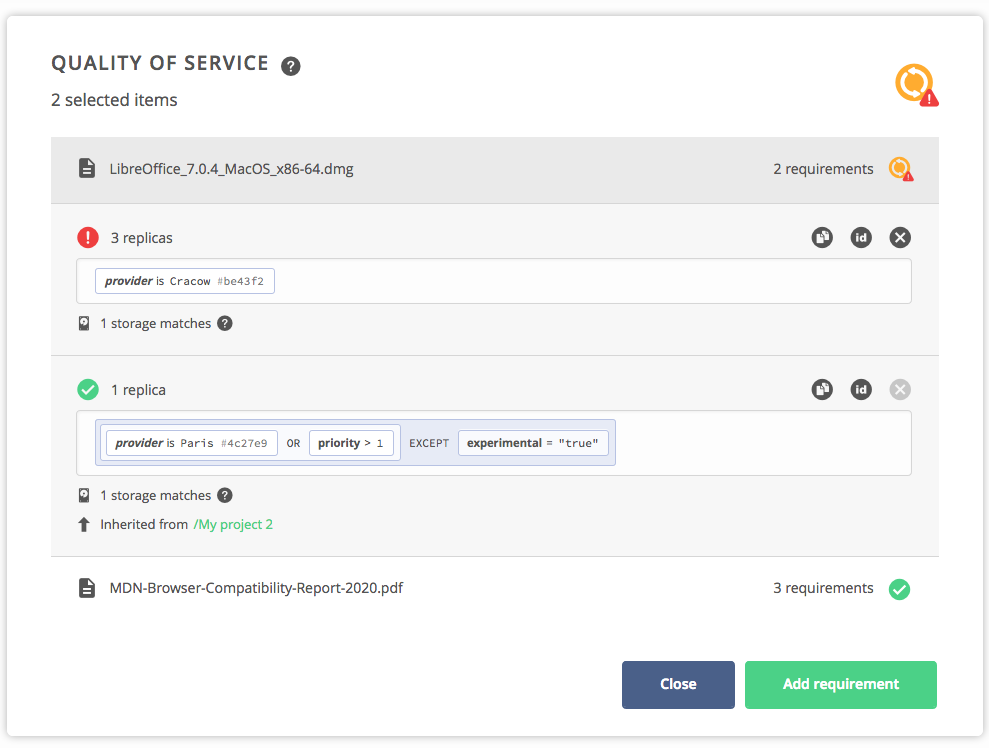
The QoS tab brings up an editor of Quality of Service requirements defined for the selected file(s), which are used to automatically manage the replication of file data according to logical rules.
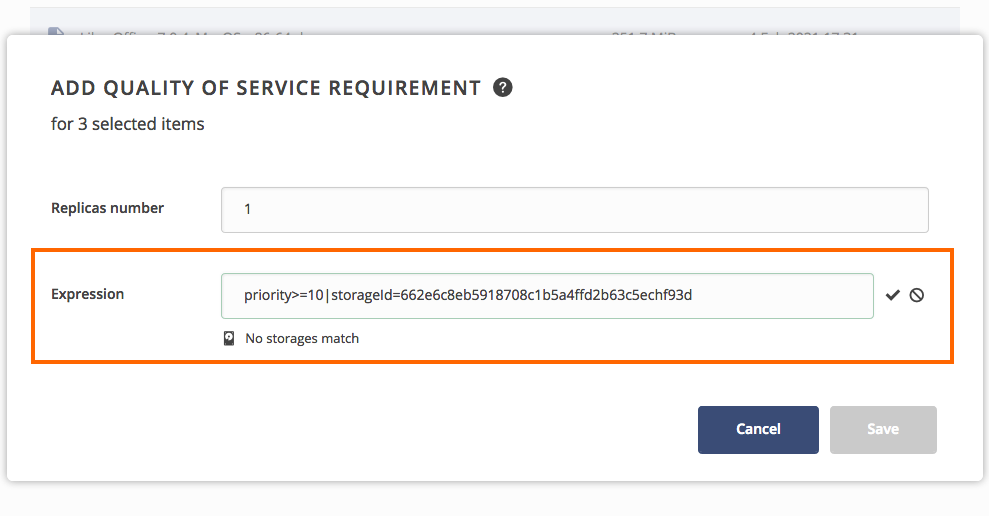
You can put down the rules using a visual block-based expression editor. These rules are evaluated against the QoS parameters assigned to different supporting storage backends to determine where the replicas should be stored.
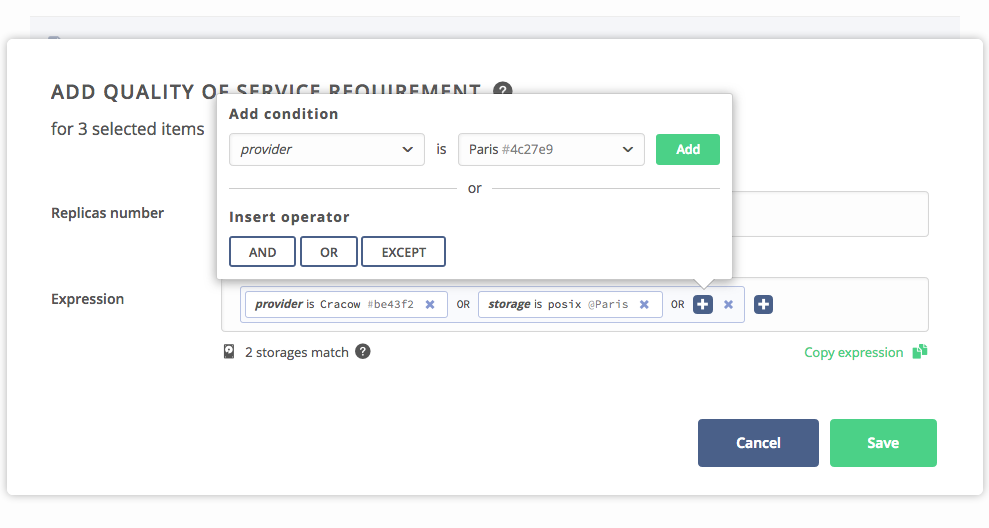
Below the requirement, it is displayed what storage backends match the requirement and an action that copies the expression in textual form, to be reused when creating a new requirement or using the REST API.
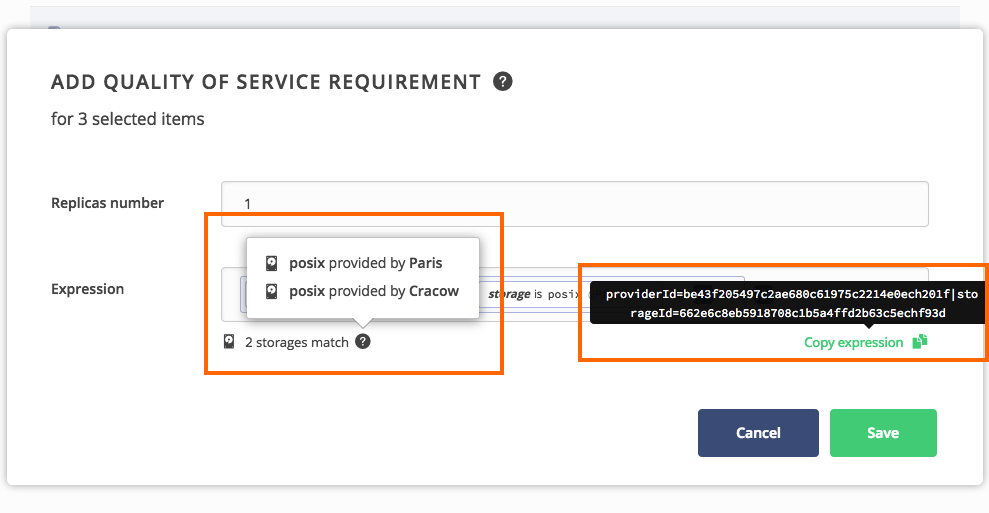
Expressions can be entered in the textual form. They are converted to block form upon confirmation and then can be further edited.
If the selected files have any QoS requirements defined, they are displayed on the list along with their status of fulfillment, matching storage backends, transfer statistics, and other information. It is possible to remove selected QoS requirements unless they are inherited from any parent directory.
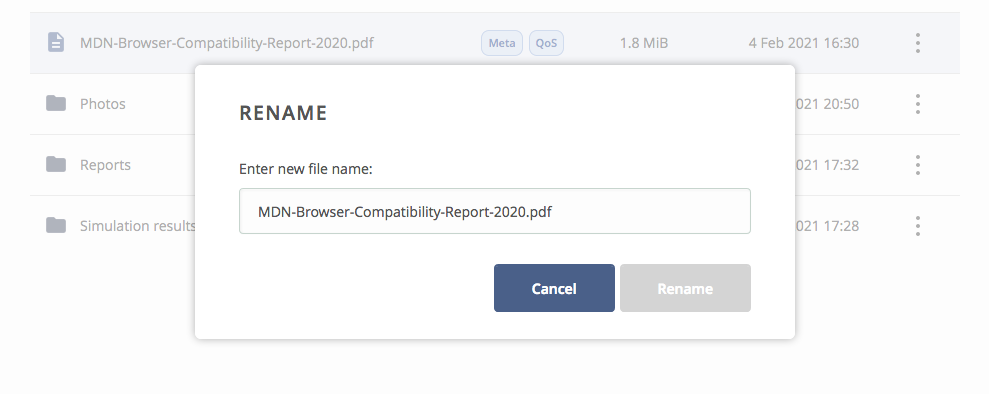
# Rename
The basic operation used to change the file name.
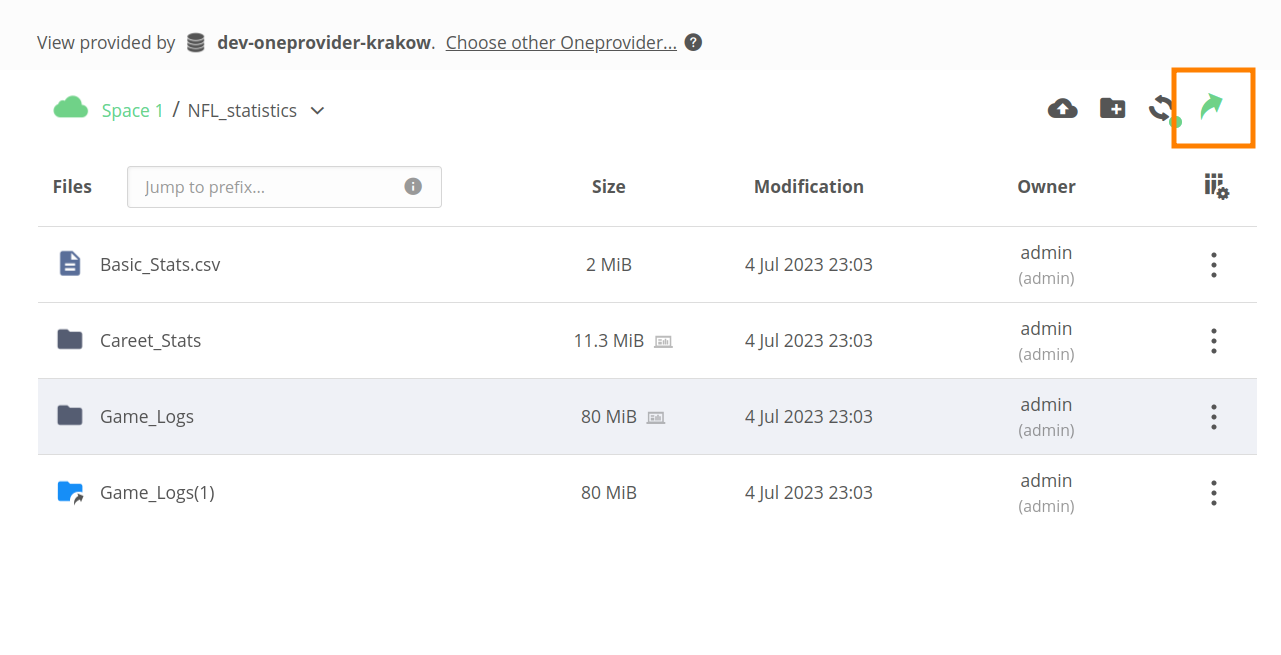
# Create symbolic link
A symbolic link, also known as a symlink, is a special file that acts as a reference or pointer to another file or directory. First, use the Create symbolic link action on the target file or directory. Then, navigate to the directory where the symbolic link should be placed and click on the highlighted button in the top right corner.
# Create hard link
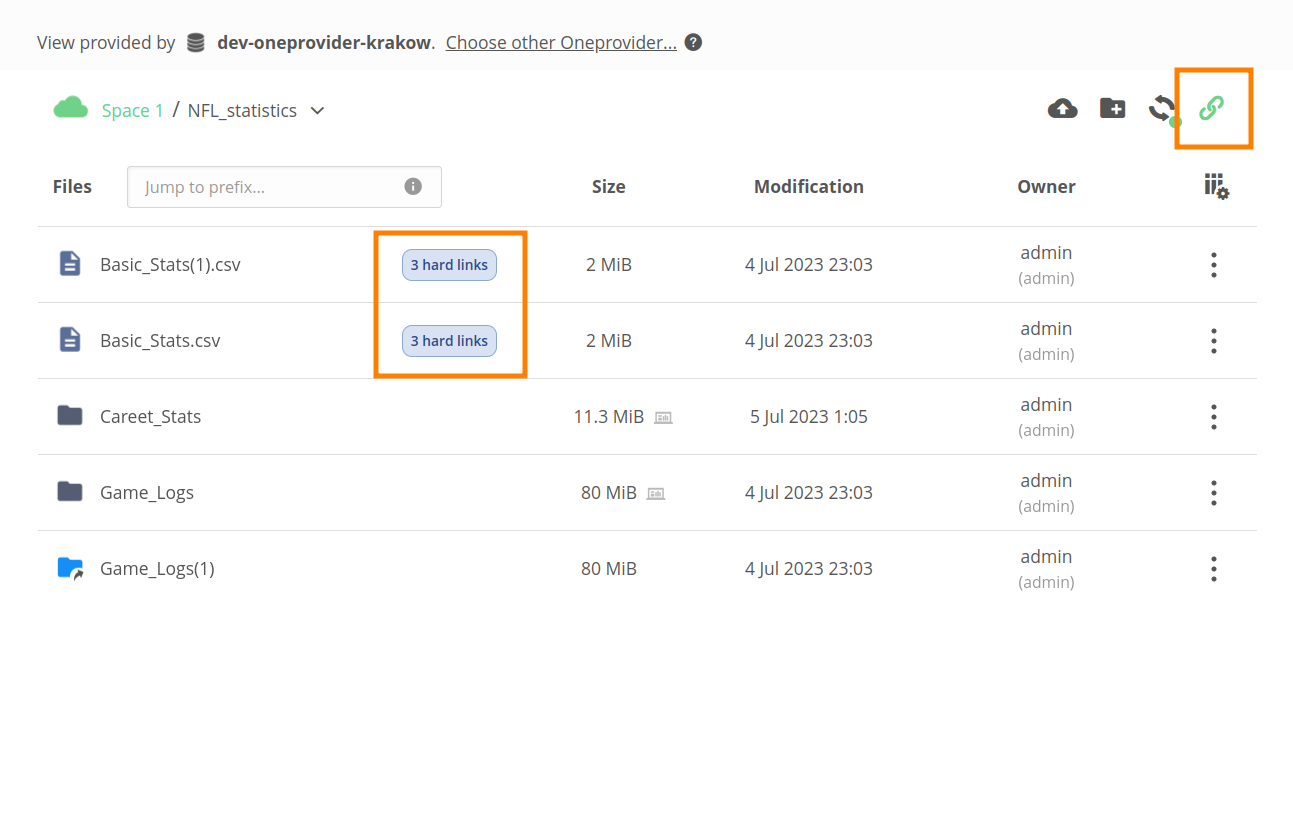
A hard link is a reference to a file that points directly to the underlying data of that file on a file system. In simpler terms, a hard link is an additional name or entry for an existing file. Multiple hard links can exist for a single file, and they all refer to the same underlying data on the disk.
To place a hard link, follow the same steps as for a symbolic link. As you create a hard link, both the original file and the hard link will now display a label with the number of hard links referencing the same file. You can click on the label to view the list of hard links.
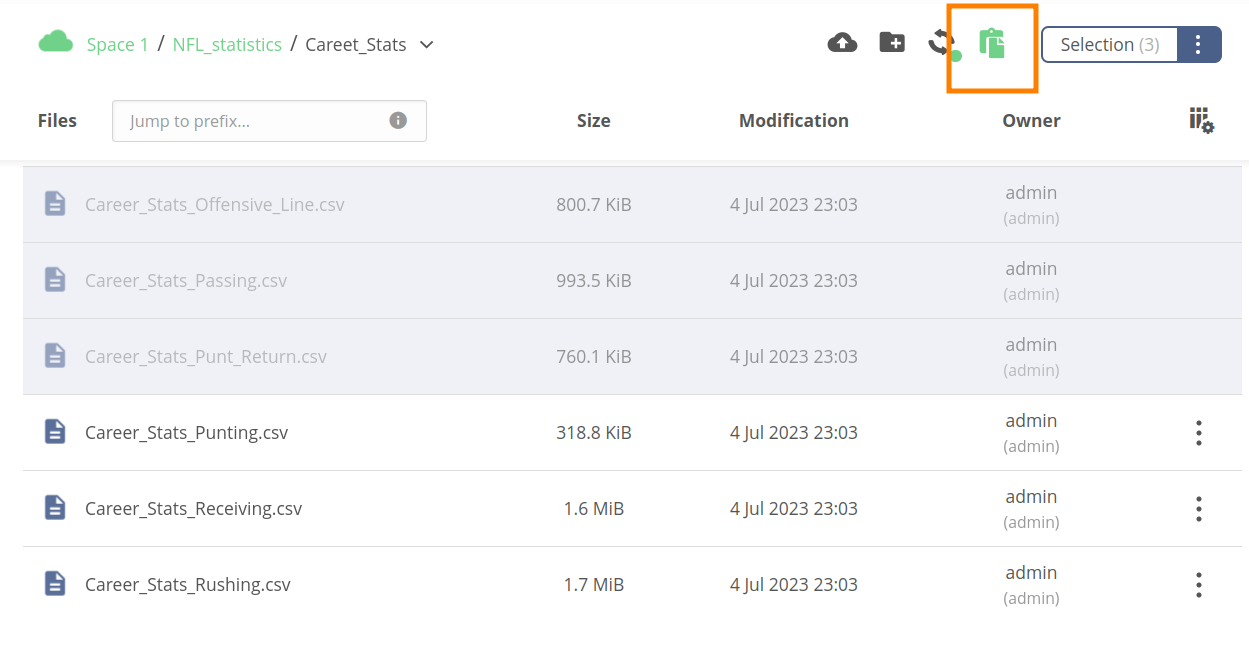
# Copy, Cut, and Paste
The copy or cut action from the context menu can be used on one or more selected items. Then, a paste action will appear in the toolbox, which can be used to copy or move the files to the current working directory.
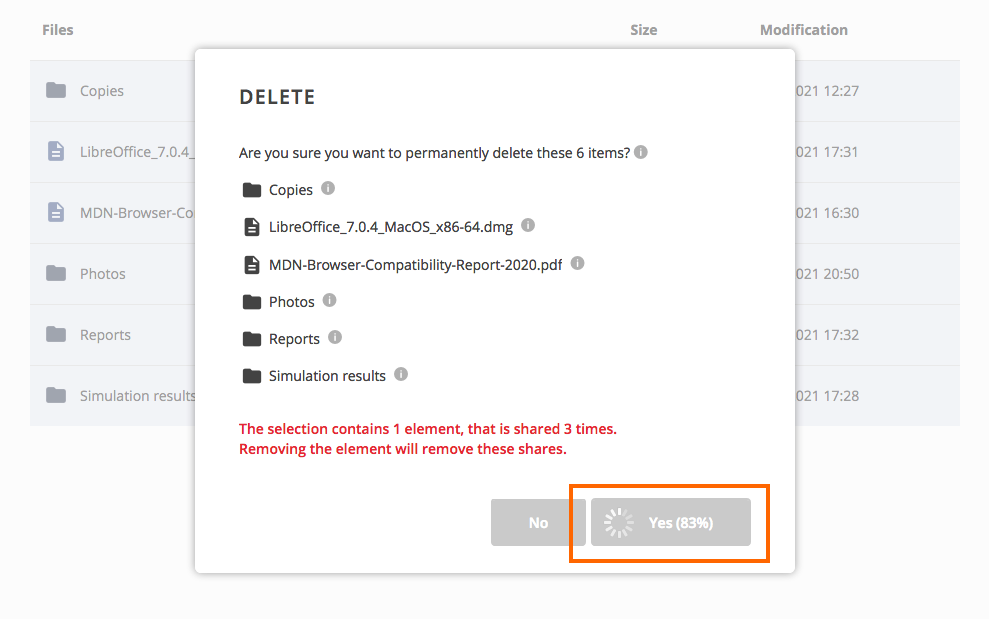
# Delete
This action permanently deletes the selected files and directories.
# Mobile file browser
Onedata web file browser supports mobile devices such as smartphones or tablets. Available features are the same as in desktop mode, but the page layout is adjusted for small devices.

In mobile mode, the navigation is adapted for touch screens. Use a tap gesture instead of a double click to download a file or open a directory.
To select a file/directory, press and hold its row for about a second. To extend the selection, tap on further rows. Invoke the context menu using the three-dots menu in the file row or the Selection button at the bottom of the screen.
Operations on the current working directory, such as creating a new directory or uploading files, are available in the breadcrumb navigator. When an upload is started, a progress bar appears at the bottom of the screen.
# Switching between providers
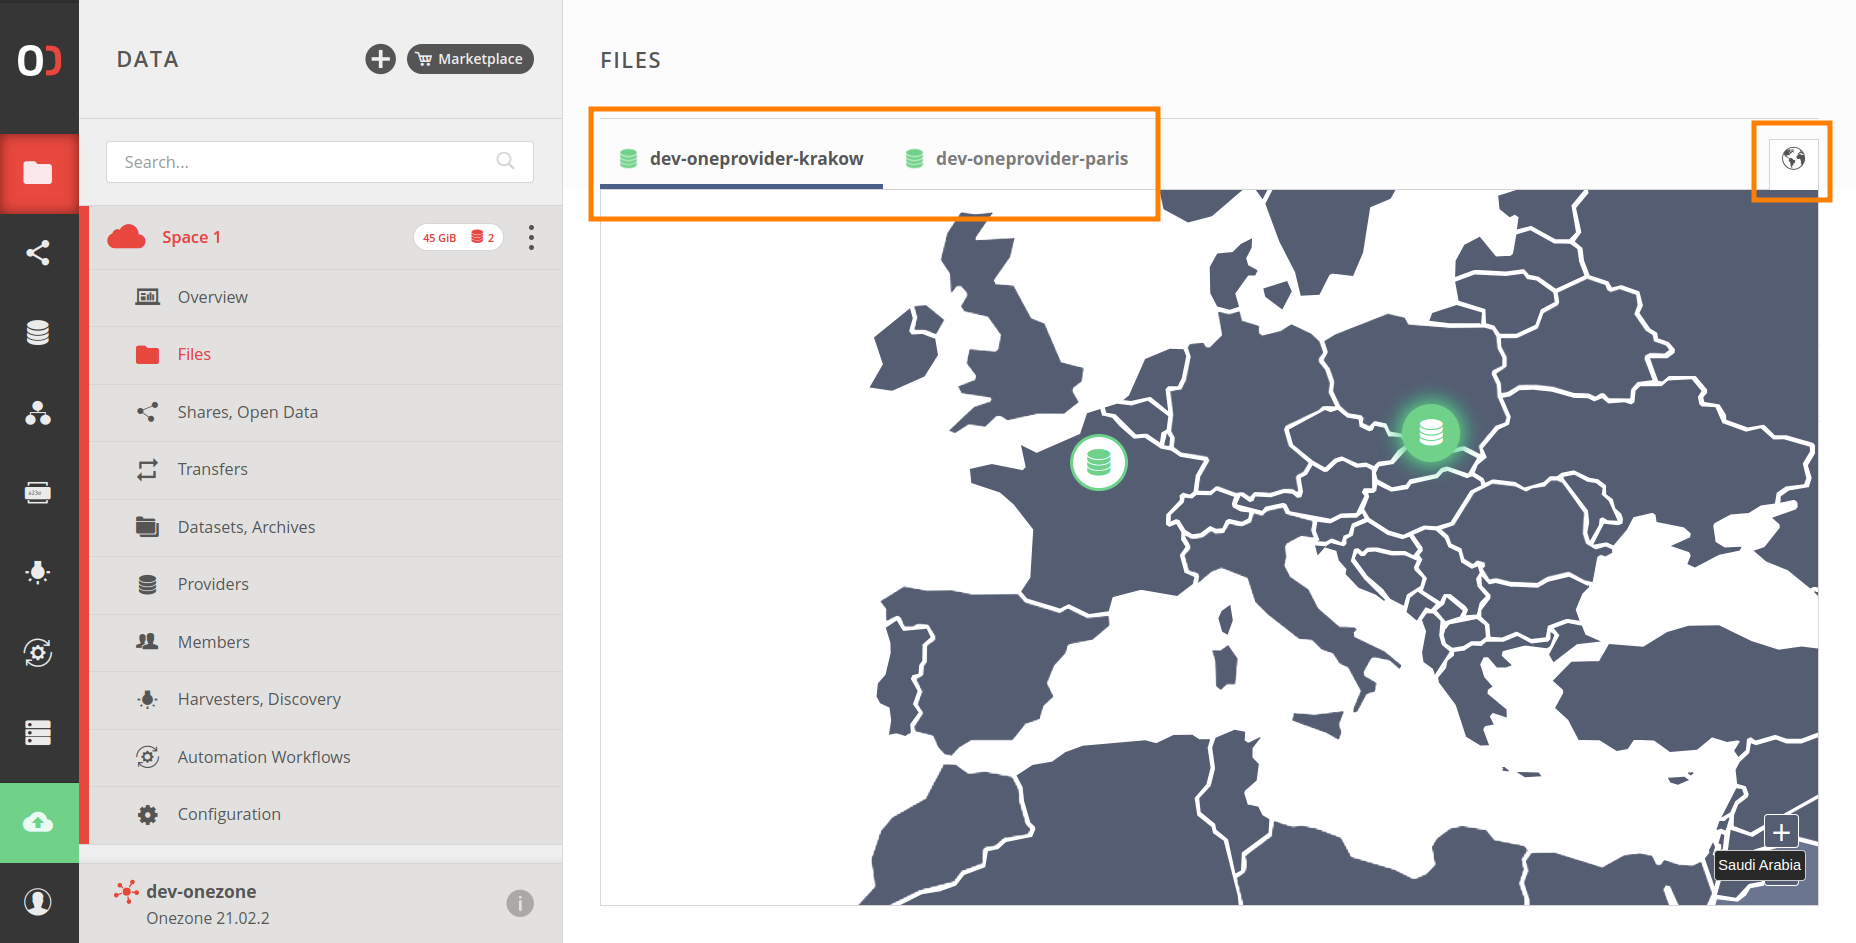
The file browser view is provided by one of the providers supporting the space. The currently selected provider is shown on the top of the file browser in the View provided by... bar. Although the provider is chosen automatically, it is possible to manually select a different one using the Choose other Oneprovider... action at the top of the file browser, given that there is more than one supporting provider. Alternatively, providers can be switched using a world map visual representation, available under the globe icon.
TIP
After switching to another provider, you will eventually see the same content, but new changes might appear with different delays. Providers continuously synchronize the data changes within spaces, and depending on the resource usage, they can take from a couple of seconds to even hours to propagate. To see the changes immediately, you should select the provider on which you are making them (modifying file content, creating new files or directories, scheduling data transfers, etc.).